Saturday, April 30, 2016

~Special Mom~

 
Hello Blogger Friends! Thanks for taking the time to stop and visit with the Charmed Life Blog. Can you believe it's the last day of April? Where has this month gone?
 
I am almost finished with my school year as well. We have 6 classes left in preschool. I will definitely miss this class. Some of the students just hold a special place in my heart. their parents even tell me how much their kids love me. It makes me feel special.
 
Right before our graduation ceremony I will make a short trip to San Francisco to take care of my precious little granddaughter Phoenix Daisy. I can't wait to hug and kiss her. We do a video chat all the time on our IPads but seeing her in person will be wonderful. She already has plans made for us playing with her baby dolls. And lots of other ideas I am sure (lol).
 
Now onto my card for today. This one I made for the color challenge #580 on Splitcoaststampers. Vicki was our hostess and she chose daffodil delight, island indigo and garden green for her color palette.
 
daffodil delight island indigo garden green
 
I have been wanting to try the pleated skirt fold after I saw this great tutorial on Splitcoaststampers. For my fold I used island indigo designer paper from the Stampin'-Up "gingham garden" collection.
 
The teapot is cut with more Stampin'-Up designer paper. This one is from the "greenhouse gala" collection. The teapot lid and scallop decoration are cut in garden green.

Completed my card with my sentiment from a set by ODBD. The hearts are part of the Stampin'-Up "cups and framelits dies", The island indigo ribbon and bow are also Stampin'-Up.
 
Well that's it for me for today my friends! Off to watch my grandson play baseball. He is over this side of town today so I don't have to travel an hour to watch him play. So until next time........God bless.
 
card details:
Stamps: mother's day (ODBD)
Paper: ww, garden green, daffodil delight, gingham garden & greenhouse gala dsp (Stampin'-Up)
Paper Size: A2 
Ink: island indigo
Accessories: cups & kettle framelits, island indigo ribbon, pearls  
 
I am also entering: 
1. Jo's Scrap Shack has a Mother's Day challenge.
2.  Simply Create Too has a ladies only challenge.
3.  DL.Art has a Mother's Day challenge #179
4.  Mod Squad Challenge is Mother's Day


Thursday, April 28, 2016

~Happy Spring~

 
Hello Blogger friends! Thanks for taking the time to visit the Charmed Life Blog. Spring is breaking out all over here in Pittsburgh. The leaves on the trees seemed to pop out over night and so many of the spring flowers are getting ready to bloom. We are having warm days and cool nights. I am loving it. It rained all day today but we haven't had much in April so no complaints here.
 
My card today is reflecting spring even down to the sentiment. I made this one for my DT Wednesday blog post on the CottageCutz blog. I was happy with how it turned out. So here are some details on how I made it.
 
cardstock and designer paper sizes: daffodil delight card base measures 4 1/4" x 11" and scored at 5 1/2"
purely pomegranate embossed layer  is 4 1/8" x 5 3/8"
 designer paper layer is 3 1/8 x 4 3/8"

I used the Stampin'-Up Tulip embossing folder that just embosses around the cardstock edge. Thereby creating a perfect frame for the next layer where I used my designer paper. It's from a retired Stampin'-Up Christmas collection.
 
I used the new CottageCutz large leafy flourish die and cut 2 of them in Stampin'-Up mossy meadow card stock. I added an extra swirl at the top right and some extra leaves on the middle left.  That just helped create balance on my card. I adhered the flourish with multi matte medium. It's a strong adhesive and it dries clear unlike glossy accents.
To continue building my card, I cut some flowers from the mushroom & flowers die in daffodil and pomegranate.

My sentiment was stamped before I attached all the die cuts in mossy meadow ink. It makes it easier for placement to do that first. The sentiment came in the Stampin'-Up April 2016 Paper Pumpkin Kit.
 
To finish off my card I added a butterfly cut from the butterfly with flowers die. I cut it once in daffodil cardstock and then in a daffodil designer paper. I used the multi matte medium to attach just in the middle. That way I was able to lift the wings for added dimension. The solid butterfly is glued directly to the patterned paper layer.


Well, friends that's my card for today. The CottageCutz April release is filled with  awesome dies to help you create some gorgeous floral cards. Check it out.

Just a little reminder, it's not to late to enter the brand new challenge on the CottageCutz blog. There are prizes to be won. Check out all the details here.
 
Until next time........God bless.
 
Here are some photos of the dies I used.
http://www.scrappingcottage.com/cottagecutzlargeleafyflourishelites.aspx
http://www.scrappingcottage.com/cottagecutzmushroomandflowers4x4pre-order.aspx
http://www.scrappingcottage.com/cottagecutzbutterflywithflowerspetites.aspx
 
 
I am also entering: 
1.  Moo-Mania has floral challenge.
2.  Crafty Girls Creations has an anything goes.
3.  Southern Girls has a texture challenge.
4.  Addicted to Stamps and More has an anything goes challenge.
5.  Simon Says Stamp Wednesday Challenge is anything goes.


Sunday, April 24, 2016

~Best Dad Ever~

 
Hello Blogger Friends! Thanks for taking the time to stop and visit with the Charmed Life Blog on this Sunday in April. Or whatever day you have dropped by.
 
Well, progress is being made with my kitchen remodel. Our contractor came and installed the appliances on Friday. He didn't get to the lights because the dishwasher took more time than planned. I had no issue with that.
 
He will be back this week for the under cabinet lighting and he mentioned the other kitchen lighting. I haven't purchased that yet. Although I did see a pendant light for over my sink  at Lowe's that I liked. The other main ceiling fixture I am not sure yet. I did see one at Lowe's but not sure if I really liked it.
 
He keeps stressing to me to make sure that I like what I buy because once it's done.... So many decisions and making sure that everything looks good is a big factor. More than I realized, I think.
 
Now onto my card for today. This one I created for the color challenge #579 on Splitcoaststampers. I am your hostess this week and I have chosen lost lagoon, hello honey and basic gray for my color palette. Optional is something masculine.

I decided to go with a Father’s Day theme for both my samples this week. I make a lot of them so this is a nice start for me.

For this card I used the Paper Trey Ink text block Dad die. I cut in basic gray and then highlighted a couple of the words in lost lagoon. Used dimensional adhesive to pop it up over some designer paper from Stampin’-Up – the confetti celebration collection. To complete this card, I used lost lagoon thick bakers twine and a few stars cut in hello honey.
 
Well that's my card for today. So until next time........God bless.
 
card details:
Paper: basic gray, whisper white, hello honey, lost lagoon, confetti celebration dsp (Stampin’-Up) 
Paper Size: A2 
Accessories: text block Dad die (PaperTrey Ink), lost lagoon bakers twine (Stampin’-Up), starry die (Verve)

I am also entering:
1.  A Bit More Time To Craft has an anythinggoes challenge. 
2.  Crafts Galore Encore Challenge has an anything goes.
3.  One Crazy Stamper Inc has an anything goes challenge.   


Wednesday, April 20, 2016

Happy Mothers Day

 
Hello Blogger friends! Thanks for taking the time to stop and visit with the Charmed Life Blog.
 
I am just getting over a cold. Some of the kids at PreSchool were sick and I picked up what they had. On Tuesday, one of the little girls said to me "Miss Mary-I have a cold". I had to laugh because that's how I got mine.
 
Our kitchen appliances were delivered yesterday. We went with stainless and they look great with our countertops. Our contractor will be back on Friday to install the appliances and also the under cabinet lighting. My final step will be having the backsplash and floor installed. I haven't made a decision on that yet.
 
Now let's get on to my card for today. This one I made for my DT blog post on the Scrapping Cottage blog.  I have created a little garden scene as a Mother's Day card.  Mother's Day is Sunday, May 8. It's just under 3 weeks away so time to get busy creating a card for Mom, Grandma, Daughter or someone special.
 
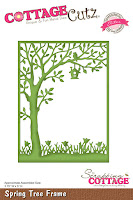
The main die is the spring tree frame and I cut it in white card stock.  Using sponge daubers and distress inks I colored the tree, leaves, birdhouse, bird and tulips. The die cut measures 3 3/4" x 5". I set that aside to work on the background.
 
Background: I cut white card stock 3 7/8" x 5 1/8" and used a stencil to sponge in the sun rays.
 
Then I lightly sponged in a soft blue background and adhered this to my spring tree frame. 
 
I applied versamark ink and clear embossing powder and heat set. It gives a nice shine to the trees and leaves.
To highlight the scene I added a frame around cut in Stampin'-Up rich razzleberry and attached it to the spring tree frame with glue dots. The outside measurements are 3 7/8" x 5 1/8". The inside measurements are 3 3/8" x 4 5/8".
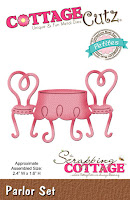
I used the parlor set and cut in rich razzleberry card stock to set in the middle of my garden scene. The vase on the table is from the Mushroom & Flowers dies. It's the base for the smaller mushroom. Just another way to get more mileage out of your dies. I cut it in a chocolate card stock.
The flower in the vase is cut from the butterfly with flowers die. I cut it once in green cardstock then again in pink. I paper pieced the pink flower over the green and placed it in my vase.
 
Once the scene was created I attached it to a white card base measuring 4 1/4" x 5 1/2". I used mounting tape to pop it up on the white base.
 
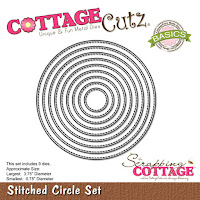
To complete my card I stamped my sentiment and cut it out using the circle set and the stitched circle set. Attached to the side of my frame for a little interest.
 
Also, did you know that we are having a challenge for our fans and followers to display the cards you have made with CottageCutz dies? There are prizes to be won as well. Click here for all the details and the linky to submit your entry.
 
Well, my friends that's it for me for today. So until time....... God bless.
http://www.scrappingcottage.com/search.aspx?find=spring+tree+frame
http://www.scrappingcottage.com/cottagecutzmushroomandflowers4x4pre-order.aspx
http://www.scrappingcottage.com/search.aspx?find=parlor+set
http://www.scrappingcottage.com/cottagecutzbutterflywithflowerspetites.aspx
http://www.scrappingcottage.com/cottagecutzstitchedcirclesetbasics.aspx


Sunday, April 17, 2016

~Snowy Christmas~

 
Hello Blogger friends! thanks for taking the time to stop and visit with the Charmed Life Blog today. We are having such beautiful spring weather here in Pittsburgh. It's been sunny and mild for the past 4 days. My hubby has been out working in his gardens every day. He is in his happy place for sure. Our tulips are blooming and look so beautiful gracing our front yard. Note to self: I need to get a photo to share it here on the blog.
 
My card certainly doesn't reflect spring though. I made it for the color challenge #578 on Splitcoaststampers. Maura is our hostess and she chose elegant eggplant, old olive and Bermuda bay. Optional is to add embossing.
 
 
I like using non-traditional colors for Christmas cards so that’s the direction I went this week. I created a snowy, glittery winter scene using different dies and stamps using this card as inspiration.

Started my card by stenciling snowflakes on my background panel using the MFT stencil and 3-D molding paste.

Cut my snowy hills with the Lawn Fawn hillside borders. I used some Stampin’-Up chunky essentials glitter for the snow. Adhered the snow banks with foam mounting tape.

The left white tree is a die from Memory Box – “small forest archway”. Cut in white added some chunky glitter to the limbs. I used a Paper Shapers punch for the small tree. Pine trees are from Inpression Obsession and cut in old olive and secured with foam mounting tape.

My 2 houses are stamps and dies from PaperTrey Ink. I stamped in eggplant and bermuda bay and then die cut them. These are also secured with foam mounting tape.
 
I used to have trouble with these stamps and dies from Papertrey but my friend Barbara, gave me a pointer on how to use them. I first stamp the image and then cut a house from scrap paper. I used the negative piece and place it over my stamped image. Then I take the die and place it in the negative image and run it through my Big Shot. It works like a charm every time.

To finish off my card, I stamped a sentiment from the PaperTrey ink “holiday home” set in elegant eggplant and added a few Bermuda bay sequins. And that's my card for today and my 2nd Christmas card for the 2016 season. So until next time......God bless.
 
card details:
Stamps: holiday home (PaperTrey Ink) 
Paper: bermuda bay, whisper white, old olive Paper Size: A4 
Ink: elegant eggplant, bermuda bay 
Accessories: evergreen trees (Impression Obsession), small forest archway (Memory Box), stitched hillside borders (Lawn Fawn), chunk essentials glitter (Stampin’-Up), mounting tape(Scotch), snowflake stencil (MFT), 3-D molding paste (Americna Traditional Designs)   

I am also entering:
1.  Winter Wonderland has pink - blue challenge. Card base is blue, house in blue and blue sequins.
3.  HLS Christmas Challenge is to use die cuts.
4.  The Glory of Christmas Challenge is to make a scene.

Thursday, April 14, 2016

~Hugs From Afar~

 
Hello Blogger Friends! thanks for taking the time to visit with the Charmed Life Blog.
 
Today was my day at Preschool. We are working on the letter "L" so I took my juicer and we made lemonade. The kids loved being able to actually help make it. I cut the lemons in wedges and each child got to put a wedge in the hopper and then watch the juice come out of the chute.
 
They were really interested in the whole process. After we finished the juicing, I added water and sugar and each child was able to taste it. They all came back for 2nd and 3rd helpings. I have never made fresh lemonade and it really is quite delicious. So this day was a success.
 
Now onto my card for today. This one I made for the color challenge #577 on Splitcoaststampers. Barbara was our hostess and she chose pink pirouette, pool party and mossy meadow for her color palette. Optional was to use animals on our card.
 
I decided to use these super cute animal dies from CottageCutz and decided to use them for my card today. I didn’t want to make a baby card so I decided to go with a “thinking of you” type card.

My background designer paper is from the Stampin’-Up “sweet li’l thing” collection. I used a MFT stitched circle die to cut a circle for added interest on my card.
Cut my baby elephant die in pool party and the baby lion die (temporarily sold out) in pink pirouette and used some designer paper for his mane. I lightly sponged around the edges for depth.

My “sending” word is a die from Simon Says Stamp” and I cut in mossy meadow. My sentiment banner is a die from Impression Obsession. The sentiment is from Verve and it’s stamped in mossy meadow ink. I added a pink heart and some twine to complete my card.

If you have any CottageCutz dies, we are having a challenge on the Scrapping Cottage Blog. There are prizes to be won. Click here for more info. That's it for me for today. So until next time.......God Bless.

card details:
Stamps: order thank you (Verve) 
Paper: pool party, pink pirouette, mossy meadow, sweet li’l thing dsp (Stampin’-Up) 
Paper Size: A2 
Ink: mossy meadow, pool party, pink pirouette Accessories: Baby lion, sweet baby elephant dies (CottageCutz), Sending die (Simon Says Stamp), plane and banner, love you dies (Impression Obsession), Blueprints 15 & 18 dies (MFT) blossom twine (Twinery) 
Techniques: die cutting  
I am also entering:
1.  Kleurne Met Potloden has an animals challenge.
2.  Aud Sentiments has an anything goes challenge.
3.  Crafting with an Attitude has an anything goes challenge.

Wednesday, April 13, 2016

Happy Mothers Day

 
Hello Blogger friends! Thanks for taking the time to visit the Charmed Life Blog. Today was Grandparents Day at Ethan's (youngest grandson) school. It was an all day event that started with breakfast and then we went to class with him.
 
Our first class was physics where they were discussing centripetal motion. Say What (lol)!!!  I was so impressed with the teacher plus how the students interact. It is not a lecture class in fact none of their classes are lectures.
 
The goal of his school, Shadyside Academy, is to  prepare students to become independent thinkers and learned, compassionate and productive citizens of the world. As well as preparing them for college.
 
It was a great day for me and a learning experience. So glad I was able to go and be a part of the event.
 
Now onto my card for today. This one I made for my DT post on the Scrapping Cottage Blog.  I have been asked how I start my cards or where I get the ideas for my layout. It's always a bit different for me. Sometimes I have the card layout in mind and I just start creating. And, then sometimes I have a particular theme in mind.

Today, my card started with my layout. There are many places on the web that provide card sketches. I used a sketch from Splitcoaststampers. So let's get started with the card details.


Card Base:  8 1/2" x 5 1/2" and scored at 4 1/4" to make an A2 card (4 1/4" x 5 1/2")
Into The Woods Designer Paper (Stampin'-Up)  4 1/8" x 5 3/8"
Large Rectangle Layer:  5" x 2" and white layer is 4 7/8" x 1 7/8"
Small Rectangle Layer:  3 3/4" x 2 1/4" and white layer is 3 5/8" x 2 1/8"
Green Background Panels: 1" x 4 1/8" and embossed with a flower pattern from Cuttlebug.
 
After I decided on this sketch, I chose my designer paper and that helped me decide on my card colors. The paper colors are rich razzleberry and olive green so I stayed with that palette for my die cut flowers and leaves.

The flowers and leaves are part of the new release for April. The flowers are the "doodle flower set 1". They come with a background die and also the doodle flower die. Aren't they just the cutest little things?

I cut the background in rich razzleberry and decided to use some patterned paper to create a bit of contrast. I used dimensional adhesive and attached them to my card. To attach the doodle part of the flower I used multi-matte medium. It's a strong adhesive like glossy accents but it dries clear.
 
The leaves are also a new set of dies and come with a background and pattern die. They are the new leaves & stems dies.  I cut them in olive green and then a celery green shade. If you look close, you will see that on one set of the leaves I used light and then dark for the top layer. I just switched it around on the other set of leaves for interest.

I used the Mushrooms & Flowers die for the 2 small flowers on the card. I cut those in rich razzleberry and used the same patterned paper for the flower centers.
 
Since I used flowers, I decided to make it a Mother's Day card. We will be celebrating on Sunday, May 8 less than a month away now.  I stamped my sentiment, added a couple of enamel dots in rich razzleberry and a flag to complete my card.
 
 
There is a challenge for CottageCutz fans to display the cards you have made with CottageCutz dies. There are prizes to be won as well. Click here for all the details and the linky to submit your entry.
 
Well, that's it for me for today. So until next time.......God bless.
 
I am also entering:
1.  Crafty Gals Corner is die cuts/punches.
2.  Fresh Brewed Designs has a flowers challenge
3.  Tuesday Throwdown wants us to use our die cuts

Wednesday, April 6, 2016

Gate Fold Flower Card

 
Hello Blogger Friends! Thanks for taking the time to stop and visit with the Charmed Life Blog. Today was the start of our grandson's Ethan baseball season. It was a bit of a cold day. Not exactly baseball weather in my mind but I just wore a sweatshirt and brought a blanket and I was fine. Their team won so that is always a plus for the fans.
 
Did you get your taxes finished yet? We have an appointment with our accountant tomorrow. Nothing like waiting until the last minute. We usually owe some money so I am never in a hurry to file. Once they are done I am always glad to have them out of the way for another year though.
 
Now onto my card for today. This one I created for my scheduled turn on the Scrapping Cottage Blog. I have never made a gate fold card before so I thought I would have a go at it.
 
Card Base: White Card Stock 8½” x 5½” and scored at 2 1/8” and 6 3/8”
 
White Panels: when folded are 2 1/8” x 5 ½”. Card is still 4 1/4" x 5 1/2".
Stampin'-Up mossy meadow layer: 2” x 5 3/8”
Stampin'-Up English Garden designer paper: 1 7/8” x 5 ¼”
Melon Mambo rear panel: 5 5/8" x 4 3/8"
 
Attached layers with double sided tape and adhered to white card base. After I took this picture, I remembered I wanted to use some pink ribbon. Oops! I had to remove the left panel to  add my ribbon. But, I forgot to take another photo.
 
Now for the die cuts: I used the 3D Flower #2 from the March release and cut in pink cardstock.  Between each layer of the flower I used dimensional adhesive. I also used a bone folder and curled the ends of the petals. It creates a nice rounded look to the flowers.
 
 
For some added greenery, I used the CottageCutz Butterfly with Flowers die. I cut once in dark green and once in pink. I cut the pink flowers and adhered them over the green.
The CottageCutz circle set basics is the backdrop for my flower. I used the 3rd largest die and cut in white and then the 4th largest die and cut in pink. Attached this to my card, but I just taped the left side of the circle. That way it won't interfere with the card opening.
 
To finish off the front of my card I cut a butterfly from the Butterfly with Flowers die. I attached one to the patterned paper and then for some added height I cut another one and used glue to secure just the middle.
 
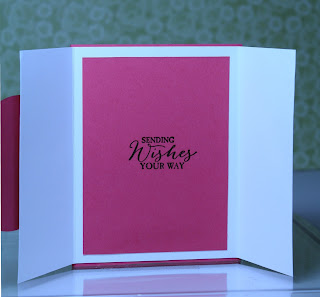
 I also finished the inside of the card simply by adding a piece of melon mambo cardstock and stamping a sentiment from the Stampin'-Up "Butterfly Basics" set.
Well, that's my card for today. Time to dim the lights in charmed Life land for another day. So until next time........God bless.
http://www.scrappingcottage.com/cottagecutz3dflower2.aspx
http://www.scrappingcottage.com/search.aspx?find=butterfly+with+flowers
http://www.scrappingcottage.com/cottagecutzcirclesetbasics.aspx
 
 
I am also entering:
1.  Fresh Brewed Designs has a ribbon or twine challenge.
2.  Stampin' Royalty has an anything goes challenge.
3.  Clear It Out Challenge Blog has a springtime stash-add a flower challenge; Stash items: ribbon, designer paper
 

Monday, April 4, 2016

~Let it Snow~

 
Hello Blogger Friends and a happy Monday to you all! Thanks for taking the time to visit The Charmed Life blog.
 
Can you believe that there was snow and freezing rain here in Pittsburgh on Saturday night? It brought the salt trucks out in our area. Hopefully, for the last time this season. Spring can bring a bit of weather extremes so I guess this was one of them.
 
As for my kitchen, the countertop is in and I am very happy with it. Our contractor came back on Saturday and connected the faucet and garbage disposal. The place where we bought the granite from had to do the install or there is no warranty. Plus, they had to cut the hole in for our faucet on site. That's the reason for 2 different installers.
 
I am getting under cabinet lighting and our contractor suggested we do that next. That way when we bring home samples for the backsplash, we can see it in different light settings. I thought it was a good idea. So that is my next purchase.
 
Now, let's get onto my card for today. This one I created for the color challenge #576 on Splitcoaststampers. Peggy is our hostess and she chose tempting turquoise, whisper white and tangelo twist for her color palette. Optional is to use metallic-a little or a lot.

Ha-this week I thought I had the option nailed! Then I discovered it wasn't glitter but metallic that I should have been using.

My saving grace on this one is that I used a shimmery metallic paper and sponged turquoise ink on it, then I added the glitter. So Peggy is giving me credit for the metallic layer (lol)!! My girlfriends love me.

Anyway, I wasn't sure until today where I was going with my card this week. I had lots of ideas floating around in my head. Then I remembered these dies I bought before Christmas but never used them. I bought them after seeing this card from Kittie. Yes, I was able to create a Christmas card with these colors. My first of this year!
 
So here are my deets on the card: I cut the MB country fence oval frame and the small forest archway in whisper white cardstock. I sponged the tangelo twist and a little soft suede on the fence. I layered over the scene another oval cut from the MFT stitched oval dies.

The next step was where I included the dessert option. I took some shimmery white metallic paper and sponged turquoise over it. Used some glitter glue and sprinkled glitter for the effect of a frozen stream. I taped it to each side of the white snowbank.

On the tempting turquoise background, I used a MFT "snowfall stencil" and some 3d molding paste for a snowy background. To complete my card I used the Lawn Fawn "let is snow" border die and cut it in turquoise. I shaped it around my frame.
 
Well, that's it for me for today. So until next time.......God bless.
 
card details:
Paper: tempting turquoise, whisper white, metallic white (The Paper Company) 
Paper Size: A2 Ink: tangelo twist, tempting turquoise 
Accessories: country fence oval frame, small forest archway (Memory Box), fir trees (Impression obsession), let it snow border (Lawn Fawn), snowfall stencil (MFT), 3D molding paste (American traditional Designs), dazzling diamonds glitter (Stampin'-Up)  

I am also entering:
1.  ABC Challenge is "E" is for everything.
2.  Glitter 'N Sparkle  has a punch/die challenge.
3Christmas Card Challenge has an anything goes.

LinkWithin

Related Posts with Thumbnails