Showing posts with label get well. Show all posts

Saturday, August 14, 2021

Heard You Caught a Bug

Hello Blogger Friends! Thanks for taking the time to stop and visit with The Charmed Life Blog this Saturday in August. 

Hope there is some fun summer activities on your calendar today. We are going to a 1st birthday party for our next door neighbor. It will be held at a local park and hopefully the rain holds off. Then from there we head over to my son's home for a family gathering. 

Plus I have more garden harvest to try and get taken care of today. My hubby cut basil yesterday so I will be making pesto. Then he also picked about 20 banana peppers that will need to be stuffed and then frozen for winter enjoyment. Also the tomatoes are starting to come in. There aren't enough yet to do any canning so I will roast the 10 that I have and then freeze them. 

So I have a busy day and wanted to get my Blog post done early. This get well card I created for my weekly DT post on the CottageCutz Blog. I am using new stamps & dies from the Lil' Bluebird Designs - a Scrapping Cottage brand. So let's get started with some details on how I created my card.

Design Steps:

I started my card by ink blending the background using tumbled glass, broken china, hello honey and mowed lawn distress inks. The cardstock is Bristol smooth from Canson. I find that the inks blend so smoothly on this paper.
Next, I stamped, die cut and colored the images from the Love Bugs set. I used a combo of Alcohol markers and Prismacolor pencils and gamsol.
I also stamped and die cut the sentiment that is part of this stamp set. The edges are sponged with Broken China distress ink.

For the bug jar I decided to use white cardstock. Then I sponged the yellow, blue and green distress inks so it would appear as glass and you see the colors of the background behind it. I think it worked.
This is a photo of the coloring mediums I used for my images.
Now I am ready to start card assembly. I first stamped the bee "flight trails" in black ink.
I attached the images to the background panel using dimensional adhesive. I cut the grass using the Spring Grass die from CottageCutz.
To complete my card I added a white layering panel - measuring 3 7/8" x 5 1/8". Then the turquoise card base measures 4 1/4" x 5 1/2". After I took the above picture, I decided that I didn't like the darker green cardstock I used originally. So I switched it out to a lighter green.

Well, that's it for me for this post. So until next time......God bless!

Stamps & Dies I used to create card:

I am also entering:
1.  Aud Sentiments has an anything goes + a sentiment.
2.  Cute Card Thursday has an anything goes challenge. 
3.  Crafty Creations has an anything goes challenge. 
4.  Simon Says Stamp has a funny/punny challenge. 
5The Paper Funday has an anything goes with optional of  cute critters. 


Tuesday, June 25, 2019

Get Well Wishes


Hello Blogger Friends! Thanks for taking the time to stop and visit with The Charmed Life Blog today. 

I hope you are enjoying your summer so far. We have been having some great warm and sunny days. Our flower gardens are blooming profusely and the vegetable garden is coming along nicely. 
So far just zucchini, lettuce, sweet peas and garlic scapes. But soon the banana peppers will be ready and sometime toward the end of July we should start getting tomatoes. 

The local farms are already starting to sell corn. We love it and pick it up regularly during the summer. I went to the farmers market last week and picked up eggs and sausage. I missed the rhubarb this year again. I wanted to try making a rhubarb and strawberry pie but that will have to wait until next year. 

Anyway, onto my card for today. This one I created for a group DT post on the CottageCutz Blog. I used the new Wishing Well die to create my card. I love the detail in this die. Notice the woodgrain scallop roof and the grout lines in the well base.

I used a sky patterned paper from Paper Studio for my background. I built my well and then added the flowers at the base. When I saw this die I thought of a get well card as a takeoff on the well itself. The sentiment is from the Stampin'-Up "perfectly penned" set. The "wishes phrase" is from another CottageCutz die. 

And, that's it for me for this post. So until next time...….God bless. 

dies I used to create card: 
I am also entering:
1.  Path of Positivity has an anything goes challenge with optional of encouragement. 
2Lil Patch of Crafty Friends has an anything goes. 
3.  Love To Craft has an anything goes challenge.
4 A Gem of a Challenge has an anything goes challenge.  
5.  Inkspirational has a garden challenge. 


Saturday, May 19, 2018

Get Well Bouquet

Hello Blogger Friends! Thanks for taking the time to stop and visit with the Charmed Life Blog on this 3rd Saturday in May.
 
It is royal wedding day. Prince Harry and Megan Markle were married today in Windsor Castle. It was on much to early for me so I set the DVR and watched when I awoke at 8:00 am. She was such a beautiful bride and I loved the ceremony. They had an American Bishop deliver a sermon and then the marriage ceremony performed by an Anglican minister.
 
Such a fairy tale come true for Megan. She marries into British royalty in a marriage that was approved by the Queen. Something as Americans that we don't quite understand but nonetheless it is fascinating to us. 
 
The only thing I really didn't like was the media commenting more than once about the A-list Hollywood celebrities that were in attendance. I didn't really care that George Clooney and his wife or Oprah were in attendance. I am not a big fan of the out of touch Hollywood crowd.
 
But, anyway it was nice to view the wedding and I wish the new couple years of happiness. o let's move onto my card for today.
 
This one I created for my weekly DT post on the CottageCutz Blog. I am featuring the Mom's Garden Bouquet die and I created a get well card. I never seem to have any of this type of card on hand when I need one. And, this die has such pretty flowers that it will brighten anyone's day.  So let's get started with some details on how I created my project.

Step 1: I started my card by choosing my layout. This sketch is an older one from Splitcoaststampers. I thought it would work well to show off the floral image, allow me to use  patterned paper and possibly some ribbon.
Step 2: Once the layout was decided on, I chose my card colors. I found this floral patterned paper in my stash and that determined my card colors. 
Vanilla Card Base: 4 1/4" x 5 1/2"
Baja Breeze Layer 1: 4 1/8" x 5 3/8"
Springtime Vintage Designer Paper Layer 2: 3 7/8" x 2 1/2"
Vanilla Embossed Layer 3: 2 7/8" x 4 1/8"
Always Artichoke Oval Layer 4: 4th largest oval die
Vanilla Oval Layer 5: 4th largest stitched oval die


 Step 3: I cut the pieces in the garden bouquet. Used a rose red, saffron (light yellow) and sugarplum cardstocks for my flowers. Used Ranger multi medium matte to secure.
 I assembled the bouquet in the pitcher according to the packaging photo.
 Then attached it to the oval using dimensional adhesive.
 Step 4: Now that all the elements of my card are cut, I am ready to start card assembly.
 Attached the panels using double sided tape.
 I decided to go with ribbon and used this baja breeze pleated ribbon
Attached the oval panel using dimensional adhesive on the top and bottom of the oval. This way it will sit evenly on the ribbon.
For my sentiment, I decided to use the "feel better" phrase from the "Ouch with Tooth" die. I cut it in rose red cardstock 2x to give it a bit more dimension. Used the multi medium matte to attach to bottom of card. To complete I cut a few of the flower centers and added to the top of my card. 
 
And, that's it for me for this post. Hope your weekend is a great one. So, until next time.........God bless!!!
 
dies I used to create card:


I am also entering:
1.  Crafty Friends has a "B" is for....challenge. Mine is a bouquet and baja breeze paper.
2.  Creative Fingers has an anything goes challenge.
3Kitty Bee Designs has a Mom/feminine challenge.


Saturday, November 25, 2017

Sending Handmade Hugs

Hello Blogger Friends! Thanks for taking the time to stop and visit with the Charmed Life Blog this Thanksgiving weekend.
 
Hope all my American readers had a fabulous Thanksgiving. Mine was such a wonderful celebration with family and all my food turned out so delicious. Now it's time to begin getting ready for Christmas. I plan on starting my decorating this weekend.
 
But right now I want to share my project for today. This one I created for my weekly post on the CottageCutz Blog. Today, I am featuring the new Sending Hugs Bear die. So let's get started on the details of my card.

Step 1:  I started my card this week, as in some other weeks, with a sketch I found over on Splitcoaststampers. I thought it was a good one to showcase this sweet little bear. And, also to use some patterned paper that wouldn't get completely covered up.
Step 2: Once the layout was decided, I looked through my paper stash. I wanted to see what I could use that would coordinate with the theme of the bear die.
I found this heart paper that I thought would work perfectly for any of the card ideas I gave above. I also liked the red & white colors as I usually gravitate towards the bright shades.
Red card base: 4 1/4" x 5 1/2"
Heart Patterned Paper: 4 1/8" x 5 3/8"
Red scalloped circle: I used the largest of the Nested Scallop Circles
White Circle Image Panel: I used the largest of the Circle dies
Step 3: I cut my bear image, the flower and the sending word from this die set. I decided to stamp the word "Hugs" just for added interest.
I cut the flower in yellow cardstock to break up all the red I was using. Did you notice the cute little embossed belly button this bear has? I used a blush marker to make it stand out a bit. CottageCutz dies all have such incredible detail.
Step 4: I am now ready to start the card assembly.
The circle in the layout has a flat bottom. I first assembled both circles and then cut off approximately 3/8" from the bottom. Before I adhered to the card base, I stamped my "handmade hugs" sentiment.
After it was stamped, I thought it was slightly off-center. So I cut 2 red hearts from an older CottageCutz die and added to the left side. It draws your eye away from it not being centered. I attached my bear to this panel with dimensional adhesive. Gives it more depth.
 
To complete my card, I added the sending phrase on a slight angle to the patterned paper. Again it just adds some interest to the card.

Well, that's it for me for this post. I hope I have given you an idea for a way to use this new Sending Hugs Bear die. Remember, there is a big Black Friday sale going on until Tuesday, December 1. It's a chance to pick up some new dies at bargain prices.
 
So until next time........God bless.
 
Dies I used to create card:
http://www.scrappingcottage.com/cottagecutzsendinghugsbear.aspx

http://www.scrappingcottage.com/cottagecutznestedscallopcircleset.aspx

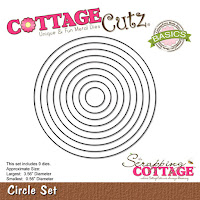
http://www.scrappingcottage.com/cottagecutzcirclesetbasics.aspx
I am also entering:
1.  Crafting with Friends has an anything goes challenge.
2.  Jo's Scrap Shack has an anything goes challenge.
3.  PolkaDoodles has an anything goes challenge.
 

Saturday, November 18, 2017

Feel Better

Hello Blogger Friends! Thanks for taking the time to stop and visit with the Charmed Life Blog this Saturday in November.

It's a rainy and cold day here in Pittsburgh today. One of those all day rains according to the local weatherman. My plans are to get to the supermarket to get all that I need for our Thanksgiving meal. Then I hope to get to my craft room and get it cleaned up - not fun but necessary (LOL)!!!

But, before that I have a card to show. This one I created for my weekly DT post on the CottageCutz Blog.  There are a new release of "get Well" dies coming on Black Friday. Today, I am giving you a sneak peek of two of the new dies.

I am using Chicken Soup and Ouch with Tooth dies. They are all so cute. This little chicken just made me giggle so I had to create a get well card with him as the star. So let's get started on my card details.

Step 1: Since I knew what dies I was going to use, I just needed to decide on my card colors plus the card layout. I found a great sketch that I thought would work well with my design. I chose the wonky striped patterned paper because I thought it would work well with the whimsical chicken image.
Yellow Card Base: 4 1/4" x 5 1/2"
Yellow Striped Patterned paper: 4 1/8" x 5 3/8"
Red Rectangle Layer: used the largest of the pierced rectangle dies.
White Image Layer: used the largest of the rectangle dies.
Step 2: I decided to cut and assemble my die pieces at this point just to make sure everything would fit in the layout I had chosen to use. Love the detail on the can of chicken soup. the chicken is just too cute sitting in the bowl along with the soup noodles.
Step 3:  Started my card assembly. I adhered the panels to the card base with double sided tape. It's my go to adhesive. I wasn't sure what I was going to use for the horizontal layer of the sketch. I thought of ribbon but because this is more of a fun card, I decided to use yellow cardstock. The panel measures 1 1/4" x 4 1/4".

Step 4: I am now ready to adhere the dies to the image panel. I used the chicken noodle soup can in place of the circle on the sketch. The detail on the soup can is amazing. I have a close-up photo and also you can click on the photo to make it even larger.
I finished off my card with a few sequins - hearts and regular circles. I thought it just added a finished element to the bright and cherry card.
 
That's it for me for this post. Until next time........

Dies I used to create card:


I am also entering:
1.  Crafty Catz has an anything goes challenge.
2.  Creative Fingers has an anything goes challenge.
3.  Emerald City Crafts has an anything goes challenge.

LinkWithin

Related Posts with Thumbnails