Hello Blogger Friends! Thanks for taking the time to stop and visit with the Charmed Life Blog this Thanksgiving weekend.
Hope all my American readers had a fabulous Thanksgiving. Mine was such a wonderful celebration with family and all my food turned out so delicious. Now it's time to begin getting ready for Christmas. I plan on starting my decorating this weekend.
But right now I want to share my project for today. This one I created for my weekly post on the CottageCutz Blog. Today, I am featuring the new Sending Hugs Bear die. So let's get started on the details of my card.
Step 2: Once the layout was decided, I looked through my paper stash. I wanted to see what I could use that would coordinate with the theme of the bear die.
I found this heart paper that I thought would work perfectly for any of the card ideas I gave above. I also liked the red & white colors as I usually gravitate towards the bright shades. Red card base: 4 1/4" x 5 1/2"
Heart Patterned Paper: 4 1/8" x 5 3/8"
Red scalloped circle: I used the largest of the Nested Scallop Circles
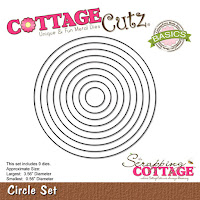
White Circle Image Panel: I used the largest of the Circle dies
Step 3: I cut my bear image, the flower and the sending word from this die set. I decided to stamp the word "Hugs" just for added interest.
I cut the flower in yellow cardstock to break up all the red I was using. Did you notice the cute little embossed belly button this bear has? I used a blush marker to make it stand out a bit. CottageCutz dies all have such incredible detail.
Step 4: I am now ready to start the card assembly.
The circle in the layout has a flat bottom. I first assembled both circles and then cut off approximately 3/8" from the bottom. Before I adhered to the card base, I stamped my "handmade hugs" sentiment.
After it was stamped, I thought it was slightly off-center. So I cut 2 red hearts from an older CottageCutz die and added to the left side. It draws your eye away from it not being centered. I attached my bear to this panel with dimensional adhesive. Gives it more depth.
To complete my card, I added the sending phrase on a slight angle to the patterned paper. Again it just adds some interest to the card.
Well, that's it for me for this post. I hope I have given you an idea for a way to use this new Sending Hugs Bear die. Remember, there is a big Black Friday sale going on until Tuesday, December 1. It's a chance to pick up some new dies at bargain prices.
So until next time........God bless.
Dies I used to create card:
I am also entering:
1. Crafting with Friends has an anything goes challenge.
2. Jo's Scrap Shack has an anything goes challenge.
3. PolkaDoodles has an anything goes challenge.


This is really great and I love your step-by-step!
ReplyDeleteHugz Tinz
Hello Mary,
ReplyDeleteThank you so much for your sweet comment. Love your card which definitely is made from the heart. Glad you were able to get a place on Kauai. I'm sure you'll love the island, a tropical paradise.
What a sweet little bear - love the hearts paper - and I can just feel the hug this card is sending!
ReplyDeleteFabulous layout for that sweet, sweet little bear. Love the tiny yellow bloom, too! Thanks for sharing at Jo's Scrap Shack! Blessings,
ReplyDeleteChristine
DT Member
https://withaverygratefulheart.blogspot.com
sweet and cute teddy. A great card.Thanks for playing along with us in our Anything Goes challenge at Polkadoodles
ReplyDeleteShylaa DT@Polkadoodles
Adhiraacreations
Very cute. That tiny print in the paper looks great with that tiny scallop. TFS!
ReplyDeleteadorable CAS design. Wishing you the best of luck in this weeks challenge over at Polkadoodles
ReplyDelete