Wednesday, December 22, 2021

Happy Holidays

Hello Blogger Friends! Thanks for taking the time to stop and visit with The Charmed Life Blog today.

Well, it's official the winter solstice started yesterday. The good news is that the days start to get longer once again. Looking for the bright side of cold, gloomy days. Another bright spot is that Christmas is only 3 days away. I am so looking forward to some great family time starting with Christmas Eve. 

I have presents to wrap and I am still making my chocolate treats, but I should be finished with all of that tonight. Then tomorrow do a little cleaning and I am all set for the celebrations.

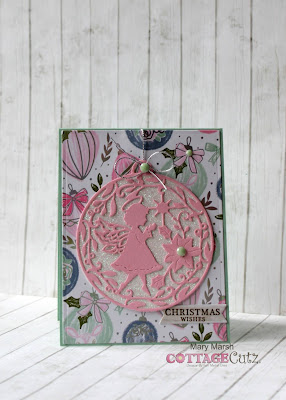
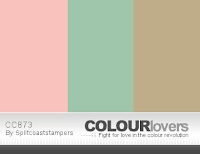
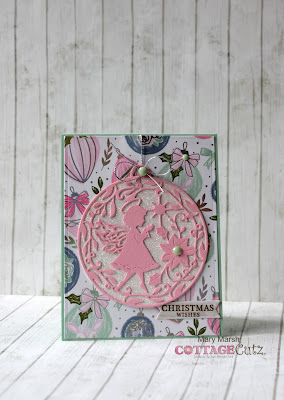
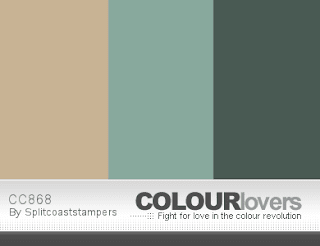
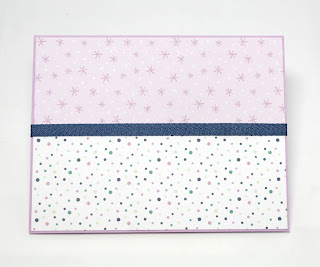
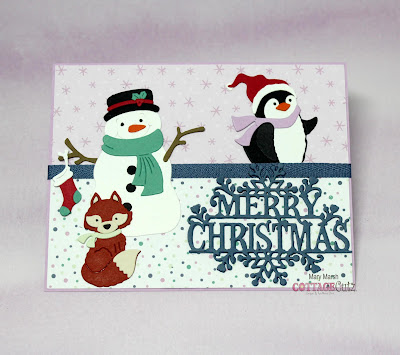
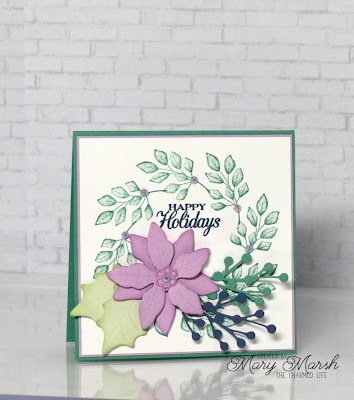
So now onto my card for today. This one I created for the color challenge #872 on Splitcoaststampers. Jeanne was our hostess, and she chose just jade, soft seafoam, misty moonlight and fresh freesia for her color combination. Anything goes was an optional item this week. I am using jewels. Although I am not happy with the way they photographed. IRL they are so pretty and sparkly.
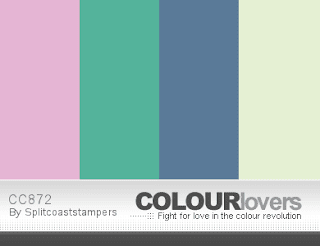
fresh freesia, just jade, misty moonlight, soft seafoam

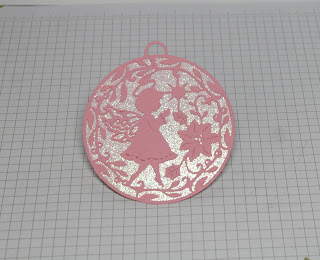
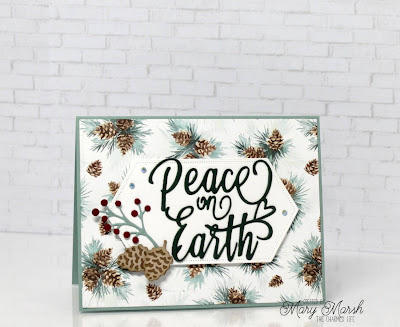
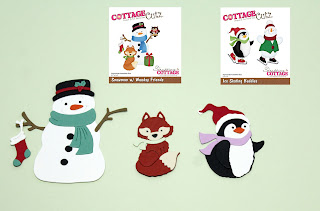
Anyway, I used the Forever Fern stamp set and a template to create a Christmas wreath. It's stamped in the just jade ink. I stamped and die cut the poinsettia in fresh freesia, die cut leaves in soft seafoam and die cut other greenery in just jade and misty moonlight cardstocks. They are from the Stampin'-Up Poinsettia Petals stamp set and matching dies.

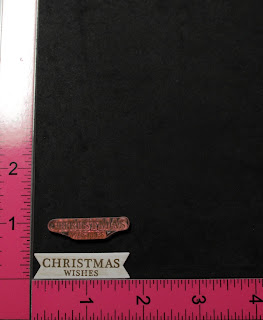
My sentiment is also from the Poinsettia Petals stamp set and it's stamped in misty moonlight ink. I finished off my card by adding the fresh freesia jewels. And that's it for me for this post. So, until next time........God bless. 

card details:
Stamps: forever fern, poinsettia petals (Stampin'-Up)
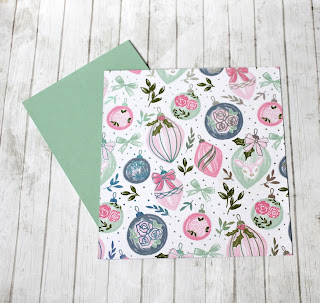
Paper: just jade, fresh freesia, whisper white, soft seafoam, misty moonlight (Stampin'-Up)
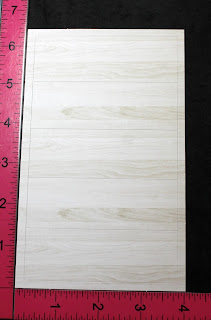
Paper Size: 4 1/4" Square
Ink: just jade, soft seafoam, fresh freesia, misty moonlight (Stampin'-Up)
Accessories: poinsettia dies, 2-in-color jewels (Stampin'-Up)
I am also entering: 
1.  A Gem of a Challenge is anything goes. 
2.  Crafty Calendar has a Christmas Challenge. 
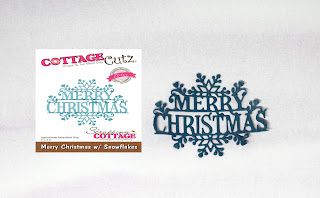
3.  CHNC #573 is anything goes Christmas with optional to use the word "Merry". 
4 Sweet Stampin' has an anything Christmas challenge. 
5.  Jingle Belles has an anything goes Christmas challenge. 


Sunday, December 12, 2021

Angel Ornament Card

Hello Blogger Friends! Thanks for taking the time to stop and visit with The Charmed Life Blog today.

Hope your weekend is going well and you had some crafty time along with getting your Christmas preps done. We had some friends over for dinner last night. It was a wonderful evening and my appetizers as well as main course was a big hit. And today we have another Christmas get together to attend. So I wanted to get my post done before we leave.

Today, for your viewing pleasure I have a Christmas card in non-traditional colors using the Fairy Angel Ornament die. It's from the Christmas Part 1 release. So, let's get started with some details on how I created my card.

Design Steps:
This card I created for the Splitcoaststampers color challenge #873 and for my weekly DT post on the CottageCutz blog. Karen was the hostess on SCS and she chose blushing bride, mint macaron and crumb cake for her color trio. Optional was to add bling!
blushing bride, mint macaron, crumb cake

I chose some metallic ornament paper from my stash that had two of the challenge colors. I thought it would a great backdrop for my angel ornament. I love the paper but metallics are not easy for me to capture a good photo. This paper has lots of silver on every ornament, but it doesn't show on the photo. If you have any tips, let me know.

mint macaron card base: 4 1/4" x 5 1/2"
designer paper layer: 4 1/8" x 5 3/8"
Next, I cut my fairy angel ornament in the pink cardstock and decided to use some white glitter paper for the background. I used the largest die from the Circle set to cut it.
I had a bit of a struggle trying to figure out how to get the crumb cake color in my design. It doesn't have to be a lot, but it has to be there. So, I found some paper in my stash that had that color in a muted way.
I cut it in a small banner and stamped my sentiment in a medium brown ink.
Now that all my card elements are prepared, I am ready to start card assembly. I attached the designer paper to the card base with double sided tape.

I attached the angel ornament to the glitter paper with Art Glitter glue. It dries clear and hold securely.
I used silver cord as the ornament "hanger" and also added a silver cord bow for interest. The ornament is attached with double sided tape. To finish off my card, I attached the sentiment banner with double sided tape and scattered some mint faceted enamel dots for the bling option.

Well, that's it for me for this post. So, until next time.........God bless. 

die I used to create card:


I am also entering:
1.  CHNC #572 is anything goes w/optional of quick and easy. 
2.  Sweet Stampin' has an anything Christmas challenge.
3.  Creative Knockouts has a "time to be merry" challenge. 


Friday, December 10, 2021

Peace on Earth

Hello Blogger Friends! Thanks for taking the time to stop and visit with The Charmed Life Blog today.

The Christmas countdown is in progress. I hope you are on track with all your Christmas preparations. I just finished all my decorating. It takes longer than I plan but oh so worth it when it's finished. 

Now I need to move onto finishing up my cards and getting them in the mail. I have about 35 cards made and I just need a few more. I have a couple of the Stampin'-Up Paper Pumpkin kits sitting around and the designs are more simplified. So, I just may finish up another 10 cards using those kits. 

I am not sure about all the baking and candy making that I do each year. I give a lot of the treats away, but I always eat more than I intended to especially with the chocolate treats. Who can resist good chocolate candy (LOL)??? I have to decide soon because time is running out. 

Well now let's move onto my card for today. This one I created for the Splitcoaststampers color challenge #868. LeAnn was the hostess, and she chose crumb cake, soft succulent and evening evergreen for her color trio. Optional was to use a die.
crumb cake, soft succulent, evening evergreen

For my card, I used the new Peace on Earth Phrase die from CottageCutz. It's cut in the evening evergreen shade. I added a berry sprig and some pinecones on the image panel. I placed the phrase in a stitched label die. It's from Stampin'-Up. 
The background paper is from the Stampin'-Up "Painted Christmas" collection. It has all the challenge colors.

To finish off the card I scattered a few soft succulent gems. And, that's my card for today. So until next time .......God bless. 

card details:
Paper: soft succulent, evening evergreen, whisper white, crumb cake, soft suede, merry merlot, painted christmas dsp (Stampin'-Up)
Paper Size: A2
Accessories: peace on earth phrase, christmas farmhouse floral dies (CottageCutz), stitched label dies, in-color gems (Stampin'-Up)

Die I used to create card:

I am also entering:
1.  Beyond the Blue has a Christmas challenge with non-traditional colors.
2.  Crafty Catz has an anything goes with an optional twist of Christmas celebrations.  
3.  Paper Funday has an anything goes with optional of Holiday. 
4 Jingle Belles has a "It's a Wrap challenge. 
5.  Addicted to Stamps has a die and/or stencils challenge. 


Tuesday, December 7, 2021

Snowman & Penguin Buddies

Hello Blogger Friends! Thanks for taking the time to stop and visit with The Charmed Life Blog today.

I hope all your Christmas decorating and cardmaking are going as planned. Mine is coming along nicely. I have a bit more decorating to get finished and that's my goal for today. Then I can finish up my cards and get them mailed. I always make chocolates and some cookies for Christmas but this year I am up in the air about that. I give a lot away, but I also eat a lot. Something I don't want to do this year. 

For today I have another Christmas card to show you. It's a whimsical card for a friend who loves animals. I made it for my weekly DT post on the CottageCutz Blog. 

Design Steps:
I started my card this week by first selecting my designer paper. Since this is a whimsical style card, I wanted designer paper to reflect that style. I found a pattern that I thought would work well. And, it had non-traditional colors, so I liked that as well.

Misty Moonlight (Blue) card base: 5 3/4" x 4 1/2"
Fresh Freesia Layer: 5 5/8" x 4 3/8"
Designer paper Layers each: 5 3/8" x 2 1/4"
Next, I cut the images and used the colors that were in the designer paper for their accessories with the addition of red for the Penguin hat & Snowman hat trim and the Christmas stocking. 
I wanted a Christmas greeting and decided to use the Merry Christmas w/Snowflakes dies. I cut it in the misty moonlight cardstock. I cut it 2x to give it more emphasis on my card.
Now that all my elements are prepared, I am ready to start card assembly. I attached the designer paper to the fresh freesia panel with double sided tape. To join the 2 panels, I used some misty moonlight ribbon.
The images are next, and I attached those with double sided tape. The Merry Christmas greeting is secured with Art Glitter glue. This adhesive dries clear so it's my new fave.
To finish off the card, I added the image panel to the card base with double sided tape. I also scattered a few white enamel dots just for added interest. That's my card for this post. So, until next time.......God bless.

dies I used to create card:


I am also entering:
1.  Peace On Earth challenge is anything goes Christmas w/option of mood board.
2 Crafty Calendar has a Christmas challenge.  
3.  Crafter's Castle has an anything goes challenge. 
4.  Cut It Up has a Holiday challenge. 
5.  Winter Wonderland has an anything goes. 


Sunday, November 28, 2021

S'more Fun

Hello Blogger Friends! Thans for taking the time to stop and visit with The Charmed Life Blog this last Sunday in November. 

Hope you all had a great Thanksgiving celebration. Ours was such a wonderful and thankful celebration with family. And, now I am looking forward to Christmas. I got all my Fall decorations put away yesterday. I like to leave them up through Thanksgiving. I started the Christmas decorating and plan to finish up this week. Then I have to get to work on my Christmas cards. 

But for today I have a birthday card that I created for a special little girl who turns 4 next month. We had s'mores with them this past summer so I thought this would be a cute reminder for her of the fun we had. Today for your viewing pleasure, I have a design featuring several of the new Campin' Out dies. They are part of the CottageCutz Black Friday release. Let's get started on some details of how I created my card. 

Design Steps:
I decided to make a nighttime card in the slimline design. I found some perfect designer paper for the background. It already had the night sky and stars on it. I cut it from the largest Nested Stitched Rectangles Slimline die. The card base is white and measures the same size as the designer paper.

white card base: 3 1/2" x 8 1/2"
designer paper: 3 1/2" x 8 1/2"
Next, I cut the images. I used the Campin' Out Fox, Campin' Out Hedgehog and Mouse and the Campin' Out Sun & Moon.
For the next step, I used the Hills Slimline die to cut a slope for the ground. I stamped the sentiment in chocolate chip ink.
Now that all the elements are prepared, I am ready to start card assembly. I attached the slope with double sided tape and the images with dimensional adhesive.
I thought the card looked like it needed something else so I cut a tree from the Campin' Out Trees die. Took some white acrylic paint and splattered it around the card, added a few more yellow stars and some sparkle with clear wink of stella.
And, that's my card for this post. So, until next time.......God bless. 

dies I used to create card:


I am also entering:
1.  A Gem of a Challenge is anything goes. 
2.  Crafter's Castle has an anything goes. 
3.  Creative Fingers has an anything goes. 
4.  Creative Moments has an anything goes challenge. 
5.  Simon Says Stamp has an anything goes challenge. 


Thursday, November 25, 2021

More 2021 Thanksgiving cards

Hello Blogger friends! Happy Thanksgiving Day to you all. 

Things are under control in my kitchen so I thought I would make a quick Blog post. I am expecting 10 people for dinner and also expecting a great family time. I spent all day in the kitchen yesterday prepping for the meal. So today is just a matter of roasting the turkey and baking all the sides. Dessert is pumpkin and apple pies plus a pumpkin roll. 

I wanted to post more of the Thanksgiving cards I made this year. These ones were from the Stampin'-Up Paper Pumpkin Kit - Hello Pumpkin. It's last year's kit but I finished all the cards and even made some favors from it. Forgot to take pictures of the favors.  


So I hope your Day is a blessed one and remember to give thanks for something or someone. So until next time......God bless. 

I am also entering:
1. Crafty Gals Corner has a thanks/thankful challenge.
2. Creative Moments has an anything goes challenge.  
3. Fab 'n' Funky has a checks and/or plaids challenge.
4. Simon Says Stamp has an anything goes challenge. 
5. Lemon Shortbread has an anything goes challenge. 


Saturday, November 20, 2021

Magic of Christmas

Hello Blogger Friends! Thanks for taking the time to stop and visit with The Charmed Life Blog today. 

It's the weekend before Thanksgiving and I have lots to do here. My son came over to help us mount a TV upstairs, and we thought originally he was going to go up in the attic. Well the access to the attic is from the closet in my craft room. 

So I had to take out the storage unit and everything that was on it. Then the plans changed, and he didn't have to go up there. So now I have to get the shelving unit back in the closet and everything put back on it. It is a good time to go through everything and get rid of the stuff that I don't use anymore. I can see it will be an all day project. 

So let's move onto my card for today. This one I created for my weekly DT post on the CottageCutz Blog.  

Design Steps:

I started my card this week with the layout. I liked the sketch #880 on Splitcoaststampers. I thought it would work well for the oval shape of the die.
I looked through my designer paper for a background pattern that might fit and not overwhelm the die scene. I found this "all is calm" collection from Stampin'-Up. It's a subtle snowflake pattern that I only had pieces of, but I had enough to use for the three horizontal layers.
 
Soft Sky Card Base: 4 1/4" x 5 1/2"
All is Calm Designer Paper Layer: 3 7/8" x 3 11/16"

Layer under DSP: 4" x 3 11/16"  
Next, I cut the image from lost lagoon cardstock. Then I used the 2nd largest die from the Oval die set to cut a snowy background from white glitter paper.
I cut the Christmas sentiment using the Merry Christmas w/Shadow die. The shadow is the soft sky (card base) and the Christmas phrase is the lost lagoon shade.
Now that all my card elements are prepared, I am ready to start card assembly. I attached the designer paper layers to the card base using double sided tape. 
I attached the image panel to the white glitter panel with Art glitter glue. Then I attached to the card base with dimensional adhesive.
To finish off my card I attached the Christmas phrase with glue dots and added a few snowflakes for element 4 of the sketch. And, that's it for me for this post. So until next time.......God bless. 
I am also entering:
1.  Creative Fingers has an anything goes challenge. 
2.  Jingle Belles has a Banner Holiday challenge. Inspiration is the blog banner. My designer paper has the snowflakes and the trees.
3.  Aud Sentiments has an anything goes + a sentiment.  
4.  Crafty Creations has an anything goes challenge. 
5.  Paper Shelter has a say something challenge. 


LinkWithin

Related Posts with Thumbnails