Showing posts with label Graduation. Show all posts

Saturday, July 24, 2021

Filmstrip Graduation Card

Hello Blogger Friends. Thanks for taking the time to stop and visit with The Charmed Life Blog. Hope your weekend is going great and you have some fun plans or maybe you're reading this while on vacation. That would even be better!

I had friends over on Friday for a night on my deck. I served up some great appetizers and sangria. It was just the girls for this one. We had a beautiful evening temperature wise and the time spent laughing and talking was so nice. 

Then Saturday we went to a graduation party honoring my nephew. I made him this card I am featuring today using the new CottageCutz Film Strip Slimline die.  So let's get started with some details on how I created it. 

Design Steps:
I cut the filmstrip from black cardstock. My white card base is 8 1/4" x 3 1/4". It's the same size as the filmstrip.
I cut another white panel 3 1/4" x 8 1/4" to stamp my sentiment and grad cap images. I just thought it would be easier this way rather than stamping directly on the card base. I laid the filmstrip down for placement of the stamps. These are wood stamps so I used my Stamp-a-ma-jig for exact placement. 
I am ready to start card assembly. I attached the filmstrip to the white background panel with Ranger multi medium matte. When I use this die again I will definitely use an adhesive sheet. It will be easier that way.
Next, I placed the camera image and smile phrase in the left opening. I used double sided tape and liquid adhesive to attach these images. Notice the graduation cap in the corner. It's not a die. I cut it out and in the next photos I will tell you how I did it.
Grad Cap Steps:
I started with a piece of red cardstock 2" x 1". I penciled a line at 1" and then turned it and penciled another line at 1/2".
Then I started making my cuts. I went from point to point so it would form the top of the graduation cap. The next photo shows the start of my cutting.
I went around and made 3 additional cuts going from point to point to form the shape. I believe it's called a parallelogram. I flipped it over since my pencil marks were still there.
Now to make the piece that fits on the grad's head, I used the 2nd largest stitched die heart and placed just a portion of it on red cardstock.
This is what the cut looks like. I am using the negative part of cut. I just trimmed until I got the size that would work for the cap.
Here is the finished piece.
And then I attached it to the head part. I was happy with how it turned out. Then I started thinking about a tassel but I didn't want to fuss with twine. So I looked through my dies and found a ribbon that I thought would work. It's from the Penguins with Presents die. I cut just the ribbon portion and then used the longest loop of the ribbon. I think it works for the tassel. I punched a 1/8" hole and added a gold brad.
Before I attached the white card base to the image panel, I stamped my inside sentiment. I also added a few stars that are part of this Film Strip die. I thought this sentiment is a perfect companion to the front of my non-traditional graduation card.
To finish off my card I attached the image panel to the card base using double sided adhesive.
Well that's it for me for this post. So until next time .......God Bless. 

Dies I used to create card:

I am also entering:
1.  My Time to Craft has no patterned paper challenge. 
2 Daisy Chain Challenge wants us to a die or stencil. 
3.  Creative Knockouts has a die cuts or punches challenge. 
4Addicted to Stamps and More has a die cut and/or stencil challenge. 
5.  Watercooler Wednesdays Challenge is all about occasions. 


Thursday, July 12, 2018

Follow Your Dream

Hello Blogger Friends! Thanks for taking the time to stop and visit with the Charmed Life Blog today.
Hope your week is going well and that you are getting to take advantage of some of this great summer weather.
 
I had our annual preschool teacher get together on Tuesday evening. It was a wonderful and relaxing evening. We were able to sit out on my deck and enjoy the summer night. Weather conditions were right until about 9:00 when it started raining. So we just moved it in doors.
 
My menu had an Italian theme this year. For the appetizers, I made a charcuterie board with soppresta, prosciutto, capicola and a nice selection of various cheeses and olives. I wanted a caprese salad and decided to serve it on a small wooden skewer. That made such a nice presentation. I also served a French sparkling lemonade, ice tea and a homemade Sangria.
 
Then for our main entrĂ©e, I served ravioli with a basil pesto. The basil was from my garden. I also had meatballs made from grass fed beef in a marinara sauce. The sauce was from last summers harvest. It was a blend of roma and heirloom tomatoes roasted with onions, garlic and a balsamic vinegar. These were the last 2 bags left in my freezer.  
 
I was completely happy with how everything turned out and the teachers thoroughly enjoyed the food. I love opening up my home and hosting a gathering. It's a reminder to me that I need to do this more often.
 
Now onto my card for today. This one I made for the color challenge #CC693. Jeanne was our hostess and she has chose so saffron, bermuda bay and flirty flamingo for her color trio. Optional was to add balloons to your card.

I needed a graduation card and I wanted something a bit less traditional. I thought this hot air balloon fit that criteria and also the optional item. So I created a little outdoor scene.

The hot air balloon die is from CottageCutz, and I used the challenge colors to cut the pieces. The sentiment is an older set from Waltzingmouse that had just the right sentiments for my card. The background paper is from an older Stampin'-Up Paper Pumpkin kit. It was a bermuda bay card base and I cut it to use as designer paper.

Scattered some Bermuda bay sequins to finish off my card. Well, that's it for me for this post. So until next time...…...God bless.
 
card details:
Stamps: half pint heroines (Waltzingmouse)  
Paper: bermuda bay, flirty flamingo, so saffron, baked brown sugar, smoky slate, whisper white   
Paper Size: A2   
Ink: tuxedo black (Memento)   
Accessories: spring hot air balloon, stitched sun, clouds, umbrella dies (CottageCutz), bermuda bay sequins (Stampin'-Up) 
Dies I used to create card: 
http://www.scrappingcottage.com/cottagecutzspringhotairballoon.aspx
http://www.scrappingcottage.com/cottagecutzstitchedsuncloudsandumbrella.aspx
 
I am also entering:
1.  Crafting By Designs has an anything goes challenge.
2.  Creative Moments has an anything goes challenge.
3.  Pause, Dream Enjoy has an anything goes challenge.
4.  Simon Says Stamp has a fun in the sun challenge.
5Sunny Day Crafting has an any animal challenge.


Saturday, June 23, 2018

Graduation Card

Hello Blogger Friends! Thanks for taking the time to sop and visit with the Charmed Life Blog today.
 
It's been a crazy week here. We had a flash flood on Wednesday night in our community and our street was affected. Only minor damage at my home but other houses on the street weren't so fortunate.
 
I have never been in a flash flood before and it's incredible how fast the water comes and how powerful it is. It took chunks of asphalt out of the street and our road is buckled in several areas. The homes at the other end of my street had dumpsters brought in to throw stuff away that was damaged when water came into their basements.
 
It was scary watching what was happening on the outside of my home. Neighbors were calling and panic was in their voices. My hubby wasn't home so I was getting unsettled the worse it got. The rain stopped almost as quickly as it started. I think we had about 4.5" of rain in an hour at least that's what I believe I hear on the news.
 
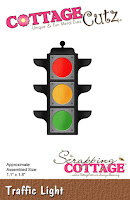
Now onto my post for today. This card I made for my weekly DT post on the CottageCutz Blog. I am featuring the new Traffic Light die. I needed a graduation card, and I thought this die would make something a little different.  Let's get started with some details on how I created my project. 
Step 1: I chose my card colors based on the school colors. It's a blue -gray theme. My blue cardstock is called lost lagoon and I used patterned paper to match. I used the largest Stitched Scallop die to cut my rectangle panel.
Card Base: 4 1/4" x 5 1/2"
Patterned Paper Layer: 4 1/8" x 5 3/8"
Stitched Scalloped Layer: 3 1/2" x 4 1/2"
 
Step 2: Cut out the traffic light pieces. I like to use colored cardstock when I cut my dies. It's easier for me to do it that way. But you can certainly use white cardstock then the color medium of your choice. Either way works great.
I cut the 2018 from gray cardstock and I used the Stitched Numbers die. This card is going to a girl so the scalloped panel and the stitched numbers give it a bit more femininity.  
Step 3: Time to start a bit of the card assembly. I attached the PP layer to the card base with double sided tape.  
Started the assembly of the image panel. First, I had to stamp my "go" word on the greenlight. I didn't have a stamp with just that word. But, I found one with the word "got".
By masking off the "t" and the rest of the sentiment I had what I wanted. Sometimes we just have to get a little resourceful with what we have to work with.   
Attached to panel then I stamped my sentiment in the bottom right corner. Used the Stamp-a-ma-jig for help with keeping it straight.  
 I  applied Ranger multi matte medium to the numbers. Placed them on an angle just for added interest.
Step 4: To finish off my card, I used mounting tape and attached image panel to base.  I thought it needed something else to complete it so I added a few gray enamel dots. It was just a little bling but not too much to overwhelm the other elements of my card.  
Well, that's it for me for this post. So until next time...…..God bless. 
 
dies I used to create card:
http://www.scrappingcottage.com/cottagecutztrafficlight.aspx

http://www.scrappingcottage.com/search.aspx?find=stitched+numbers

http://www.scrappingcottage.com/cottagecutznestedstitchedscalloprectangleset.aspx
I am also entering:
1.  PolkaDoodles has an anything goes challenge.
2.  Aud Sentiments has an anything goes + a sentiment challenge.
3.  Crafting with an Attitude has an anything goes challenge.
4.  World Wide Open DT Challenge has an anything goes challenge.


LinkWithin

Related Posts with Thumbnails