Saturday, February 29, 2020

Springtime Pals

Hello Blogger Friends! Thanks for taking the time to stop and visit with The Charmed Life blog this last day of February.
 
And, it's also leap day. It occurs once every 4 years.  How many times have you said- if I only had a bit more time. Well we are getting an extra 24 hours - so enjoy!!
 
We are in the middle of a bathroom remodel. Our contractor is here working now. He is amazing. I thought I would have dust and dirt everywhere. We closed off all the doors upstairs and covered the bed and particularly my craft room with plastic drop cloths. I am so surprised that the dust is so minimal after taking out walls, the old tub and the toilet.
 
My craft room is closed off for a few days. I could to in there to work but I would have to remove all the drop cloths to get to everything. I am not interested in doing that. This card I had done before he showed up to work.
 
I made it for a group post on the CottageCutz Blog. To create my card I used the new Springtime Pals die. I thought the die was so cute and my precious little granddaughter loves horses so this card will go to her.
 
I used various colors of Stampin'-Up cardstock to cut the elements. Used a light blue designer paper for the background. I cut the fence in a naturals white cardstock and then used weathered wood distress ink and sponged. The horse was cut in a caramel cardstock and I used the same color of ink for shading. I liked how it turned out.
 
The tulips are from another CottageCutz die. I just thought the bottom of the fence needed something as an embellishment.  To finish off the card I added my Easter phrase and a couple of clouds.
 
Well that's it for me for this post. So until next time...….God bless.
 
dies I used to create card:


I am also entering:
1.  PolkaDoodles has an anything goes challenge.
2.  Cute Card Thursday has a Spring fever challenge.
3.  Krafty Chicks has an all occasions challenge.
4.  Addicted to Stamps and More has a Holiday Challenge.
5.  Simon Says Stamp has an anything goes.

Tuesday, February 25, 2020

Hark the Herald Angels

Hello Blogger Friends! Thanks for taking the time to stop and visit with The Charmed Life Blog today.
 
I just finished up my Preschool class for today and I thought I would get in a Blog post while I am sitting here unwinding. It was a good day and the kids were very cooperative.
 
They love doing art projects and their letter of the week pages. We also played a game that reviewed numbers 1-10. That was fun for them as well.
I used a big die that they got to roll and count all the dots on the die after it landed. They then had to match the number with the correct Uno card (from the Uno game) and the correct plastic magnetic number. 
 
Just some ways to help them identify and recognize numbers plus counting skills. They all did so well for 3 year olds. Only my youngest student needed a little help from me. 
 
Now onto my card for today. You might think it's a bit odd to be showing a Christmas card in February but I am trying to keep ahead of the Christmas rush at the end of the year. And there are challenge blogs that encourage us to make Christmas cards all year round.
 
I kept my design simple and worked it around the designer paper and the sentiment. The designer paper is from the Stampin'-Up "joyous noel specialty" collection. The copper foil on this paper is so pretty. I added a copper foil layering panel and then the card base is cherry cobbler.

The sentiment is from the PaperTrey Ink "O Holy Night" stamp set and is stamped in cherry cobbler ink.

I added some sprigs of greenery around the circle in garden green and pear pizzazz cardstocks. The trumpeting angels are cut in the copper foil. I used the Angel Trio die from CottageCutz.
 
Well, that's it for me for this post. So until next time...….God bless.
 
card details:
Stamps: O Holy Night (PaperTrey Ink)
Paper: cherry cobbler, garden green, pear pizzazz, whisper white, copper foil, joyous noel specialty designer paper (Stampin'-Up)
Paper Size: 4 1/2" x 5 3/4"
Ink: cherry cobbler (Stampin'-Up)
Accessories: angel trio, pine spray, circle set, stitched circle set, scalloped circle set dies (CottageCutz)

I am entering:
1.  52 Christmas Card Throwdown has a foil challenge. I don't have a foiling machine so I used copper foil designer paper and cardstock.
2.  CHNC Christmas Challenge is anything goes.
3.  Winter Wonderland has an anything goes challenge.
4.  Merry Little Christmas Challenge February is anything goes.


Saturday, February 22, 2020

Easter Parade

Hello Blogger Friends! Thanks for taking the time to stop and visit with The Charmed Life Blog today. 

It's a beautiful sunny, day here in Pittsburgh. And, the reason I make mention of it is because in January and February we don't see much sun here. It's usually overcast and cloudy. Something about the sun being out. Even if it's cold, which it is, you just feel better.

We are getting ready for a bathroom remodel starting next week. Several years ago we put in a new tile floor and a new pedestal sink. Why we didn't complete everything at that time, I am not sure.

So now we are replacing the tub, toilet and ceramic tile. Our house was built in the 1960's and this bathroom has the original tub and ceramic tile. The original owners picked a yellow tub and tile for this bathroom. I have kept it hidden with a shower curtain for the years we have been here. But now it's time to go. 

The contractor said we can keep the tile on the floor. There is nothing wrong with it and I have a box for the row by the tub that he will have to replace. We are going with a white tub and white subway tile around the tub. I have everything picked and we have to order the tub. The tile is in stock in the store so we will pick that up tomorrow along with the new tub and shower faucets. It will be a bit messy in the house for about a week to 10 days, but I can live with that.

Let's move onto my card for today. This one I created for my weekly DT post on the CottageCutz Blog. I used the new Spring Parade die to create my card. So let's get started on some details.

Design Steps: 
I started by cutting the images. I used a variety of Stampin'-Up colored cardstock for the images. You could always cut everything in white cardstock and use the coloring medium of your choice. I just prefer using the colored cardstock.

Next, I selected my cardstocks. I chose this designer paper from a pack I bought at Hobby Lobby. It's a lighter shade of blue-green and I thought it would make a great background. I sponged some lighter green ink (pear pizzazz) at the bottom for a grassy area for my parade marchers. I decided to go for a long and skinny card to fit all of my images. For mailing, this would fit in a #10 business size envelope.
Teal (bermuda bay) card Base: 4 1/2" x 7 1/2"
Designer Paper Layer: 4" x 7"
I didn't have a stamp that had the word parade in it so I decided to use the Retro Alphabet die. The cardstock is a teal (bermuda bay) shade.
Now that all my card elements are cut, I am ready for card assembly. I started with the die cut images. I used double sided tape to secure to the designer paper. Then added the "parade" phrase with Ranger multi medium matte. I stamped the "Easter" phrase in the same teal (bermuda bay) ink. 
To finish off my card, I added the image panel to the card base. I decided to add a few purple sequins for a little added interest. Well, that's it for me for this post. So until next time.......God bless. 

die I used to create card:
I am also entering:
1.  Crafty Calendar challenge is to use die cuts/punches.
2Alphabet Challenge - W - Anything you wish.  
32 Crafty Critter Crazies has an anything goes with a critter. 
4Crafty Animals has an anything goes challenge. 
5.  World Wide Open DT Challenge Blog is anything goes. 


Thursday, February 20, 2020

Valentine Happy Ending

Hello Blogger Friends! Thanks for taking the time to stop and visit with The Charmed Life Blog today.
 
Today was a Preschool day or me. We had a great class session. This group of 3 year olds love to do art projects. They don't like messy crafts or getting glue or paint on their fingers. So I try to stick to paper crafts. Since it's letter "G" week, we made a giraffe for our end of year alphabet books. They turned out so cute.
 
I sent pictures to the parents because the kids were so proud of their artwork. I am so in my element working with kids. It's a second career for me. I worked in the telecommunications industry for 30 years. I just don't consider this a job. It brings me such satisfaction to see how much they absorb in each class.
 
Now onto my card for today. This one I created for the color challenge # 777.  Karen was our hostess and she chose rococo rose, cherry cobbler and vanilla for her color trio.  Optional is "Have a Heart".

This card seemed to be a series of mishaps but in the end I liked how it turned out. My card is all about the designer paper. I used this pattern from the Stampin'-Up "feels like frost" designer series collection.

This designer paper from Stampin'-Up has the most beautiful winter scenes. Check out some other cards I made using it - here, here, here, and here.

I wanted to stamp my sentiment directly on the designer paper with the help of my MISTI. I didn't get a good image the first time and when I went to re-stamp-the paper moved on me. So I did get double stamping, just not what I had in mind.  

So I had to improvise and stamp my sentiment on a rectangle. I used more designer paper and sponged with rococo rose ink and then stamped in cherry cobbler. The first time around when I did the sponging, the sponge dauber somehow wrinkled the paper. So I had to repeat my first 2 steps!!
 
I added 2 hearts and an arrow cut in cherry cobbler cardstock to cover up the mistake from my original stamping!

To finish off my card, I added some twine, a small bow and epoxy hearts and this card is finished. Whew!!!
 
I  gave this one to my hubby for Valentine's Day. We watch the Hallmark Channel together, and he always remarks how there is a happy ending on the movies. Hence my choice of sentiment.

Well that's it for me for this post. So until next time...….God bless.

card details:

Stamps: forever & always (Penny Black)
Paper: rococo rose, feels like frost dsp (Stampin'-Up)
Paper Size: SQ
Ink: cherry cobbler
Accessories: stitched rectangle, Valentine dies (CottageCutz), heart epoxy droplets (Stampin'-Up), twine (DMC)

I am also entering:
1.  Aud Sentiments Challenge is anything goes.
2.  Southern Girls has an anything goes challenge.
3.  Crafty Creations has an anything goes challenge.
4.  Crafty Gals Corner wants us to add a heart.
5.  Little Red Wagon wants us to have a "heart".
 

Saturday, February 15, 2020

Double Trouble Bunnies

Hello Blogger Friends! Thanks for taking the time to stop and visit with The Charmed Life Blog this Saturday in February. 

It's the day after Valentine's Day. Hope someone did something special for you or you were able to celebrate with someone special. I celebrated with my hubby. We went out to lunch and then in the evening I put together some appetizers for us to continue our Valentine celebration. 

I made shrimp and garlic pasta and then some shrimp quesadillas. We toasted our evening with a glass of asti spumante. My hubby isn't really a wine drinker but he does like asti. It's a bit sweet for me, but I enjoyed it as part of our celebration. 

Now today, I am trying to get some chores done around my home. I ordered a new area rug for my craft room and as soon as my hubby gets home we will put it in place. I have an oval braided rug in there now. It was part of the room when my hubby used it as his den. But, since we changed the room over to my craft room, I wanted something bright and more appropriate to reflect art.  I found this one on the Bed, Bath and Beyond website. It arrived this morning and I really like it. The only difference is the trim on the edge of the rug is blue not orange as shown in the photo. I actually like the blue better. 

Now let's move onto my card for today. This one I created for my weekly DT post on the CottageCutz Blog.  I used the new Double Trouble Bunnies die for my card.

Design Steps: 

I started off with an older MojoMonday sketch.  As I have said so many times before, having a layout in mind at the start of my card is always a big boost for me. It jump starts my creative thought process. I love working with the sketches that are out there in the online world. That way I just choose the colors and designer paper and I am good to go.

I wanted some bright Spring colors for my card. I chose this watercolored designer paper from my collection and then paired colors that I thought would work well with it.

Daffodil Yellow Card Base:  4" x 5 1/2"
Designer Paper Layer: 3 3/4" x 4"

Square Panel: 2 3/4" stitched rounded square die (3rd largest).For this element of the sketch I kept it a square panel and made it a 1/2" larger than what was called for in the sketch. I needed it larger to accommodate my images.

Next, I cut the bunny images using grape, heather, gray and mint cardstocks. You could always cut everything in white cardstock and use the coloring medium of your choice. I just prefer using the colored cardstock.
I sponged clouds on the square panel using tumbled glass distress ink and a cloud stencil. It just adds a little interest to the outdoor scene. Now that all my card elements are cut, I am ready to start assembly. I started with the image panel. The images are attached with Ranger multi medium matte.I like this adhesive because it dries clear. I also used dimensional adhesive to lift them off the sponged panel slightly. 
I attached the designer paper to the card base using double sided tape. I used a grape ribbon to come across the middle of the designer paper per the sketch. 
Attached the image panel with dimensional adhesive. I also cut 2 small pieces of ribbon and attached them to the side of the image panel. I didn't have enough of this color to make a bow and the tufts make a nice presentation. To finish off my card, I scattered some grape glittered enamel dots and this one is complete.

Well, that's it for me for this post. So until next time...…..God bless. 

dies I used to create card:
I am also entering:
1.  The Alphabet Challenge has an anything you wish challenge. 
2Little Red Wagon has a wild  one challenge. You are to use an animal found in the wild.
3.  Unicorn Challenge is anything goes. 
42 Crafty Critter Crazies has an anything goes that features a critter. 


Saturday, February 8, 2020

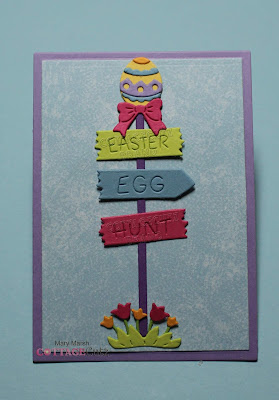
Easter Egg hunt

Hello Blogger Friends! Thanks for taking the time to stop and visit with The Charmed Life Blog today. 

We had our first real taste of winter yesterday with a 5" snowfall. It closed the schools. It was one of those bone chilling days. The kind that makes you want to sit in front of the fireplace and cuddle under a blanket. 

My hubby was under the weather so he did that most of the day. Me on the other hand had a card to get ready for my weekly DT post on the CottageCutz blog. But, I did manage to make it to the gym for a workout. My community had all the main roads cleared by 12:00. 

I created my first Easter card for the upcoming season. So let's get started on some card details.

Design Steps:
As I have said so many times before, having a layout in mind at the start of my card is always a big boost for me. It jump starts my creative thought process. I love working with the sketches that are out there in the online world. That way I just choose the colors and designer paper and I am good to go.
I liked this week's sketch #787 from Splitcoaststampers.
I wanted some bright Spring colors for my card. I chose this gorgeous grape designer paper from my Stampin'-Up collection and then paired it with other Stampin'-Up colors that I thought would work well.

Gorgeous Grape Card Base: 4 1/4" x 5 1/2"
Grape Gingham Designer Paper: 4 1/8" x 5 3/8"
Heather Heather Layer #2: 3 1/8" x 4 3/8"
Balmy Blue Layer #4: 2 7/8" x 4 1/8"
Next I cut the images from the die. I used various colored cardstock. You could always cut everything in white cardstock and use the coloring medium of your choice. I just prefer using the colored cardstock.
Now that my panels and images are cut. I am ready to start my card assembly. I started with the image panel. The images are attached with mini glue dots and Ranger multi medium matte. I like this adhesive because it dries clear.
My original idea was to use ribbon for panel 3 of the sketch. Instead I decided to cut a 1" strip of the lemon-lime cardstock and emboss it. This way the image panel would lay flat on top of it. My cards are always a work in progress.
I attached the image panel to the designer panel layer using double sided tape. For the bunny, I used dimensional adhesive. At this point I wasn't going to use the other bunny. But that changed as well.
To finish off my card I attached the grape card base. I used lemon-lime sequins for element 5 of the sketch. I thought it just kept with the whimsical card appeal. In the upper right corner I used some grape enamel dots. This is the point that I decided to go with the gray bunny. I attached him with dimensional adhesive and my card is complete.
Well that's it for me for today. So until next time........God bless

die I used to create card:
I am also entering:
1.  2 Crafty Critter Crazies has an anything goes with a critter.
2.  Crafty Animals has an anything goes. 
3.  Crafty Catz has an anything goes with optional of embossing. 
4.  Cute Card Thursday has an anything goes. 

Saturday, February 1, 2020

Bee My Valentine

Hello Blogger Friends! Thanks for taking the time to stop and visit with The Charmed Life Blog this first Saturday in February 2020. January is one for the record books. 

Lots happened here in my neck of the woods but one bright moment was that my nephew returned safely from his tour in Iraq. So glad he is home for a bit and all is well.

Tomorrow is Super Bowl Sunday. We are going over my son's home to watch the game and eat some delicious food. It will be a great family time and I am looking forward to it. I will bring some appetizers for everyone to enjoy.

Now onto my card for today. This one I created for my DT post on the CottageCutz Blog. I used this new Busy Bee die and created a Valentine card. 

Here are some card details. 
I started off by choosing my designer paper. I decided to stick with traditional Valentine colors for this card and I wanted some heart paper. I found this one in my collection that I thought would work. The hearts are small enough and once I added my die cut hearts it wouldn't overpower the image.

Red Card Base: 4 1/4" x 5 1/2"
Designer Paper Layer: 4 1/8" x 5 3/8"
\
Next, I cut the bee image in normal bee colors- black and yellow. I used vellum for the wings and sponged them with tumbled glass distress inks.
I wanted a "punny" sentiment for my card. I had this "bee happy" stamp. So I masked off the happy word and with the help of my stamp-a-ma-jig I stamped just the "bee" word in the corner of my heart with black ink. To make it stand out I stamped in black onyx ink and then embossed with a black embossing powder.
To finish off my sentiment, I used just the "my valentine" phrase from the Be My Valentine Puppies die and cut in black cardstock. When I started card assembly I decided to recut this phrase in a shiny black foil to make it stand out like the stamped sentiment.
I also cut a 1 1/2" wide strip of black cardstock and embossed it with a heart folder. Just wanted to get some other color on the card besides the red and white.
Assembled my card and scattered a few red hearts to complete the card. 
Well that's it for me for this post. Enjoy your weekend! Hope it includes something crafty. So until next time......God bless.

dies I used to create card:


I am also entering:
1.  Cute Card Thursday has a Valentine's challenge. 
2 Krafty Chicks has an anything goes challenge. 
3Simon Says Stamp has an anything goes challenge. 


LinkWithin

Related Posts with Thumbnails