Showing posts with label baby. Show all posts

Friday, January 26, 2024

It's A Girl

Hello Blogger Friends! Thanks for taking the time to stop and visit with The Charmed Life Blog today. Another weekend is upon us, so I hope you have something crafty planned. 

Today I had an appointment with the functional medicine Dr that I am seeing. This Dr is a Godsend. He is a board certified internist but he doesn't practice medicine by just treating a symptom and handing you a prescription. He works with his patients to develop a comprehensive wellness plan by digging deeper and tending to the roots of the illness. He can write a prescription if needed but that's not his first line of approach. 

I am not really having any major medical problems and I was looking for a Dr like this for years. A friend of mine mentioned him in casual conversation and it immediately piqued my interest. I looked him up online and called for an appointment. I have seen him 3x now and each visit I am more and more impressed. 

Anyway, that was my day. So now I am moving onto my card for today. This one I created using the colors from the Splitcoaststampers color challenge #982. Our colors were pool party, soft seafoam and bubble bath. 
pool party, soft seafoam, bubble bath

My niece just had a baby girl, and I thought these colors would work great for a baby card. And, I thought a screen divider layout would also work for the baby dies I wanted to use. I am really happy with how this turned out. 

Here is a link to the tutorial that I used. 

I focused on the bubble bath color for my card. But I did get the soft seafoam in with the diaper pin and  pool party ink is sponged on the cloud.

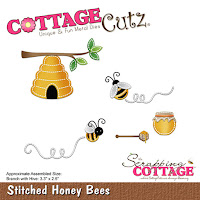
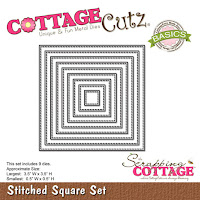
My panels are the vanilla cardstock and I embossed with a heart embossing folder. The dies are all from CottageCutz.

That's it for me for this post. So until next time......God bless. 

Card Details:
Stamps: Ten Little Fingers (Great Impressions Stamps), Practically Perfect (Verve)
Paper: bubble bath, soft seafoam, baked brown sugar, vanilla, ivory, white (Stampin' Up)
Paper Size: A2
Ink: tumbled glass distress (Ranger)
Accessories: decorative label punch, oval punch (Stampin' Up), garden rail punch (Martha Stewart), Stork, Bear on Cloud & Moon, Diaper Pin, Baby Footprints, Heart dies (CottageCutz), Heart EF (Darice)
I am also entering:
1.  Crafty Catz has an anything goes challenge. 
2.  Creative Creases has anything goes with a fun fold. 
3.  Creative Fingers has an anything goes challenge. 
4.  Craft Rocket Challenges wants us to use embossing. 
5 Creative Knockouts has a lots of layers challenge. 


Saturday, June 19, 2021

Beautiful Baby Boy

Hello Blogger Friends! Thanks for taking the time to stop and visit with The Charmed Life Blog today. 

It's a rainy day here in Pittsburgh. We were getting ready to start our daily 3 mile walk this morning and the rain came pretty quickly and heavy. Fortunately we were still in our front yard and that ended the walk for a bit. We were able to get out about an hour later and got in 2 miles before the rain started up again.

I did get my home workout in while we waited for the rain to stop. I have a trainer and see him once a week along with a friend of mine at a private training facility. He has worked out a routine for me to do at home with the equipment I have. 

Now onto my card for today. This one I created for my weekly DT post on the CottageCutz Blog. I am featuring the new Curly Sheep & Lamb die and created a card to welcome a new baby boy. A young couple from church just had their 3rd baby and I want to send them a card. So let's get started with some details on how I created my card.

Design Steps:
I started my card this week by picking the colors. I wanted to use some colors that are typical boy colors. I found this cute designer paper in a royal blue and decided to go with it. I decided to add some ribbon and went with this white flax ribbon.

Pacific Point (Blue) Card Base: 4 1/4" x 5 1/2"
White Layering Panel: 4" 1/8" x 5 3/8"
Designer Paper Layer: 3 7/8" x 5 1/4"
White image panel: 2 3/4" x 3 3/4"
Blue Image Layering Panel: 2 7/8" x 3 7/8"
Next, I cut my sweet Mama sheep and Baby lamb dies. They are so, so cute. I just love how they turned out.
Then I stamped my "beautiful baby boy" sentiment on the white cardstock die cut image panel. I used the 3rd largest die from the rectangle set and stamped in pacific point (blue) ink to match the cardstock and designer paper panels.
I attached the sheep & lamb image with dimensional adhesive. Then the blue layering panel that was cut with the 2nd largest Stitched Rectangle die was attached with double sided tape to the image.
I attached the designer paper to the white layering panel and the white flax ribbon with double sided tape. I used a foam adhesive sheet to attach the image panel. I wanted that lifted slightly off the designer paper.
To finish off my card, I attached the panels to the card base and scattered a few pacific point hearts. I am happy with how the card turned out and I think my friends will like it as well. So until next time.......God bless. 

dies I used to create card:


I am also entering:
1.
  Gem of a Challenge is anything goes. 
2.  Sweet Stampin' has a something beginning with B challenge.
3.  Taylormadecards4u has a use your words challenge.  
4.  Alphabet Challenge is "F" is for furry.
5.  Crafty Catz has an anything goes challenge with optional of animals. 


Tuesday, April 28, 2020

Special Little One

Hello Blogger Friends! Thanks for taking the time to stop and visit with The Charmed Life Blog. 

Can't believe that April is drawing to a close in a couple of days. Spring is breaking out all over our neighborhood. Trees are budding and some in bloom, tulips and hyacinths are still around. And the beautiful dogwoods are everywhere or so it seems. 

My hubby has already planted his beans, onions and kale. He also planted sunflower and zinnia seeds today. Next month he will have the rest of his vegetable garden in place. 

I noticed the other day that his garlic is coming up. Early June we will enjoy the garlic scapes. That's the green leafy stems that come up out of the ground. They have a wonderful garlic flavor and can be used the same way you would use chopped garlic. It's wonderful in pesto.

Now let's move onto my card for today. This one I created for the color challenge #787 on Splitcoaststampers. I was the hostess and I chose pink petal, mint macaron and so saffron for my color trio. Optional was to make a congratulations card. 
petal pink, mint macaron, so saffron
I need a baby card for my niece who is due in 2 weeks and having a baby girl. So hence the optional item and color choices this week. 

My images are from the "bear on cloud with moon" die from CottageCutz. The sentiment is from the beautiful baby stamp set from MFT. I stamped in mint macaron ink.

The mint macaron background paper is from the "tranquil textures" collection from Stampin'-Up. I added some mint macaron ribbon. This was originally white and I used the mint macaron Stampin' Blend to color it. Worked like a charm. 

To finish off my card I cut a few stars in pink and my card is done. And, that's it for me for this post. So until next time.......God bless. 

card details:

Stamps: beautfiul baby (MFT)
Paper: mint, macaron, petal pink, so saffron, baked brown sugar, whisper white, tranquil textures dsp (Stampin'-Up)
Paper Size: A2
Ink: mint macaron
Accessories: bear on cloud and moon, cross stitched rectangle die (CottageCutz), ribbon (Darice)

I am also entering:
1.  Unicorn Challenge is furry friends.
2.  A Place to Start has a ribbon or bows challenge. 
3Country View Challenges has an animal magic challenge.
4.  Die Cut Divas has an animal challenge.
5.  Cutie Pie Challenge is Bunnies,  Bears and other B's.

Saturday, May 26, 2018

Welcome Owl Baby

Hello Blogger Friends! Thanks for taking the time to stop and visit with the Charmed Life Blog on this Memorial Day weekend.
 
It's always considered the official start of summer. My hubby has already been working in his yard and gardens. He has everything looking so nice and now it's just waiting for the perennials to start blooming. There are different flowers for early and late spring as well as early and late summer. I enjoy going out and cutting them for bouquets.
 
We have no plans for this weekend. My Mother-in-law is coming to spend the day with us. She has moved in with my sister-in-law and although things are going smoothly, they both need a break from each other. So I wanted to get this post done and some other things before she comes over later this morning.
 
This card I made for my weekly DT post on the CottageCutz Blog. I used this sweet Mama Owl and Baby that was actually part of the Mother's Day release to welcome a new baby. I like to have some of these type of cards on hand for either a baby shower or to send out to congratulate on a new birth. So let's get started with some details on how I created my project.

Step 1: I started by picking my card colors this week. I wanted to use some soft baby boy colors. So I chose coastal cabana, brown sugar (soft brown), and a designer paper that has both of these colors for the card base.  I also had some of the coastal cabana twine that I decided to use. Thought it would fit well with these owl images. Twine and dotted paper - I like the combo for a baby boy
card.
Card Base: 4 1/4" x 5 1/2"
Brown Sugar Panel: 4" 1/8" x 5 3/8"
designer Paper Layer: 3 7/8" x 5 1/4"
 

 Step 2: Cut my Mama & Baby owl. For baby, I used the coastal cabana cardstock and sponged his wings with the same ink for a bit of color variation. Mama was cut in a cantaloupe shade and her wings and eyes are cut in coral cardstock.  They are so, so cute. I just love how they turned out.
 Step 3: Stamped my welcome baby sentiment on white cardstock that was cut with the 3rd largest pierced rectangle die.
 I layered that onto another rectangle cut with the coastal cabana cardstock.  Added a branch for the owls to perch on. It's from the stitched honey bees set.
 Step 4: Added the blue twine to the background panel and attached to card base.
 I used mounting tape to attach the image panel. I wanted it lifted somewhat from the twine. I dimensional adhesive only on the top and bottom of the panel.  No need for the dimension where the panel sits on the twine, since that's already raised.
I finished off this week's card by adding a few hearts cut from the Coastal Cabana cardstock.
Well, that's my card for today. So until next time...…..God bless.
dies I used to create card:
http://www.scrappingcottage.com/search.aspx?find=mama+owl+%26+baby


http://www.scrappingcottage.com/cottagecutzstitchedhoneybees.aspx
I am also entering:
1.  Crafting with Friends has an anything goes challenge.
2.  PolkaDoodles has an anything goes challenge.
3.  Cute Card Thursday has a little boy blue challenge. I thought my baby boy card fit.


Saturday, February 17, 2018

Welcome Baby

Hello Blogger Friends! Thanks for taking the time to stop and visit with the Charmed Life Blog this Saturday in February.
 
Hope you have something fun planned for the holiday weekend. It's President's Day on Monday so we all get an extra day to our weekend to relax.
 
We did have a great Valentine celebration on Wednesday. I love to make us an elaborate dinner and serve it in courses. I don't make anything ahead of time so my work is done between courses. This way we get to enjoy each course before the next one arrives.
 
I started with our appetizers of baked brie served with jam and crackers and a glass of wine. The next course was our salad. That was a mix of baby arugula, spinach, red and green romaine and a baby tango lettuce with chopped cauliflower, brussel sprouts, pistachios and strawberries. I served it with a champagne pear vinaigrette.
 
Next was our entrée which consisted of broiled salmon with  lemon pepper seasoning, filet mignon with a blue cheese sauce and a baked potato. The potato I start in the microwave then rub it with butter and salt, wrap in foil and bake for 30 minutes.
 
Our dessert was chocolate covered strawberries. My hubby enjoyed his special dinner and my treat was a dozen white roses plus 2 dozen red tulips. He couldn't decide what to buy so he got both.
 
Now onto my card for today. This one I created for the color challenge #CC670. Karen was our hostess and she has chosen pink pirouette, blushing bride and pear pizzazz as her color trio. Optional was to use lace on our card.

When I saw the colors I could only think of a baby card with the 2 pinks and light green. So that’s the direction I took.

My sweet little bear and moon are a die from CottageCutz – Bear on Cloud and Moon. I cut the moon in white glitter paper. The bear is in baked brown sugar. I couldn't seem to get a good picture that shows the true color of the bear. It is a soft, light brown shade. It fits the pinks well IRL.

The blankie, hat, bow, cap on moon and bear nose are in pink pirouette.

The card base is blushing bride as is the designer paper. The paper is from the Stampin’-Up “bundle of love” collection.

My welcome baby sentiment is from the MFT stamp set “beautiful baby”. Finished my card by adding a few pear pizzazz stars.
 
Well, that's it for me for this post. Until next time...........God bless.
 
card details:
Stamps: beautiful baby (MFT)  
Paper: blushing bride, pink pirouette, pear pizzazz, baked brown sugar, very vanilla, bundle of love dsp (Stampin'-Up)  
Paper Size: A2  
Ink: pear pizzazz  
Accessories: Bear on Cloud and Moon, cross stitched rectangle dies (CottageCutz), white cotton lace (Hobby Lobby)
 
I am also entering:
1.  Simon Says Stamp has an add a die cut challenge.
2.  Alphabet Challenge has a "X" for x-tra special occasion.
3  Polka-Doodles has an anything goes challenge.
4  4 Crafty Chicks has a lots of layers challenge.
my valentine tulips

my valentine roses


Saturday, July 1, 2017

~ Precious Little One ~

Hello Blogger Friends and a happy Saturday to you all. This is a holiday weekend here in the USA. Our July 4th celebration is coming up on Tuesday. So enjoy whatever weekend plans you may have.
 
The card I am showing today is one that I made for my weekly Saturday post on the CottageCutz Blog. So let's get started on some details of how I created this card.
I have been showing you over the past several weeks how to combine word die phrases with a stamped sentiment. Check out my cards here, here, here here and here.  I am continuing with this series today as well.

Today I wanted to create a baby card and use the Baby Koala w/Blanket die. I thought the Precious Phrase would work nicely along with a baby sentiment. So let's get started with some details on how I created my card.

Step 1: I started my card this week with a sketch. I liked this one because it's a square card and I thought it would fit the Koala Bear well.

Step 2: Once the layout was decided on, I started figuring out my square card base and the additional layers. I decided to make a 4 3/4" square card. Then I picked my card colors. For the center squares I was able to use the stitched square & square set dies. I used the 2nd largest of each set.

Sweet Sugarplum Card Base: 4 3/4" square
Vanilla Layer: 4 1/2" square
Wild Wasabi Striped Designer Paper: 4 3/8" square
Daffodil Delight Center Square Layer: 3 1/8" square
Vanilla Center Square Layer: 3" square
Step 3: I cut the Koala Bear in a medium and dark brown cardstocks. Decided to use a yellow for the blanket. The ears and tummy are cut in vanilla and I shade them with cocoa ink.
Step 4: Started some partial card assembly. I hadn't cut the oval or the rectangle layers yet and I needed to determine how large to make those.
Step 5: Placed my Precious Phrase in this step. This helped in the placement of the center square. The sketch has everything evened off. I moved my image panels down slightly to accommodate the phrase.
Step 6: I decided to use the 4th largest oval from the Oval set. The Koala Bear fit nicely in that size oval.
The rectangle panel underneath the oval is cut at 1" x 3 3/4". I used a hearts embossing folder on this panel. These were both cut in the sugarplum cardstock.
The green flag is 5/8" x 4 3/8" and I cut in wild wasabi cardstock that matched the designer paper.
Step 7: Before I assembled all the center layers, I stamped my sentiment. It is a bit large and I wanted to make sure everything would fit. It also had more words than I wanted to use.  So I used my MISTI and taped off the words "for a special". I inked up just "Little One".

Step 8:  Almost finished. I adhered the image to the oval panel and then attached it to
the square sentiment panel. 
Step 9: Assembled this panel to the card base to complete my project. I used a couple of hearts in the sugarplum shade to finish it off. There is such detail in he CottageCutz dies. Here is a close-up of the Koala Bear. Love the font on these new phrase dies as well. the square sentiment panel. 
I hope I have given you some inspiration today. If you need a baby card this bear is just too sweet. And, by changing the color of the blanket you could make it for a boy or girl. Well, that's it for me for this post. Until next time........God bless.
 
Dies I used to create card: 
http://www.scrappingcottage.com/cottagecutzbabykoalawblanket.aspx

http://www.scrappingcottage.com/cottagecutzexpressionspluspreciousphrase.aspx

http://www.scrappingcottage.com/cottagecutzovalsetbasics.aspx

http://www.scrappingcottage.com/cottagecutzstitchedsquaresetbasics.aspx

http://www.scrappingcottage.com/cottagecutzsquaresetbasics.aspx


LinkWithin

Related Posts with Thumbnails