Showing posts with label wedding. Show all posts

Monday, October 16, 2017

Sweetheart LoveBirds

Hello Blogger Friends! Thanks for taking the time to stop and visit with the Charmed Life Blog.

I can't believe it is already mid-October. This year has gone by in a blink of an eye. We are still having very mild temperatures for Fall.


The leaves  on the trees are still green so I don't know if we will have the gorgeous display of autumn colors this year or not. I am hoping we don't go from warm temperatures into winter weather. I love the Fall season with its warm days and cool nights and the changing leaf color. Will have to wait to see what develops here.


In the meantime, let's move onto my card for today. This one I made for the DTGD challenges on Splitcoaststampers. Julie was the hostess for this DTGD17justwritedesigns challenge.


For my background, I used some Liquitex gloss gel, pistachio pudding, melon mambo and pink pirouette reinkers plus a heart stencil from Stampin'-Up. It is a simple technique that I thought made for the perfect background for my card.


The sweetheart lovebirds and love phrase are both dies from CottageCutz.  The love phrase is cut in melon mambo cardstock and the birds in pink pirouette and pool party. I sponged the birds with the matching ink for a little more depth.

 I thought I could use this as a wedding or anniversary card. And, that completes my card for today. So until next time........God bless.


Card details:
Paper: melon mambo, whisper white, pink pirouette, pool party
Paper Size: A2  
Ink: pink pirouette, pool party  
Accessories: sweetheart lovebirds, love phrase (CottageCutz), heart stencil, pistachio pudding, melon mambo, pink pirouette reinkers (Stampin'-Up), gloss gel (Liquitex)  
Techniques: stencil 
 
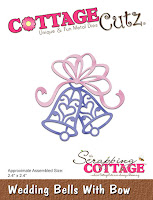
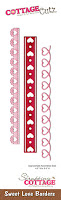
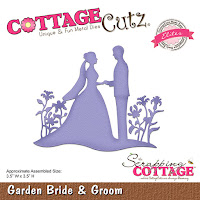
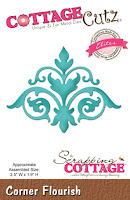
Dies I used on card:
http://www.scrappingcottage.com/cottagecutzsweetheartlovebirds4x4.aspx

http://www.scrappingcottage.com/cottagecutzexpressionspluslovephrase.aspx

I am also entering:
1.  Crafting From the Heart has an anything goes challenge.
2.  Get Creative has a wedding challenge.
3.  Glitter & Sparkle has an anything goes challenge.


Saturday, August 12, 2017

Miss to Mrs (Bridal Shower Card)

Hello Blogger Friends! Thanks for taking the time to stop and visit with the Charmed Life Blog on this Saturday in August.
 
Hope you have some fun activities planned for today. As for me it's all about household chores - cleaning and laundry.
I took part in the DGTD Challenges on Splitcoaststampers and was creating cards for lots of days. That was to the neglect of everything else except video calls with my precious granddaughter. So I had lots of fun now its time to bring things back to order. Then tomorrow I can do whatever I want once again.
 
So let's get started with my card for today. This one I created for my weekly DT post on the CottageCutz blog. I have mentioned before that it's wedding season here in Pittsburgh. Before the big day arrives for the bride and groom, first comes the bridal shower. They are always such exciting events to honor the bride.

Since I am invited to a couple of these showers, I thought I would start to create one of the cards to go along with my gift. So lets get started with some details on the dies I am showcasing today.

Step 1: This week I started my card by planning a layout for my card idea. I wanted a more elegant style card but nothing too fussy. This bride will have that elegance reflected in her wedding.
I then selected the dies that would fit what I had in mind. Since it's a bridal shower card, I chose the wedding gown die. And, then to make it all about love, I am using the love tags and sweet love borders dies.

The cardstock I chose is called blushing bride and I matched it up with some patterned paper of the same color. What an appropriate cardstock name for a bridal card.

Blushing Bride card base: 4 1/4" x 5 1/2"
Patterned paper layer: 4 1/8" x 5 3/8"
 
I assembled these panels and then placed aside to complete my die cutting.
Step 2: I made all my cuts on this step. The bridal gown, hanger and bow is cut in a pearlized gold cardstock. The tag and borders are cut in the blushing bride cardstock. I am always so impressed with how smooth the CottageCutz dies cut cardstock.
Step 3: Started adhering the die cut pieces to the patterned panel layer. I didn't add the tag and dress at this point because I wanted to stamp the sentiment first. I wanted to make sure I had the correct placement after the heart borders were attached.
Step 4: I stamped my sentiment in chocolate chip ink. This one works so perfectly for my bridal shower theme.
Step 5: I attached the wedding gown and hanger to the tag with dimensional adhesive. Angled it just a bit, mainly for card interest. I let the left side of the bow drape down on the tag and secured it there. I liked the more free flow look.
Step 6: To finish off my card I scattered some of the pink hearts that were part of the border die. As I looked at the border, I thought it would add a bit more elegance by adding some pearls down each side. I like the look and since the pearls are small it's not too fussy.
Well that's it for me for this post. I hope I have given you an idea for a bridal shower card. There are 20 different wedding designs to spark your creativity. Check them out here.  Until next time........God bless.
 
dies I used to create card:
http://www.scrappingcottage.com/cottagecutzweddingbellswithbow.aspx

http://www.scrappingcottage.com/cottagecutzweddinggown.aspx

http://www.scrappingcottage.com/cottagecutzlovetagsset4x6.aspx

http://www.scrappingcottage.com/cottagecutzsweetloveborders.aspx


Saturday, August 5, 2017

Mr & Mrs Wedding card

Hello Blogger Friends and a happy Saturday to you all! Thanks for taking the time to stop and visit with the Charmed Life Blog.
 
Another weekend is upon us. Hope you have some fun plans. Today, I am going to the Honda dealer to attend a class covering features of the CRV we just purchased. Nearly everything on the newer cars is programmable which I didn't have on the 2004 model we traded in. They will cover all the features and then answer questions. If time permits they will sit in your card to show you exactly how a feature works.
 
Tomorrow I am attending a baby shower for my niece. I haven't purchased a gift yet so that is on the agenda for today as well. Hopefully, there is something left on her registry.
 
Now onto my card for today. This one I created for my weekly DT post on the CottageCutz Blog. So lets get started with some details on the card I am showcasing today.

Step 1: I start my cards each week in several different ways. Today, I started with my card colors. That made it easy because these are the ones the Bride has chosen for her wedding. I looked through my paper stash for colors that matched along with patterned paper. I chose a soft green, a rich espresso brown and peach as my accent colors. I am also using a peach ribbon. I assembled these parts of the card at this point.
Green Card Base: 5 1/2" x 4 1/4"
Espresso Layering Panel: 5 3/8" x 4 1/8"
Patterned Paper Panel: 5 1/4" x 4" 
Step 2: I decided to use the Mr & Mrs with Hearts and frame it with the Nested Stitched Doily dies. I assembled this part of my card and attached to the base panel. I used dimensional adhesive to attach it to card. It adds depth to your card. 


Step 3: I also wanted to finish the inside of my card. I don't usually do this with anything more than a sentiment. The exception is wedding cards.  I like to add other embellies to make it a little more special for the couple. So for this card I used the Rose with wedding rings, Love Phrase.and the  Nested Scallop Rectangle dies.
I adhered the images to the scallop panel. Take notice of the wedding rings that are part of the rose die. The hearts were leftover when I cut the Mr & Mrs phrase.
 Attached the decorated panel to the card inside. The espresso is such a rich shade of brown and complements the green nicely. The bride chose some beautiful colors for her wedding.
I decided to add a bow to the card front. It just seemed a little more complete. I don't have to mail this card so no worries that my bow will get ruined. And this completes my card for this post. I hope I have given you another idea on how to use these new wedding dies. So until next time.........God bless.
Dies I used to create card:
http://www.scrappingcottage.com/cottagecutzmrandmrswithhearts.aspx

http://www.scrappingcottage.com/cottagecutzrosewithweddingrings.aspx

http://www.scrappingcottage.com/cottagecutznestedscalloprectangleset.aspx

http://www.scrappingcottage.com/cottagecutznestedstitcheddoilyset.aspx


Saturday, July 22, 2017

~ Garden Bride & Groom

Hello Blogger friends! Thanks for taking the time to stop and visit with the Charmed Life Blog.
 
I have scheduled this post and as you are reading it, I am enjoying a visit with my sweet granddaughter Phoenix daisy. She brought her parents along as well (lol)!!
 
This card that I am showing today is one that I created for my weekly DT post on the CottageCutz blog.
I am featuring the new Garden Bride & Groom die as well as the new nested Stitched Scallop Rectangle die.

I have a wedding to attend soon and this die is perfect. I like the elegant appeal of this silhouette image. So I created a card a bit more on the clean and simple side to keep the bride & groom die cut as the central focus.

Let's get started with some details on how I created my card.

Step 1: When I make wedding cards, I usually choose the colors the bride has chosen for her wedding. In this case, it's a rich denim blue and a soft pink. I cut the scallop frame in the denim and then the bride & groom in white. I used the largest of the scalloped rectangle dies for my frame.
Step 2: I decided to stamp my sentiment on the card base before I placed any of the card elements. Used my stamp-a-ma-jig to help with the placement and to keep it straight. I stamped in the denim ink. I thought this sentiment worked so well with this bride & groom image.
Step 3: As I thought of ways to incorporate the pink into my card, I decided to use some ribbon. It dresses up a card nicely and adds interest. My card base is a little larger than what I usually do.
Card Base: 5 7/8" x 4 3/4"
Step 4: Attached the bride and groom to the scalloped frame with double sided tape. Once that was placed I die cut the corner flourish. I cut them first in white but it just didn't have enough pop. Once I tried the denim blue I liked the look. I used the corner flourish die. Attached the flourishes with mini glue dots.

Step 5: Finished off my card by adding a couple of pink hearts cut from the new Mr. & Mrs. die
Well, that's it for me for this post. So until next time.....God bless.
 
dies I used to create card:
http://www.scrappingcottage.com/cottagecutzgardenbrideandgroomelites.aspx

http://www.scrappingcottage.com/cottagecutznestedscalloprectangleset.aspx

http://www.scrappingcottage.com/cottagecutzcornerflourishelites.aspx

http://www.scrappingcottage.com/cottagecutzmrandmrswithhearts.aspx


Saturday, July 15, 2017

~ Honeymoon Car ~

Hello Blogger Friends! Thanks for taking the time to stop and visit with the Charmed Life Blog on this Saturday in July.
 
Hope you have some fun plans for the weekend. Today we are going to my next door neighbor's baby gender reveal party. She is pregnant with her first baby and today the sex will be revealed.
 
Only her friend knows the baby's sex and we will all find out together. I have never been to a reveal party before so I am looking forward to it. As I type this post her hubby has a pig on a spit roasting over a wood fire in the backyard. It smells so delicious. I have my windows open and the scent is wafting in.
 
But now it's time to move on with this post. Because, I have an appetizer to prepare for the event. This is my card for my weekly DT post on the CottageCutz Blog.
 
Today, I am sharing a sneak peak of some new dies that will be released over the weekend in the online store. There are 20 new wedding dies and 17 fun new nesting shapes. Today I am showing the new Honeymoon Car die and I placed it inside a Wacky Stitched Circle Die. I also used the Love Phrase word die.

So let's get started with some details on how I created my card.

Step 1:  I started my card this week by choosing my card colors. Since this is a wedding card, I wanted the colors to be bright and fun. I decided on blushing bride, mint green, and rose red as the main card colors.
Rose Red card Base: 4 1/2" x 5 1/2"
Blushing Bride Layering panel: 4 1/8" x 5 3/8"
Blushing Bride Designer Paper Panel: 3 7/8" x 5 1/8"
Step 2: I cut my wacky stitched circle in a shimmery vanilla cardstock. The Honeymoon Car is cut in the mint green along with the other card colors. The detail on the CottageCutz dies is always amazing and this new car is no exception. Plus, I love the stitching on this new die and we have other shapes coming with the same stitching.
 Step 3: I started assembly of the card. At this point I wanted to stamp my sentiment. I am only going to use the words forever and always from my stamp. So I taped off the other words and used my stamp-a-ma-jig for placement. I didn't tape all the way to the top of the stamp. When I inked my stamp, I had the top part of stamp off the ink pad.
I placed my love word temporarily on my card just to see where I was going to place the sentiment. That way I don't have any interference from other cardstock and I get a good image.


Step 4: I adhered my honeymoon car image to the wacky stitched circle panel. Used dimensional adhesive to lift it off the circle panel. It always adds depth to your design. I love the balloons and tin cans that are part of this die. Just the way the bride and groom car gets decorated for their departure. So cute! Love this new die.
Step 5: Finished my card assembly. I used double sided tape for all the layers, multi medium matte for my Love word phrase.
 
Well, that's it for me for this post. So until next time.......God bless.

Dies I used to create card:
http://www.scrappingcottage.com/cottagecutzexpressionspluslovephrase.aspx
 

LinkWithin

Related Posts with Thumbnails