Hello Blogger friends! Thanks for taking the time to stop and visit with the Charmed Life Blog.
I have scheduled this post and as you are reading it, I am enjoying a visit with my sweet granddaughter Phoenix daisy. She brought her parents along as well (lol)!!
This card that I am showing today is one that I created for my weekly DT post on the CottageCutz blog.
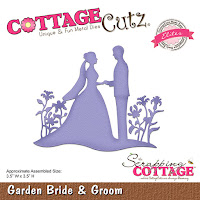
I am featuring the new Garden Bride & Groom die as well as the new nested Stitched Scallop Rectangle die. I have a wedding to attend soon and this die is perfect. I like the elegant appeal of this silhouette image. So I created a card a bit more on the clean and simple side to keep the bride & groom die cut as the central focus.
Let's get started with some details on how I created my card.
Step 1: When I make wedding cards, I usually choose the colors the bride has chosen for her wedding. In this case, it's a rich denim blue and a soft pink. I cut the scallop frame in the denim and then the bride & groom in white. I used the largest of the scalloped rectangle dies for my frame.
Step 2: I decided to stamp my sentiment on the card base before I placed any of the card elements. Used my stamp-a-ma-jig to help with the placement and to keep it straight. I stamped in the denim ink. I thought this sentiment worked so well with this bride & groom image.
Step 3: As I thought of ways to incorporate the pink into my card, I decided to use some ribbon. It dresses up a card nicely and adds interest. My card base is a little larger than what I usually do.
Card Base: 5 7/8" x 4 3/4"
Step 4: Attached the bride and groom to the scalloped frame with double sided tape. Once that was placed I die cut the corner flourish. I cut them first in white but it just didn't have enough pop. Once I tried the denim blue I liked the look. I used the corner flourish die. Attached the flourishes with mini glue dots.
Step 5: Finished off my card by adding a couple of pink hearts cut from the new Mr. & Mrs. die
Well, that's it for me for this post. So until next time.....God bless.
dies I used to create card:


No comments:
Post a Comment