Tuesday, August 29, 2017

You're Spectacular

Hello Blogger Friends! Thanks for taking the time to stop and visit with the Charmed Life Blog.
Hope all my Texas readers are safe. the floods and devastation that is going there is terrible. I have family that live in Houston and also in Galveston. They are all fine. My niece in Galveston did not evacuate because she is not in a flood area.
My sister and the rest of her family in Houston are all ok at this point. My nephew may have to evacuate his house but they are waiting to see. He has water up to his front door but it hasn't come inside as yet. I am continuing to pray.
 
Now let's move onto my card for today. This is another one that I created for the DTGD Challenges on Splitcoaststampers. Sandee was the hostess for the DTGD17stampersandeeA challenge.
 
For my card I used the geek is chic stamps and dies from MFT. The layout is one of the Blueprint 18 sketches from MFT. I cased myself on this card. Here is my original. I changed the sentiment and used black rhinestones instead of enamel dots.

On the glasses I added some glossy accents to give the appearance of a plastic frame. Sending this one off to my grandson who I think is pretty spectacular. And, that is my card for today.
 
So until next time.........God bless.
 
card details:
Stamps: geek is chic (MFT)
Paper: marina mist, black, garden green, Santorini Stripe DSP (BoBunny)
Paper Size: A2  
Ink: tuxedo black (Memento)
Accessories: geek is chic glasses, Blueprints 18 dies (MFT), rhinestones (Darice) glossy accents (Ranger)  
 
I am also entering: 
1.  Die Cuttin' Divas has a sequins, gems or pearls challenge. I used black rhinestones.
2.  The Cutie Pie Challenge has a boys will be boys challenge.
3.  heArtful Stamping challenge has anything goes + a stamp
 

Saturday, August 26, 2017

Tandem Bike on a Scenic Route

Hello Blogger Friends! Thanks for taking the time to stop and visit with the Charmed Life Blog on this last Saturday in August. I can't believe that I am even saying that.
 
Where did June, July and August go? I feel like I want to call them back and ask them to stay awhile (LOL). Unfortunately, time waits for no man.
 
I even started to put out some of my fall decorations today. I never do that this early but once I start pre-school my time seems to get limited. Last year I was decorating a couple of days before Thanksgiving and didn't really get to enjoy the fruits of my labor. So over the next week I will add more decorations and then in early October I will add to it my Thanksgiving decorations.
 
Now let's move onto my card for today. This one I made for my weekly DT post on the CottageCutz Blog.  Today I am using one of the wedding dies, Tandem Bike, and decided to create a little outdoor scene with it. I am going to send this to a friend to let her know she is being thought of.  We ride bikes together at a local trail. So this die was perfect to use. Let's get started with some details of how I created my card. 

Step 1: For my outdoor scene, I wanted a tree (grass, trees and vine die) a fence (garden accessories die) and the tandem bike. Cut these pieces first and then I chose my card colors of a medium gray and the blue -green based on the color I used on the tandem bike.

 Step 2:  I used a cloud template and sponged Tumbled Glass Distress ink for my clouds. I used a Taupe ink and sponged the ground at the bottom of my card.
Step 3:  I am ready to start assembly of the die cuts in my scene. I used multi matte medium, glue dots and dimensional adhesive to secure. The tandem bike has dimensional adhesive. I wanted it lifted slightly off the card base so it wouldn't be flush against the fence.  It gives it a bit more depth this way.
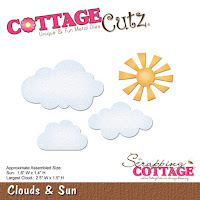
Step 4:  I wanted a sentiment on the front of my card and I found one in my stash that was ideal for this card. Especially since the bike trail we ride on is very scenic. Decided to stamp it inside a cloud with the blue-green ink that matches the bike and the layering panel. Adhere it with dimensional adhesive. The cloud is part of the clouds & sun die.

 
And that is my card for this post. I hope I have given you some inspiration on another way to use this new wedding die. So until next time........God bless..

Dies I used to create card:
http://www.scrappingcottage.com/cottagecutztandembike.aspx

http://www.scrappingcottage.com/cottagecutzgrasstreeandvines.aspx

http://www.scrappingcottage.com/cottagecutzcloudsandsun.aspx

http://www.scrappingcottage.com/cottagecutzgardenaccessories.aspx
 
 I am also entering:
1.  Challenge Up Your life has a summer challenge.
2.  Creative Fingers has an anything goes challenge.
3.  Making Memories Crafting has an anything goes challenge.

Thursday, August 24, 2017

Santa on Christmas Eve

Hello Blogger Friends! thanks for taking the time to stop and visit with the Charmed Life Blog today. Hope you are having a great day.
 
We are enjoying some beautiful late summer weather here in Pittsburgh. Our tomatoes are ripening at an incredible rate. My goal for today is to get the ones I have roasted and then pureed and put in the freezer. I don't have enough to  can these using the water bath method.
 
My recipe calls for 8 lbs. I probably have half of that. So the freezer method will work fine. Love pulling them out in the dead of winter and enjoying the summer bounty.
 
So before I head off to my kitchen, I want to share the details of my card for today. This one I created for 2 of the DTGD Challenges on Splitcoaststampers. Joyce was the hostess of DTGD17ashjoy and Jeanne was the hostess of DTGD17jeannes.
 
I started my card by sponging pool party and bermuda bay inks on white cardstock. I took a toothbrush and splattered white acrylic paint to replicate snow.

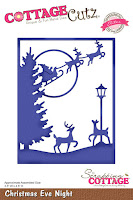
My die cut is the Christmas Eve night from CottageCutz. I inlaid silver cardstock just around the moon for some added sparkle.
 
The snowbank is a die from Lawn Fawn and covered with chunky glitter. The sentiment is from the Stampin'-Up set "wandering words". Completed my card by adding a few bermuda bay sequins to complete.
 
Well that's it for me for today. So until next time.........God bless.
 
card details:
Stamps: wandering words (Stampin'-Up)  
Paper: bermuda bay, whisper white, silver
Paper Size: 3 3/4" x 5 1/2"
Ink: pool party, bermuda bay  
Accessories: christmas eve night (CottageCutz), stitched hillside die (Lawn Fawn), bermuda bay sequins, chunky glitter (Stampin'-Up), white acryic paint (Delta)  
Techniques: mixed media
http://www.scrappingcottage.com/cottagecutzchristmasevenightelites.aspx
 I am also entering:
1.  A Snowflakes Promise has an anything goes challenge.
2.  The Holly and Ivy Christmas challenge is anything goes.
 

Tuesday, August 22, 2017

Butterfly Hugs

Hello Blogger Friends! Thanks for taking the time to stop and visit with the Charmed Life Blog.
It was another day of kitchen time for me, harvesting from our garden. Didn't get to all that I wanted to today but there is always tomorrow. I did get 2 loaves of zucchini bread baked. I also harvested our basil and made pesto.
 
I served the pesto with some sweet corn, burrrata & basil ravioli and a tossed salad. I picked up the ravioli at Trader Joe's. They are a delicious blend of ricotta and burrata cheese and my pesto complimented them well.
Tomorrow I plan on roasting tomatoes to turn into a tomato puree. I will freeze these rather than do a water bath. I like to roast the tomatoes with onion, garlic, olive oil and balsamic vinegar. They make a great base for a marinara sauce.
 
Now let's move onto my card for today. This is a card that I created for the DTGD challenges on Splitcoaststampers. They are challenges that are designed for people that join the Splitcoaststampers Fan Club. So when a challenge is posted, it's in the fan club area of the site. We aren't supposed to reveal the details of each challenge.
 
Joanne was our hostess for DTGD17sleepyinseattle. I used several different dies to create my card. The island indigo stitched doily is from CottageCutz. I layered my butterfly on the doily that is cut with Stampin'-Up Venetian Romance dsp and butterfly die.

Added the hugs word cut in daffodil delight to this panel. My background designer paper is from the Stampin'-Up gingham garden collection. That completes this card and this post. So until next time........God bless.
 
card details:  
Paper: daffodil delight, island indigo, gingham garden & venetian romance dsp (Stampin'-Up)  
Paper Size: A2  
Accessories: butterfly thinlits, daffodil delight ribbon (Stampin-Up), stitched doily (CottageCutz), hugs die (MFT)yellow pearls (Darice)  
 
I am also entering: 
1.  Paper Minutes Challenge #500 is anything goes
2.  Retarte #104 has an anything goes challenge
3.  Lil Patch of Crafty Friends #64 has an anything goes challenge

Chapel in the Woods

Hello Blogger Friends! Thanks for taking the time to stop and visit with The Charmed Life Blog.
 
Today was the well publicized total solar eclipse. We didn't have much of an event here in my community The news said we were expected to get about 80% of the sun being covered by the moon. It was partly cloudy and truth be told it gets darker here when we are having a severe thunderstorm.
 
I didn't have the special glasses you needed to look at the eclipse. There just weren't any to be found anywhere. Stores were sold out for weeks. But I did watch on television and in some areas of the U.S. it was spectacular.
 
Now onto my card for today. This one I created for my weekly DT post on the CottageCutz Blog. Today I am using one of the wedding dies, Little Chapel, but I turned it into a chapel in the woods for a Christmas card. So let's get started on how I created my card for today.

Step 1:  As I was thinking about my post for this week, I knew I wanted to do something different with the little chapel die. Then my mind went to Christmas and then to a scene in the woods. I knew I wanted snow and evergreens and also a white card with just a hint of another color.
I pulled out a falling snow embossing folder and started my background.
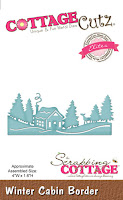
Step 2: To embellish the snow banks, I used the winter wonderland die for the sledders and the small house, for the pine trees I used the snowglobe winter accessories die and for the smaller trees on the hills I used the winter cabin border (2016 Christmas) die. I snipped these border dies to just use the parts that I wanted in my scene.
Then for my snowy hills, I decided on the jolly snowman die. That had a perfect snowdrift that would work for a hill in my scene. You could also cut your own hills. I covered my hills with glitter.
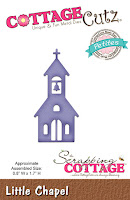
Step 3: To complete the last of the scene elements, I die cut my little chapel. This is the inspiration die for my card today I sponged some fossilized amber distress ink to give a soft glow to the inside of the church.
Step 4: For the oval frame that surrounds my scene, I used the stitched eyelet die(largest) and also the stitched oval die (2nd largest). I cut one at a time. That works better for me as far as placement. I cut the largest oval first. Then I take the next oval die and place it on that one and run it through my die cut machine. And now you've got your oval frame. It's easy enough.


Step 5: With all the elements cut it is now time to start the assembly of my scene. I secured the die cuts with glue dots, multi medium matte and dimensional adhesive. Attached my frame and then the 2 larger pine trees.
Image Panel: 4 1/8" x 5 3/8"
Card Base: 4 1/4" x 5 1/2"
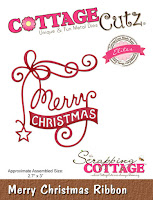
Step 6: I wanted just a touch of color on this all white scene. So I chose to use the Merry Christmas Ribbon (Christmas 2016) die and cut it in red. I snipped off the ribbon part because it was just a bit too large for the corner of my card. Secured this with the multi medium matte. I also did a die inlay technique by placing the Christmas letters back into the die.

And, that completes my card. I hope I have given you some inspiration on a way to use a die in a different way. One that was intended for a wedding has now become a part of Christmas.

So until next time........God bless.
 
Dies I used to create card:
http://www.scrappingcottage.com/cottagecutzlittlechapelpetites.aspx

http://www.scrappingcottage.com/cottagecutzwinterwonderlandborderelites.aspx

http://www.scrappingcottage.com/cottagecutzwintercabinborderelites.aspx

http://www.scrappingcottage.com/search.aspx?find=merry+christmas+ribbon

http://www.scrappingcottage.com/cottagecutznestedstitchedeyeletovalset.aspx
 
 
 I am also entering:
1.  Weekly Christmas Card Challenge is anything Christmas.
2.  A Gem of a Challenge has a snow fun challenge.
3.  Christmas Card Throwdown wants us to use a dry or wet embossed technique.
4.  Christmas Cards All Year Round wants us to use yellow on our project.
5.  Classic DT Open Challenge- must be DT member

Thursday, August 17, 2017

~ Birthday Shaker ~

Hello Blogger Friends! Thanks for taking the time to stop and visit with the Charmed Life Blog. Well after my marathon kitchen adventure on Tuesday, I am catching up on DT administrative stuff and household chores. And, after this Blog post I am heading off to my craft room for some creative time.
 
We are also taking my middle grandson out to dinner tonight. Just a little celebration before he returns to school for the fall. It seems like we just were starting summer break and now it's back to school time.
 
Our preschool term starts September 9. So I still have 20+ days to get my summer list completed.  It doesn't seem as though I got too far on my list. So I don't know what happened there. maybe not enough effort and concentration applied to get it completed (lol).
 
I can't cry over spilled milk so let's move onto a happy subject with my card for today. this one I created for the color challenge #646 on Splitcoaststampers. Karen was our hostess and she chose powder pink, sweet sugarplums and mint macaron for her color palette.
powder pink, sweet sugarplum, mint macaron
Optional was to use pearls. I used enamel dots because of the type of card I made and its for a little girl so pearls didn't work for me.
 
This was also entered in the DTGD challenges that Splitcoaststampers was running. You have to be a fan club member to participate. Here is the link to the challenge that I entered. Rebecca was the hostess for this one.

 My background sweet sugarplum designer paper is from the Stampin'-Up petal garden collection. I layered that onto sweet sugarplum cardstock and my card base is mint macaron.

The image panel is a birthday die from PTI. I layered a panel of powder pink behind to hold the sequins. Embellished this panel with enamel dots in the sweet sugarplum & mint macaron shades. The twine is sweet sugarplum.

My heart balloon is from the balloons variety die from CottageCutz. Stamped happy birthday in sweet sugarplum and my card is finished. That's it for me for this post. So until next time..........God bless.
 
card details:
Stamps: island life (MFP)
Paper: mint macaron, sweet sugarplum, very vanilla, petal garden dsp (Stampin'-Up)
Paper Size: A2  
Ink: sweet sugarplum
Accessories: Phrase Play 5 die (PTI), Balloons variety die (CottageCutz), sweet sugarplum twine, enamel dots, foam adhesive strips (Stampin'-Up), sequins (Darice), powder tool (EK Success)  
Techniques: Shaker Card  
 
I am also entering:
1.  Pause Dream Enjoy has a birthday challenge.
2.  Simon Says Stamp has a add a sentiment challenge.
3.  The Crafty Addicts has an anything goes challenge w/option of girly
 

Wednesday, August 16, 2017

Mr Smore's Christmas

Hello Blogger Friends! Thanks for taking the time to stop and visit with the Charmed Life Blog.
Well, it's harvest time here in Pittsburgh. For our vegetable gardens, I mean. Our tomatoes are finally starting to ripen and we have had an abundance of zucchini.
 
Yesterday, I spent the day in my kitchen. I made 4 loaves of zucchini bread. I shared 3 of them with my neighbors. They were happy to get a loaf of a homemade sweet bread and that made me happy. If you are interested in a good recipe, here is the one that I used.
 
Then I stuffed two of the zucchini with a sausage (sweet & hot Italian), onion and tomato mixture. These turned out so delicious. The sausage is from a local farm that doesn't use antibiotics or any of the other junk that's in the meats from some of the grocery stores. The tomatoes were also from our garden. We then had dinner with our neighbor who is battling cancer. She loved them as well. Here is a link to that recipe.
 
My next big project will be canning tomatoes. I use the water bath method. It's a lot of work but so worth it when winter comes and I can walk down the basement steps and get a jar to use in a recipe.
 
Now onto my other favorite hobby and that would be card making. This card I made for the color challenge #644 on Splitcoaststampers. I was the hostess and I chose whisper white, cherry cobbler and garden green for my color trio. Optional item was  a Christmas theme.

I used this super cute Mr. Smores die from CottageCutz to create my Christmas card. He is so cute and made for such a happy card for Christmas. I cut in the challenge colors + neutrals of choc chip and baked brown sugar.

My layout is an old MojoMonday Sketch #478. The background designer paper is from the Stampin'-Up "This Christmas Specialty" collection.

The sentiment is from a Hero Arts set "Vintage Christmas Wishes". Well that's my card for today. So until next time.......God bless.
 
card details:
Stamps: vintage Christmas wishes (Hero Arts)
Paper: cherry cobbler, garden green, whisper white, very vanilla, choc chip, baked brown sugar, this Christmas specialty dsp (Stampin'-Up)  
Paper Size: A2  
Ink: cherry cobbler, baked brown sugar
Accessories: Mr. Smores, stitched rectangle dies (CottageCutz), circle punches, baked brown sugar & black markers (Stampin'-Up), Blueprints 3 die (MFT) 
 
I am also entering: 
1.  A Snowflakes Promise has an anything goes challenge.
2.  CHNC #346 is anything goes Christmas.
3.  ABC Christmas Challenge - is People, Quick or Red. I used red and I am calling my Mr. Smores -people
 

Saturday, August 12, 2017

Miss to Mrs (Bridal Shower Card)

Hello Blogger Friends! Thanks for taking the time to stop and visit with the Charmed Life Blog on this Saturday in August.
 
Hope you have some fun activities planned for today. As for me it's all about household chores - cleaning and laundry.
I took part in the DGTD Challenges on Splitcoaststampers and was creating cards for lots of days. That was to the neglect of everything else except video calls with my precious granddaughter. So I had lots of fun now its time to bring things back to order. Then tomorrow I can do whatever I want once again.
 
So let's get started with my card for today. This one I created for my weekly DT post on the CottageCutz blog. I have mentioned before that it's wedding season here in Pittsburgh. Before the big day arrives for the bride and groom, first comes the bridal shower. They are always such exciting events to honor the bride.

Since I am invited to a couple of these showers, I thought I would start to create one of the cards to go along with my gift. So lets get started with some details on the dies I am showcasing today.

Step 1: This week I started my card by planning a layout for my card idea. I wanted a more elegant style card but nothing too fussy. This bride will have that elegance reflected in her wedding.
I then selected the dies that would fit what I had in mind. Since it's a bridal shower card, I chose the wedding gown die. And, then to make it all about love, I am using the love tags and sweet love borders dies.

The cardstock I chose is called blushing bride and I matched it up with some patterned paper of the same color. What an appropriate cardstock name for a bridal card.

Blushing Bride card base: 4 1/4" x 5 1/2"
Patterned paper layer: 4 1/8" x 5 3/8"
 
I assembled these panels and then placed aside to complete my die cutting.
Step 2: I made all my cuts on this step. The bridal gown, hanger and bow is cut in a pearlized gold cardstock. The tag and borders are cut in the blushing bride cardstock. I am always so impressed with how smooth the CottageCutz dies cut cardstock.
Step 3: Started adhering the die cut pieces to the patterned panel layer. I didn't add the tag and dress at this point because I wanted to stamp the sentiment first. I wanted to make sure I had the correct placement after the heart borders were attached.
Step 4: I stamped my sentiment in chocolate chip ink. This one works so perfectly for my bridal shower theme.
Step 5: I attached the wedding gown and hanger to the tag with dimensional adhesive. Angled it just a bit, mainly for card interest. I let the left side of the bow drape down on the tag and secured it there. I liked the more free flow look.
Step 6: To finish off my card I scattered some of the pink hearts that were part of the border die. As I looked at the border, I thought it would add a bit more elegance by adding some pearls down each side. I like the look and since the pearls are small it's not too fussy.
Well that's it for me for this post. I hope I have given you an idea for a bridal shower card. There are 20 different wedding designs to spark your creativity. Check them out here.  Until next time........God bless.
 
dies I used to create card:
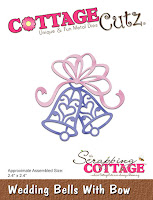
http://www.scrappingcottage.com/cottagecutzweddingbellswithbow.aspx

http://www.scrappingcottage.com/cottagecutzweddinggown.aspx

http://www.scrappingcottage.com/cottagecutzlovetagsset4x6.aspx

http://www.scrappingcottage.com/cottagecutzsweetloveborders.aspx


LinkWithin

Related Posts with Thumbnails