Hello Blogger Friends! Thanks for stopping by today to visit with The Charmed Life Blog.
Hope you have some fun plans for the weekend. It's summertime and a chance to get out and enjoy yourself. We are going to a barbecue at a friend's home later today. That will be fun with about 10 couples in attendance. I am making an appetizer to share. I have made it before and it's always a hit. Using the fresh cucumbers from my hubby's garden. Here is a link to the recipe.
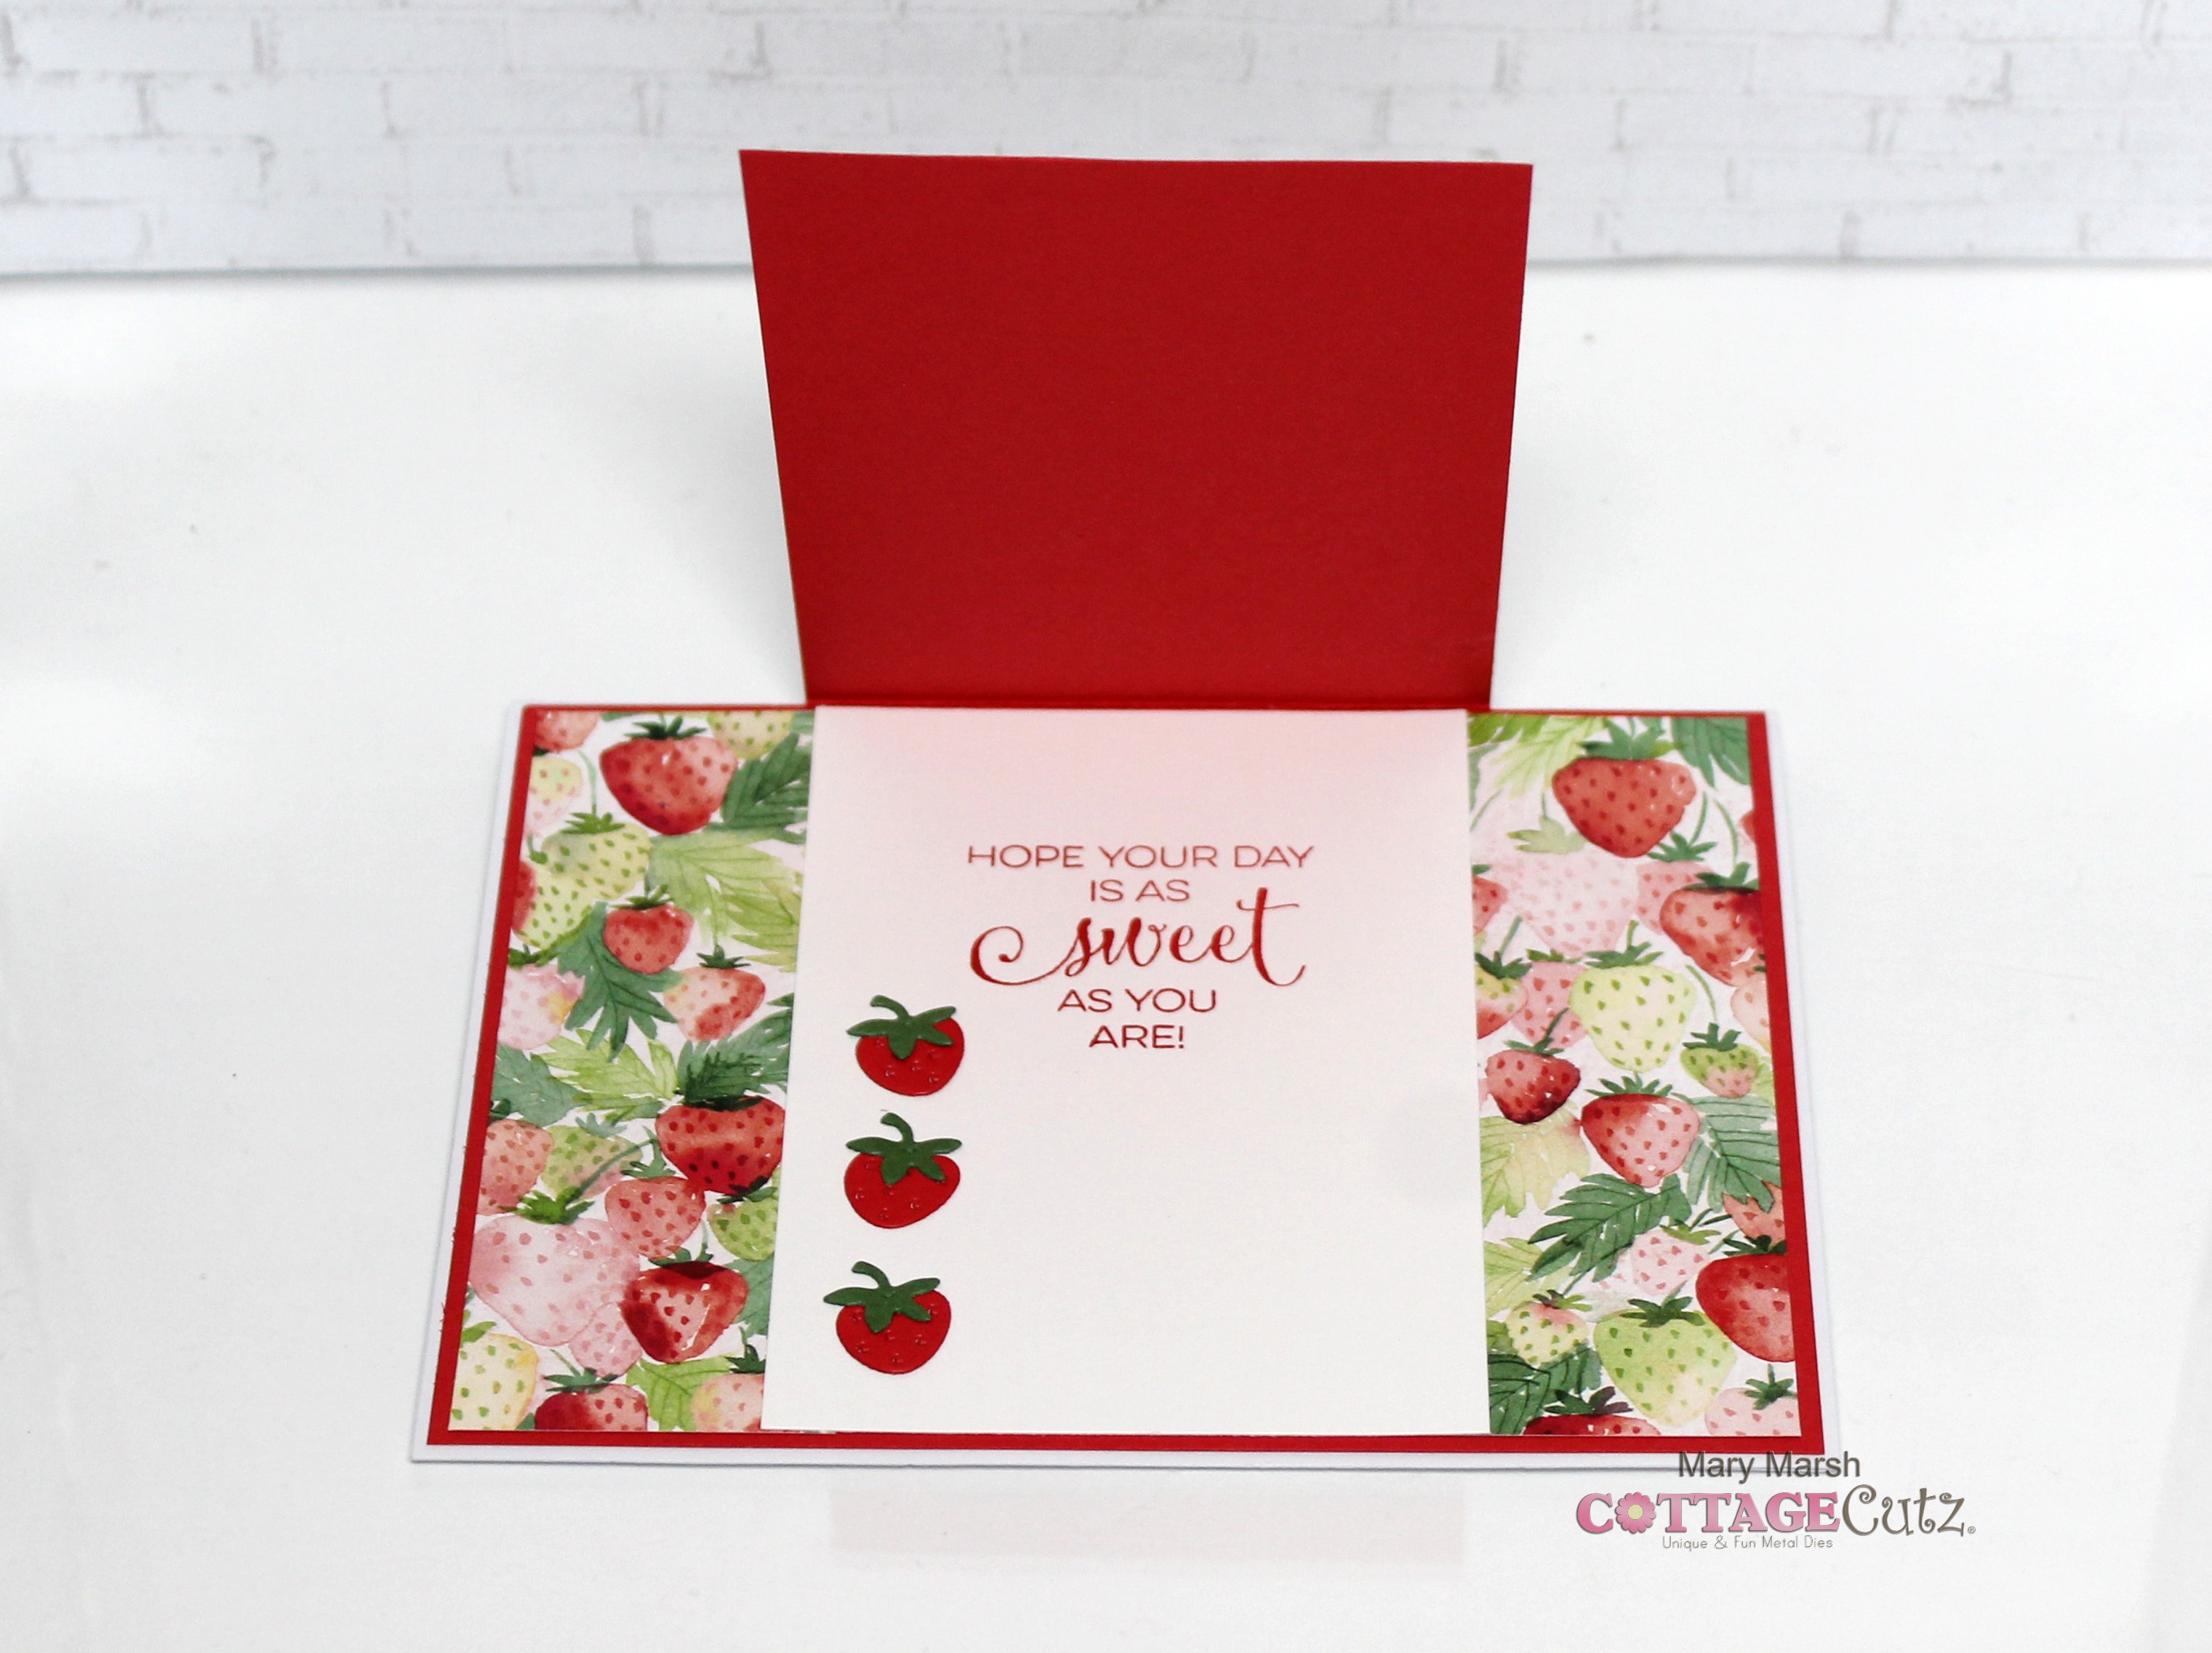
Now onto my post for today. This card I created for my weekly DT post on the CottageCutz Blog. I am featuring the new Bee Gnome and Bee Phrases die. My friend has been sick with a lingering sinus infection and her hubby with complications from Covid. I want them to know I am thinking of them as well as praying for them. So, let's get started with some details on how I created my card.
Design Steps:
After I stamped the sentiment, I used a Nuvo glitter gloss pen for some interest. It looks splotchy in some of the photos but IRL it's a nice even sparkle.
Daffodil Yellow Card Base: 4 1/4" x 5 1/2"
Black Layering Panel: 3 7/8" x 5 1/8"
Daffodil Image Panel: 3 5/8" x 4 7/8"

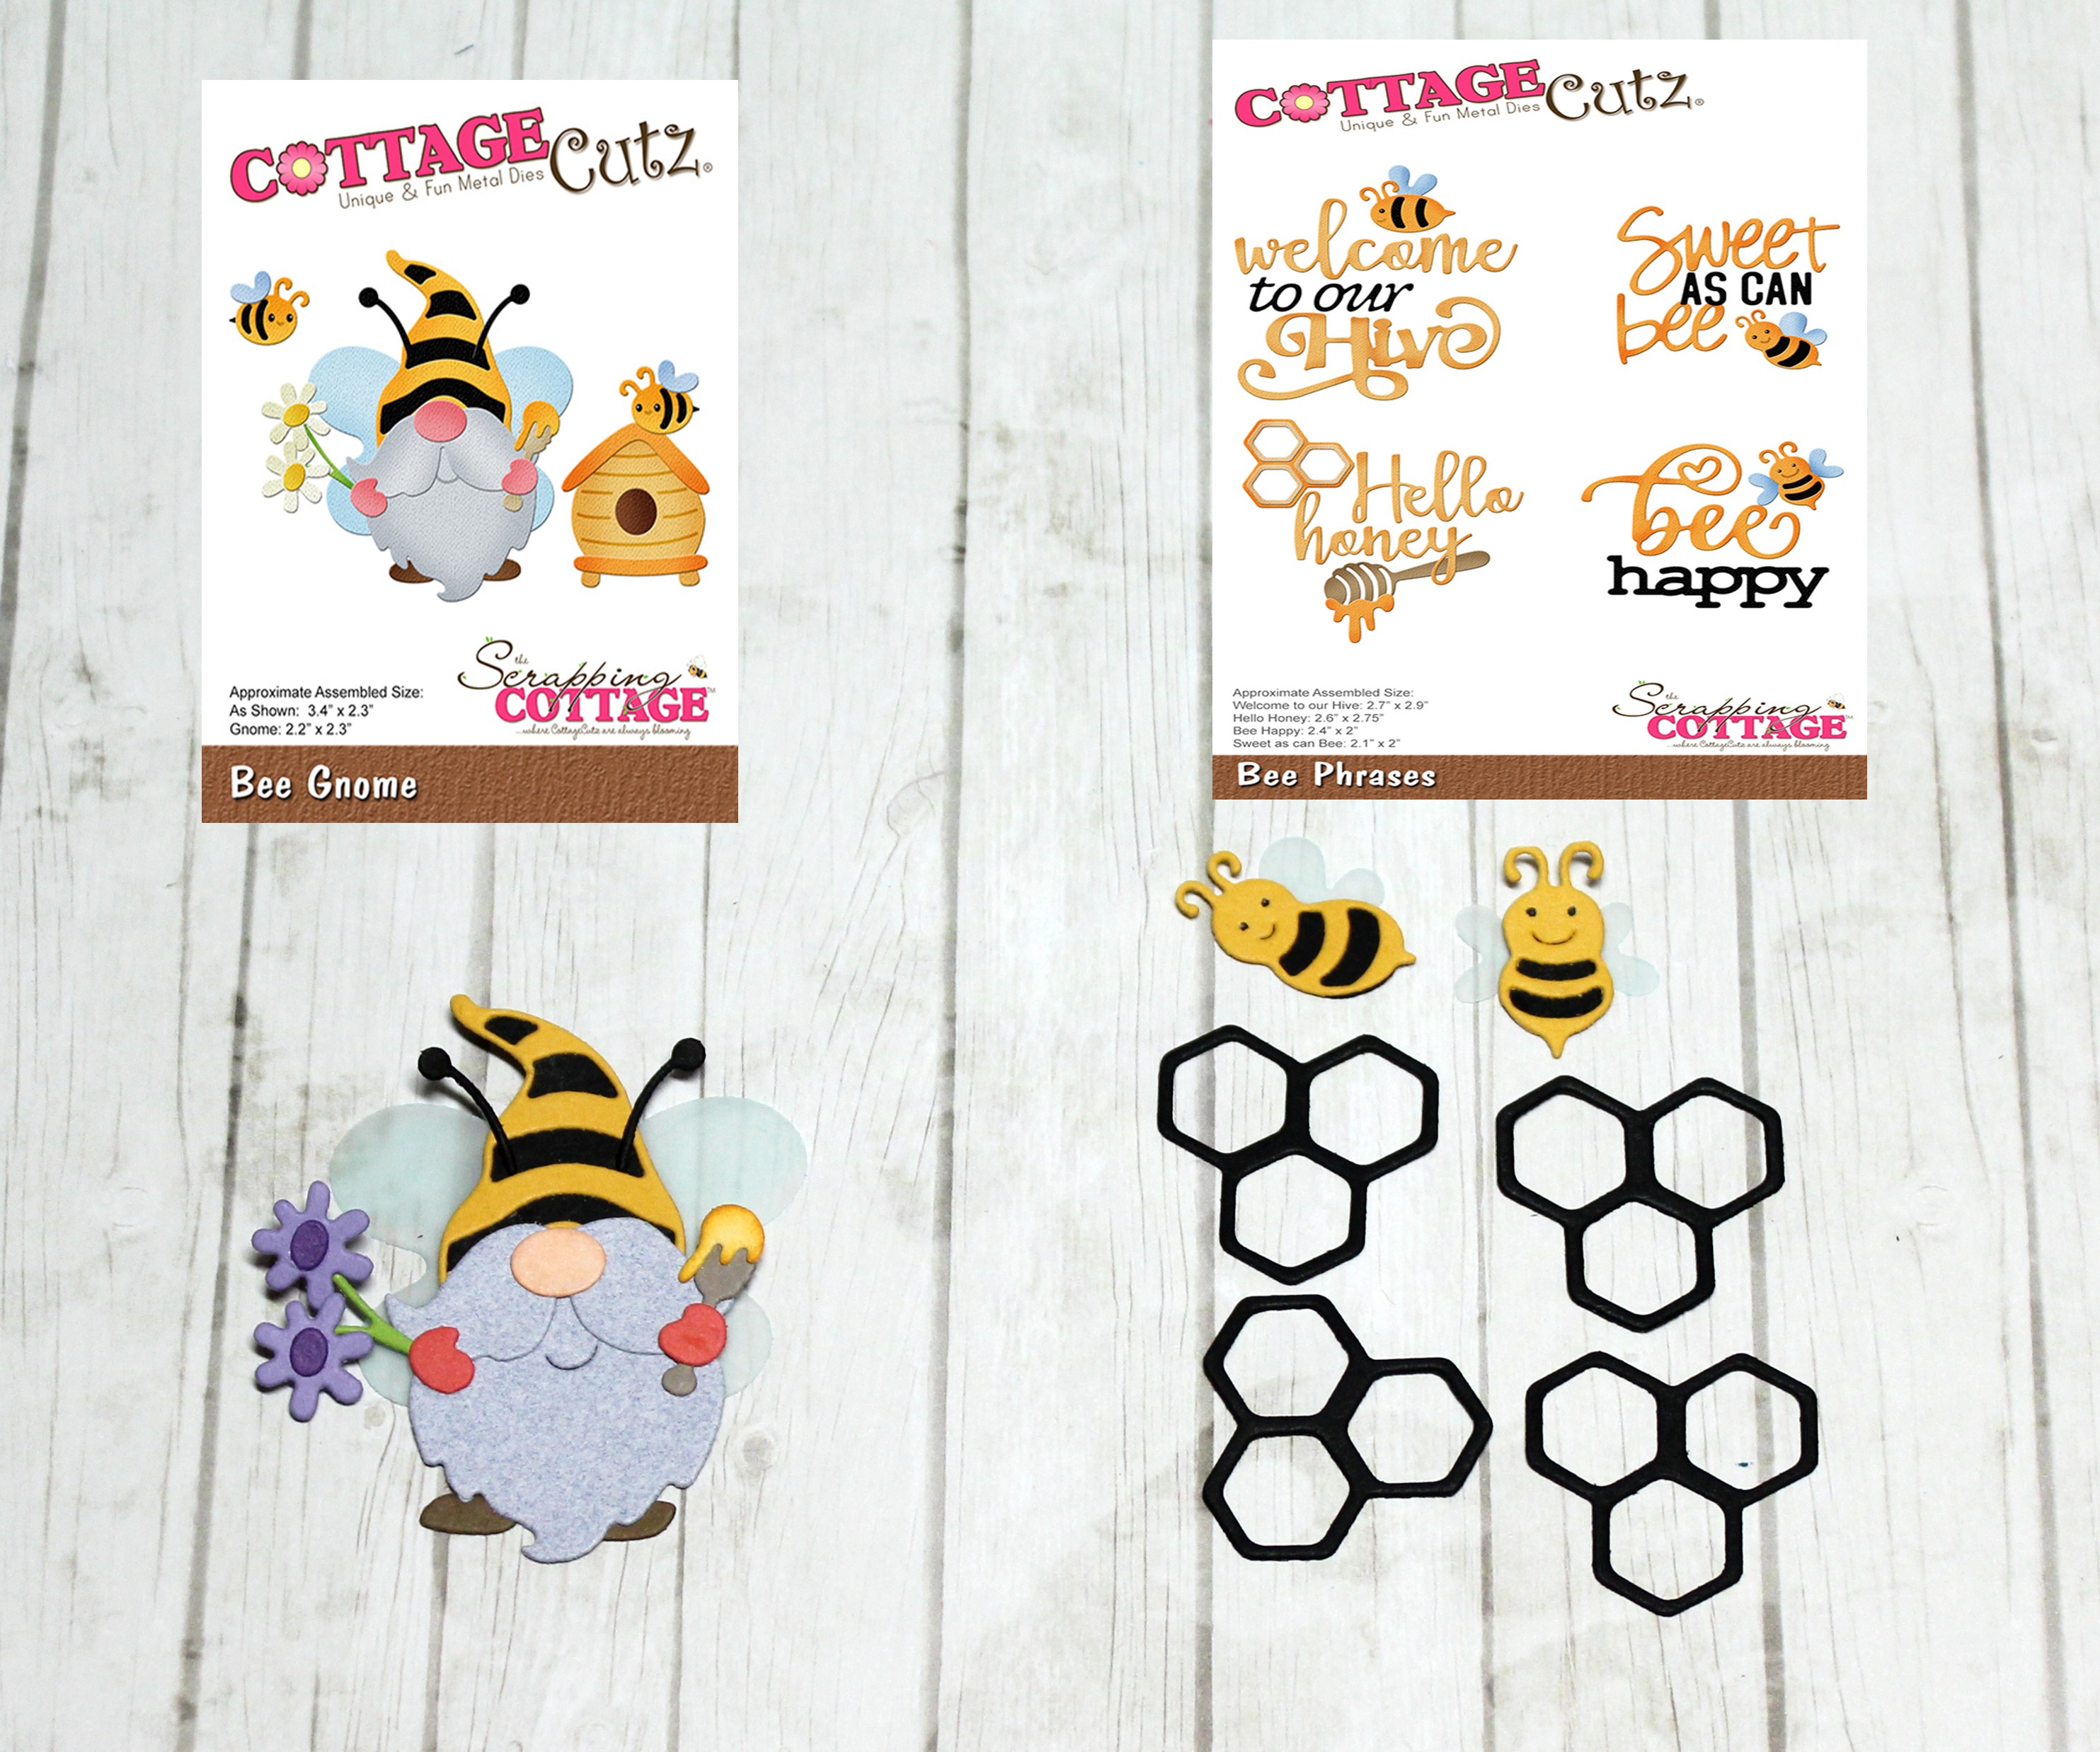


Dies I used to create card:


1. Through the Craft Room Door has an anything goes challenge.
2. Arty Divas has an anything goes challenge.
3. Love to Craft Challenge is anything goes.
4. The Creative Crafters has an anything goes.
5. Fab 'n' Funky has an anything goes.


.JPG)