Saturday, January 27, 2018

Hot Air Balloon Hello

Hello Blogger Friends! Thanks for taking the time to stop and visit with the Charmed Life Blog today.
 
Can't believe we are already at the last Saturday in January. I am using these winter months to get some organizational projects done around my home. The biggest one will be in my craft room. It's way past time to go through my stuff and get rid of things that I am not using. More on that in future posts.
 
For today I am showing a card that I created for my weekly DT post on the CottageCutz Blog.   I am using a new Spring Hot Air Balloon die and the new Stitched Sun, Clouds and Umbrella die. I thought I would create a "thinking of you" type card today. So let's get started with some details on how I created it.

Step 1: With the hot air balloon die, I knew I would be creating a sky scene with some clouds and the balloon floating. I found this designer paper in my stash from the Stampin'-Up "serene scenery" collection that worked well for this card.
I used a kraft cardstock as the layering panel for the designer paper and island indigo cardstock for the card base.
Card Base: 4 1/4" x 5 1/2"
Kraft panel: 4 1/8" x 5 3/8"
Designer Paper: 3 7/8" x 5 1/8"
Step 2: I cut the hot air balloon and the stitched clouds. When I cut my dies, I used different color cardstock as opposed to coloring each piece. I like how colorful the balloon turned out.
For the balloon:
kraft for the balloon basket
berry burst for the balloon
lemon-lime for the chevron and other shapes - I did an inlay technique here
 smoky slate for bunny
powder pink for her outfit
Step 3: Now that the dies are cut and assembled, I started the card assembly. I adhered the base and panels with double sided tape. I did that before I stamped my sentiment. It's not how I usually like to do it but my ideas were running ahead of me this week (lol)!!
Used the stamp-a-ma-jig to get the right placement for the sentiment. I stamped with black ink since it was going right on the patterned paper.
The balloon and one of the clouds was adhered with dimensional adhesive.
I felt like the card still needed something else so I scattered a few sequins. They seem to be my go to embellishment these days. I think they were a good finishing fit for my card.
Well that's it for me for this post. I hope I have given you an idea on a way to use this new die. All the new release dies are currently on sale for 25% off in the online store.
So until next time.........God bless.

Dies I used to create card:
http://www.scrappingcottage.com/cottagecutzspringhotairballoon.aspx

http://www.scrappingcottage.com/cottagecutzstitchedsuncloudsandumbrella.aspx

 
I am also entering:
1.  Crafty Friends has an anything goes challenge.
2.  My Time to Craft has a transport challenge.
3.  Crafty Catz has an anything goes with an optional of something new.


Saturday, January 20, 2018

HB From The Herd

Hello Blogger Friends! Thanks for taking the time to stop and visit with the Charmed Life Blog on this 3rd Saturday in January. Can you believe that Christmas was almost a month ago? Seems like it was just a few days ago to me.
 
Hope you are staying warm during this cold snap that is currently with us. Here in Pittsburgh we are having sunshine for the 3rd day in a row. Yay- that's big for us. January and February usually don't have a lot of sunny days.
 
I have lots of to-do's on my list for today. But before I get started, here are some details on the card I am showing today. This one I created for my weekly DT post on the CottageCutz Blog.
 
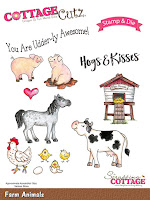
I created this birthday card from the stamp & die combo farm animals. So lets get started with the details on how I created my card.

Step 1: As I frequently do, I started my card with the layout. I saw this sketch posted on the Splitcoaststampers site and a card idea immediately came to mind. Well a rough idea had been brewing in my mind for awhile. Then this sketch just finalized everything.
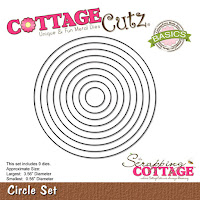
Step 2: As with any sketch you can change things up a bit. Like the shapes that are shown here. I decided to used the circles and stitched circles die for my shapes. I chose circles because of the background designer paper I am using. The paper reminded me of cow spots so I decided to go with a circle to place the cows on. The circle die only is currently on sale at 60% off the regular price. So you can pick it up for only $7.95 right now.

Card Base: 4 1/4" x 5 1/2"
Patterned Paper: 4 1/8" x 5 3/8"
White Circle: 4th largest die
Black stitched circle die: 4th largest
Step 3: I stamped the cow images, used the corresponding die and colored the images with both Copic markers and Prismacolor pencils and gamsol. Gamsol is odorless mineral spirits that is used to spread the wax in the pencil around.
Copic Markers: E000 + E02
Primsmacolor Pencils: Black PC935 + Warm Grey 70% PC1058
Step 4: I thought the cows needed a little pop on the white circles. So I cut a scallop circle for a cloud template and I stamped the hay from the "on the farm" stamp & die combo. Sponged the clouds with distress ink and colored the hay with alcohol blenders.
Step 5: I am ready for the card assembly. I attached the cows to the circle panels with Scotch mounting tape. And used the same adhesive to attach the circles to the patterned paper layer.
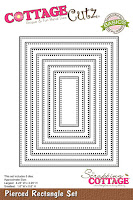
Step 6: I decided to make layer 4 of the above sketch my sentiment panel. I wanted the panel to be a pierced rectangle but the rectangle dies were just a bit too big to fit in the corner. So I adjusted the size of the 4th largest pierced rectangle.
The first photo below shows the finished panel with my stamped sentiment as well as the original size of the rectangle.
I placed the panel back in my big shot and just moved the die to where I wanted to re-cut it.
Once I re-sized the panel, it was the perfect fit for my sentiment as well as the corner of the card.
And that my friends, completes my card for this post. If you have these stamp & die combos, I hope I have given you a new idea for using them. If you don't have them they are still available in the online store. In fact, the on the farm stamp & die set is on sale for 50% off. You can get it for just $10.
 
So until next time...........God bless.
 
Dies I used to create card:
http://www.scrappingcottage.com/cottagecutzfarmanimalsstampanddie.aspx

http://www.scrappingcottage.com/cottagecutzonthefarmstampanddie.aspx

http://www.scrappingcottage.com/cottagecutzcirclesetbasics.aspx

http://www.scrappingcottage.com/cottagecutzstitchedcirclesetbasics.aspx

http://www.scrappingcottage.com/cottagecutzpiercedrectanglesetbasics.aspx
 
I am also entering:
1.  Brown Sugar has a birthday challenge.
2.  Crafting with an Attitude has an anything goes challenge.
3Cute Card Thursday has a fun card challenge.

Friday, January 19, 2018

Happy New Year

Hello Blogger Friends! Thanks for taking the time to stop and visit with the Charmed Life Blog. Wow already past the half way in January. Have you noticed the days are getting longer? It was 6:40 here last night and it was still light. Yay- always love it when I can watch the days get longer. Makes the cold and snowy winter days just a bit more bearable.
 
This is also the time of year when I make comfort foods for dinner. They always seem to taste better when it's really cold. The other night we had chili and cornbread. I only had 1# of ground beef and I didn't want to go out to the store. So I looked in my freezer and I had a 1# package of lamb gyro burgers. I buy them from a local store that deals only in organic and grass fed beef and other meats.
 
The chili was amazing. We started eating only grass fed meats about a year ago. What a difference in the taste and of course it's better for you. Tonight  I am making a stir fry with some free range chicken. Chicken is another meat that tastes so different when there is no growth hormone or antibiotics etc fed to the chickens.
 
Anyway all of that to say I am cooking more heartier foods to get us through this extreme cold spell. Now let's move onto my card for today.
 
This one I made for the color challenge #668. I was the hostess and I chose sweet sugarplum, choc chip and mint macaron for the color trio. Optional was something new - stamp, die, technique or a New Years card.
sweet sugarplum, mint macaron, choc chip
I decided to make a New Years card and I used a new to me die from Impression Obsession for the sentiment. I wanted to send it out to a neighbor that I received a late Christmas card from but here it is January 19th and I haven't mailed it yet. So it's going in my Christmas stash for next year.
 
 Layered the sentiment over a double stitched circle die from CottageCutz.

Stamped my own background in sugarplum and mint macaron inks with a fireworks stamps from Great Impressions.

Added a center panel of sweet sugarplum cardstock and mint macaron ribbon for added interest. To complete my card, I used enamel dots for the fireworks center.
 
Well that's it for me for this post. So until next time......God bless.
 
card details:
Stamps: Twirly & Fireworks (Great Impressions Stamps)  
Paper: Choc Chip, Mint Macaron, Whisper White (Stampin'-Up)
Paper Size: A2
Ink: sweet sugarplum, mint macaron (Stampin'-Up)
Accessories: it's my party enamel dots, in-color enamel shapes, mint macaron ribbon, double stitched circle die (CottageCutz), Merry Christmas/Happy New Year die (Impression Obsession)  
 
I am also entering: 
1PolkaDoodles has an anything goes challenge.
2.  Cardz 4 Galz has an anything but square challenge.
3.  Creative Knockouts has an in stitches challenge. I used a stitched circle die.
 

Wednesday, January 17, 2018

In the Meadow

Hello Blogger Friends. Thanks for taking the time to stop and visit with the Charmed Life Blog. It is really a cold day here in Pittsburgh with temps at 14°. But the sun is shining so I am not really minding how cold it is. Staying indoors is helping also (lol)!!
 
I am slowly taking down my Christmas decorations. It always takes me a long time to get everything packed up so nothing breaks or gets destroyed. I do the take down in stages. Today I will put away all my nutcrackers. I have 31 of them and they are the first to come out each year and the first to be put away. I display them going up my stairs and on the hearth and as part of my dining room table display. So when I take them away it makes me feel like I have accomplished something.
 
Now let's move onto my card for today. This one I created using the colors from the SCS CC #667.  Barbara was the hostess and she chose melon mambo, tangerine tango and Bermuda bay as her color trio. Optional was to make a snowman.
melon mambo, tangerine tango, bermuda bay
I used the CottageCutz "winter snowman die to create my sweet little snowwoman. I just love her melon mambo hat and matching scarf. I did use tangerine tango on her cute little nose.

The background was done with a snow stencil and some gloss gel for a tone-on-tone look. The trees are cut from the forest trees die also from CottageCutz.

I added a snowy hill cut with a Lawn Fawn die and added some chunky glitter. I stamped my sentiment and scattered a few sequins to complete my card.
 
Well, that's it for me for this post. So until next time........God bless.
 
Card Details:
Stamps: in the meadow (PTI)
Paper: whisper white, bermuda bay, melon mambo, tangerine tango, basic black, gingham garden dsp (Stampin'-Up)  
Paper Size: A2  
Ink: bermuda bay
Accessories: winter snowman, forest trees dies (CottageCutz), snow stencil (MFT), gloss gel (Liquitex), bermuda bay sequins, chunky glitter (Stampin'-Up)  
Techniques: Stencil 
 
I am also entering: 
1.  Christmas at Sweet Stampin' has an anything Christmas goes challenge.
2.  The Merry Christmas Challenge #3 is anything goes. Optional is stockings.
3.  Creative with Stamps has a snowflake challenge.
4.  Moo-Mania and More has a frosty winter challenge.

Saturday, January 13, 2018

Valentine Cup of Love

Hello Blogger Friends! Thanks for taking the time to stop and visit with the Charmed Life Blog today.
 
It's a cold and blustery day here in Pittsburgh. We had a winter storm overnight that dropped about 4-5" of snow. It's one of those days that's perfect for staying indoors looking at the snow from the window and doing some crafting.
 
That's my plan for the day. I am showing a card that I made for my weekly DT post on the CottageCutz blog. Today my card is featuring some older Valentine dies. I used the cups of love dies to create this card. So let's get started with the details of how I created my card.

Step 1: I started my card this week with my layout. That's always a go0d starting point for me. It gives my Mojo a jump start. Splitcoaststampers had this sketch that worked really well for the card I had in mind. I am showing a card that I created for my weekly DT post on the CottageCutz Blog.
Step 2: Once my layout was decided upon, I chose my card colors. I kept with the traditional red and white with a black accent for the card base and layers. For the cups I decided to add some pink and a Caribbean blue cardstock.
I had a pack of older Valentine themed papers and chose one of the patterns for my card. I used a hearts embossing folder on the black panel for interest.
Red Card Base: 5 1/2" x 4 1/4"
Patterned Paper Layer: 5 3/8" x 4 1/8"
Black embossed layer: 5 3/8" x 1 1/2"
Step 3: On this step I cut the cups and the various embellies to decorate them. I assembled them and then took my photo. I attached everything with Ranger multi medium matte.
Step 4: Started my card assembly. Adhered the card base panels with double sided tape.
I attached the cups to the black embossed panel with dimensional adhesive.
Then I added the steam and the ascending hearts. On the blue cup, I added the love word from the Love Bow & Arrow die. Did you catch the cute little perched birdie?
Step 5: Since I was stamping my sentiment directly on the patterned paper, I heat embossed. Used pigment ink and black embossing powder. I wanted the sentiment to stand out.
That completes my card for this post. I hope I have given you some inspiration for the Valentine cards you may be creating. All the dies I used on today's card are available in the online store.

 
Have a great week and until next time.......God bless!!
Dies I used to create card:
http://www.scrappingcottage.com/cottagecutzcupoflove.aspx

http://www.scrappingcottage.com/cottagecutzlovebowandarrow.aspx
 
 
I am also entering:
1.  CCEE Stampers has a "fits me to a tea" challenge.
2.  Creative Knockouts has an anything goes challenge.
3.  Craftaholics R Us has a pattern paper challenge.
 

Friday, January 12, 2018

Joy To The World

Hello Blogger Friends! Thanks for taking the time to stop and visit with the Charmed Life Blog.
 
It was such a spring like day here in Pittsburgh with temps in the 60° range. That won't be sticking around too long though. We are supposed to get a winter storm with 3"-6" of snow plus freezing rain this weekend. Oh well it is winter and we are less than a month into the season.
 
Since we were in Hawaii for Christmas, we didn't get to have some of our Christmas celebrations. One of those was with my in-laws. So we had them over for dinner last night.
It was a very nice evening spent with family. I kept the dinner very simple- well for me anyway. I roasted a ham, made a hash brown potato casserole, fruit salad and corn bread. Everyone enjoyed the dinner and our time together.
 
I still have all my Christmas decorations up. So my home has that Christmas feel and warmth. I wanted it that way because the in-laws don't decorate or if any of them do it's very minimal. I will probably start taking the decorations down next week. That's a slow process for me and I pack everything up very carefully. 
 
Well now let's move onto my card for today. With all the talk of Christmas, you should have known I would be showing a Christmas card. This one I created for the color challenge #663 on Splitcoaststampers. Karen was the hostess and she chose either gold & white or silver & white for her color combo. Optional was to make it sparkle.
 
I used the sunray die from MFT and cut in white glitter paper. Layered that over gold foil.

My angel image and the Joy Nativity are both dies from CottageCutz. I cut those in the same gold foil paper and scattered a few gold dots on the sun rays to complete my card.
 
Well, it's late and time to dim the lights in Charmed Life land for another day. So until next time........God bless.
 
card details:
Paper: Whisper White, Gold Foil Sheets (Stampin'-Up), White Glitter Paper (recollections)  
Paper Size: A2
Accessories: Joy Nativity, Angel Trio Dies (CottageCutz), SunRay Die (MFT) 
 
I am also entering: 
1.  The Merry Christmas Challenge has an anything goes Christmas.
2.  A Snowflakes Promise has an anything goes challenge.


Sunday, January 7, 2018

Happy New Year

Hello Blogger Friends! Thanks for taking the time to stop and visit with the Charmed Life Blog today.
 
It's been awhile since I posted a card but for good reasons. My hubby, sons and their families all went to Hawaii for Christmas. It was something out of the norm for us. My hubby wanted to take me for my birthday in September and then our kids found out and they wanted to go as well. So we planned it for Christmas.
 
We went to the island of Kauai. It was such a wonderful family time and definitely not long enough. We stayed only a week, but 10 days would have been better. Don't know if we will ever go back there again but it was a birthday present to remember.
 
I will post some pictures later because  I want to move onto my blog post for today. This one I created for my weekly DT post on the CottageCutz blog. Let's get started with some details on my card.
 
I returned home to find that I received a few Christmas cards from friends that I didn't send one to. So I decided to make a few quick New Years cards. I am using the Happy New Year Greeting die. It has such a beautiful font and it is still on sale for 25% off in the online store.

Step 1: I knew I wanted the die to be the star of this card so I chose cardstock and a subtle patterned paper. The paper reminded me of fireworks and that works perfectly for the clean and simple card I am showing today. It is from the Stampin'-Up Year of Cheer collection.
Black Cardstock Base: 4 1/4" x 5 1/2"
Pearl Metallic layer: 4 1/8" x 5 3/8"
Year of Cheer Designer Paper: 3 7/8" x 5 1/8"
Step 2: I cut my Happy New Year Greeting from black cardstock. I thought it would be striking against the patterned paper. Sometimes on certain dies I use a precision base plate with my Big Shot. It cuts the more detailed dies very easily.
The die cut removes from the die itself with very little effort on my part. I also have a metal shim but I like the precision base plate better. This plate gives you the exact sandwich you should use when cutting with your Big Shot.

I cut 2 of the greeting because I wanted it to stand out on the card.
 
Step 3: Started the card assembly. I attached the New Year Greeting with thin rolled up glue dots. It gave the greeting the dimension I was also looking for on my card.

Once I attached the panels and the die, it just didn't seem quite finished to me. Tried sequins in several different colors then finally decided on the black rhinestones. It added the extra pop that I wanted. They already had adhesive so it made them easy to scatter around the card.
Well that's it for me for this post. So until next time .......God Bless.
 
Dies I used to create card:
http://www.scrappingcottage.com/cottagecutzhappynewyeargreetingelites.aspx
 
I am also entering:
1.  Crafter's Castle has an anything goes challenge.
2.  Just Us Girls has a word week anything goes challenge.
3.  Krafty Katz has an anything goes challenge
 

LinkWithin

Related Posts with Thumbnails