Friday, February 25, 2022

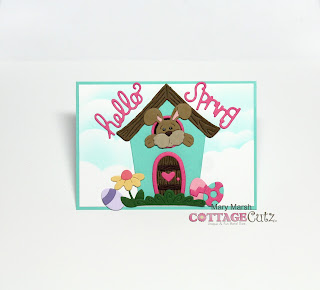
Bunny Cottage

Hello Blogger friends! Thanks for taking the time to stop and visit with The Charmed Life Blog today.

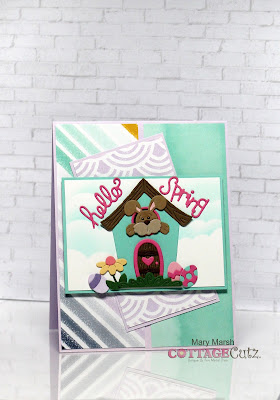
I can't believe that we are almost through February. The days are getting longer, and Spring is approaching soon. Even though we are a couple of months away from Easter, I am making my cards. I send about 10-12 cards out for Easter. So, I need to get them made now. 

My card for today is a whimsical card using the cute Hello Spring Bunny Cottage. So, let's get started on some details of how I created this card.

Design Steps:
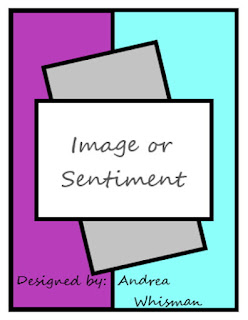
Since I knew the die, I was going to use, I looked for a layout that would allow the image to be front and center and also use some designer paper. I found this sketch online from the Tuesday Morning Sketches Blog and thought it would work well.
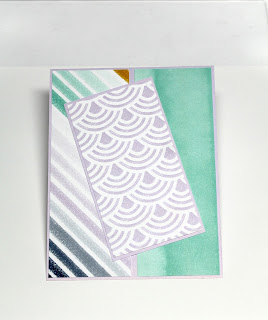
Then I looked through my paper collection for something to coordinate with the playful image. I found these papers with a stripe, a geometric pattern and one that had an ombre appeal.

Card Base:
4 1/4" x 5 1/2"
Background designer paper layers: 2" x 5 3/8"
Angled border layer: 2 3/8" x 4 1/4"
Designer paper angled layer: 2 1/4" x 4 1/8"
Next, I cut my images in shades of cardstock that matched the designer paper.
Image panel border: 3 7/8" x 2 3/4"
Image Panel: 3 3/4" x 2 5/8"
The images were attached with glue dots and Art Glitter Glue adhesive (dries clear). I stenciled some clouds on the white panel with salvaged patina distress ink. I used dimensional adhesive to lift it off the background layers slightly.
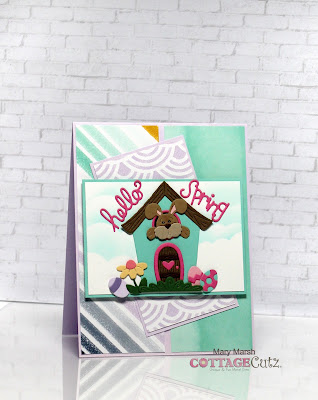
And that's my card for this post. I will stamp an Easter greeting on the card inside. This one will be for my next-door neighbor. She has 2 little ones. So, until next time.......God bless. 

die I used to create card:
I am also entering:
1.  Creative Knockouts has an anything goes challenge. 
2.  Paper Craft Crew Challenge - tic tac toe- I have patterned paper, animals, ink blended the clouds.
3Simon Says Stamp has an anything goes challenge. 


Saturday, February 19, 2022

Miss Bunny Sends Hugs

Hello Blogger Friends! Thanks for taking the time to stop and visit with The Charmed Life Blog this wintry Saturday in February. 

We are in the middle of a snow squall right now. Forecast is 1"-3" of snow. I have to keep reminding myself that it's not even the 2nd month of winter yet. We started having a couple of Spring like days this week and it made me forget winter. But today it's back to what time of year it really is. I don't have any travel plans for today, so the snow is fine with me. I am going to make some soup and enjoy the day.  

Now onto my Blog post for today. This one I created for my weekly DT post on the CottageCutz Blog. Today, I have for your viewing pleasure a whimsical card for Easter featuring the new Miss Spring Bunny die. This one will go to my precious little granddaughter. 

Design Steps:
I decided to make a fun fold card for today's post. This fold is called a center step. I bought these precut cardstock panels at my local stamp store. I felt it was a bonus when I spotted them. I used Stampin' Up "oh so ombre" designer paper in the bermuda bay and granny apple green colors for the center and side panels and layered with the coordinating cardstock. 

The center panel is 4 3/8" x 3 1/4" and the side panels are 1" x 4 3/8". I attached the panels to the card base with double sided tape.
I cut my bunny image with various colors of  Stampin' Upcardstock. I used colors that would coordinate with the designer paper panels and also project a spring vibe.

Next, I stamped my sentiment in a grape ink. It was a bit tricky because the panel was already attached, and I didn't want to remove it.

My stamp is a red rubber wood base, so I had to use my stamp-a-ma-jig for alignment. When I use this method, I only get one shot at inking because I can never line it up straight again. It didn't stamp quite as dark as I wanted but I think it's ok.
I attached my bunny image with glue dots and double-sided tape.
I decided to add a hugs phrase on the image panel. I used the Hugs w/Shadow die. Then for the side panels I added some tulips. I cut them from the Spring Kitten w/Envelope die in a light purple cardstock.
I finished off my card by scattering a few butterflies and adding a few hearts on the sentiment panel. Well, that's it for me for this post. So, until next time........God bless.
I am also entering:
1.  Crafty Catz has an anything goes w/optional to add sentiment. 
2.  Creative Creases has an anything goes with a fun fold. 
3.  Creative Fingers has an anything goes challenge. 
4.  Creative Knockouts has a 2 or more patterned papers challenge. Stampin' Up ombre designer              paper collection for my card. 
5.  Sisterhood of Crafters has a feminine + flowers challenge. 


Sunday, February 13, 2022

Be My Valentine

Hello Blogger friends! Thanks for taking the time to stop and visit with The Charmed Life Blog today.

It's the day before Valentine's Day, and I wanted to get more of my Valentine cards posted. This one I made for a friend's granddaughter who is taking ice skating lessons. When I saw this cute fox with ice skates, I knew it would be perfect for her. 

For my layout I used the sketch #890 from Splitcoaststampers. I thought the mini slimline layout would be perfect to showcase this new die. 
The background heart paper is from the Stampin'-Up "have a cuppa" collection. I placed the fox on designer paper from the "in good taste" collection. I thought it had the appearance of an ice pond.

For elements 2, 3 & 5 of the sketch, I used a combo of square and rectangle dies from CottageCutz. 

The "be my valentine" phrase is from an older CottageCutz die. It's the "Be My Valentine Puppies" die. I scattered a few hearts and that completes my card for today. So, until next time.......God bless.

card details:
 
Paper: bermuda bay, melon mambo, gorgeous grape, cinnamon cider, have a cuppa dsp, in good taste dsp (Stampin'-Up)
Paper Size: 7" x 3 1/2"
Accessories: winter fox skating, be my valentine puppies, square and rectangle dies (CottageCutz)

I am also entering:
1.  Cut It Up has a love or Valentine's challenge. 
2.  Daring Cardmakers has a "my sweet Valentine" challenge. 
3.  Creative Knockouts has a Love/Valentine's Day challenge. 
4Crafty Gals Corner has a "Add a Heart" challenge. 
5.  Little Red Wagon has a "Be my love-Valentine" challenge. 


Saturday, February 12, 2022

Ewe Are So Sweet

Hello Blogger Friends! Thanks for taking the time to stop and visit with The Charmed Life Blog today. 

It's Valentine's Day weekend. I had a Galentine's Party on Wednesday night. First time event for me and it was such a fun night. I had lots of good food and invited 3 of my girlfriends. 

We each brought a gift that started with the first letter of either our first, middle or last name. I gave a box of Merci chocolates and some mandarin oranges that had the stems and leaves on them. It made for a fancier presentation. I put them in a new faux leather bag that I had on hand and probably wouldn't use. It seemed like everyone got a gift that was so appropriate for them. I definitely plan on doing this again next year. 

Now onto my card for today. This one I created for my weekly DT post on the CottageCutz Blog. I am featuring some new Spring dies and created a slimline card for Easter. 

I used the Circle Windows Slimline die to place the sheep. I cut some blue patterned paper from my stash. I liked the soft whimsical appeal. On my white card base, I used a stencil and stenciled some clouds with broken china distress ink.

white card base: 8 1/2" x 3 1/2"
blue patterned paper: 8 1/2" x 3 1/2"
I cut the sheep, tulips and grass with cardstock. For the tulips I used 2 shades of purple cardstock. I cut more than I would need because I wasn't sure how I was going to place them.
In the center window, I stamped my sentiment using a grape ink.
Now that all my elements are prepared, I am ready to start card assembly. I attached just the top portion of the designer paper to the card base. I wanted some wiggle room to get my grass and tulips positioned on the lower portion of the card. The grass is attached with glue dots and the sheep with dimensional adhesive.
To finish off my card I added some of the tulips to the circle windows and that completes this design. I then secured the bottom of the designer paper with double sided tape and liquid glue. And that's it for me for this post. I hope you all have a great weekend and have some fun plans to celebrate Valentine's Day. So until next time.......God bless. 

I am also entering:
1.  The Paper Funday is anything goes. 
2.  Critter Crazy Challenge is anything goes with a critter. 
3.  A Perfect Time to Craft has an anything goes challenge. 
4.  Classic Design Challenge is anything goes. 
5.  Crafty Animals has an anything goes challenge. 


Saturday, January 29, 2022

Easter Cross (new die)


Hello Blogger friends! Thanks for taking the time to stop and visit with The Charmed Life Blog this last Saturday in January. 

It's a brisk day here in Pittsburgh but lots of sunshine. That always brightens the day for me.

I don't have any big plans for today. My craft room needs straightened up and I am also in the process of organizing my die collection. Once that's done I will be on the lookout for stencil organizing ideas. I currently have them on a Tim Holtz carousel storage. It just takes up too much room on my desk, so I am looking for other ideas.  

My MFT stamps & dies also need organized. I bought an Interline plastic container a few months ago to do this but nothing has happened as yet. That's on my immediate to do list. 

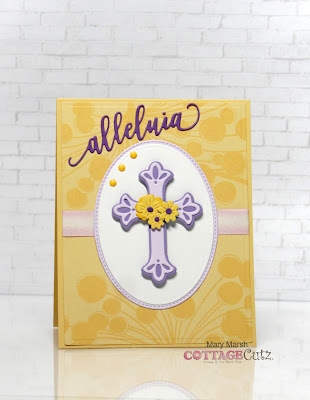
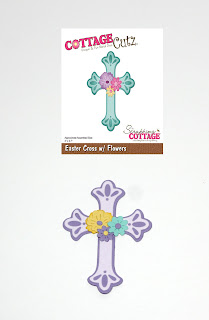
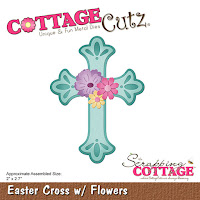
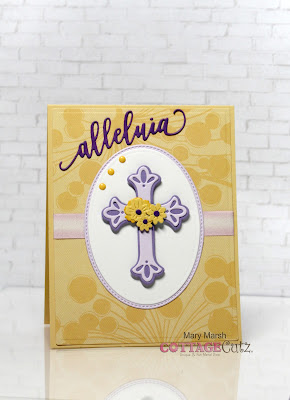
Anyway, onto my card for this post. Today, I have a religious one for you using the Easter Cross w/Flowers die. Which, I believe, is the reason we celebrate Easter. I created for my weekly DT post on the CottageCutz Blog. So, let's get started with some details of how I created my card. 

Design Steps:  
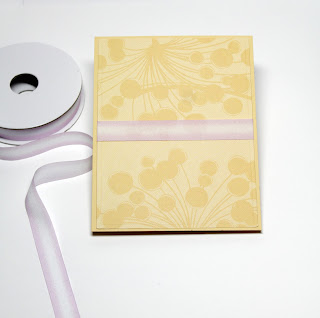
Since I knew what die I was going to use to create my card and I sort of had a layout in mind, I looked for a subtle designer paper that would work. I wanted paper that wouldn't overtake the cross. I found this one with a floral image on it.

Yellow Card Base: 4 1/2" x 5 1/2"
Designer Paper Layer: 4 1/8" x 5 3/8"
Light Purple Oval: 3rd largest from the Stitched Oval
White Oval: 3rd largest from the Oval Set.
Next, I cut the cross and flowers in colors that complemented the yellow papers.

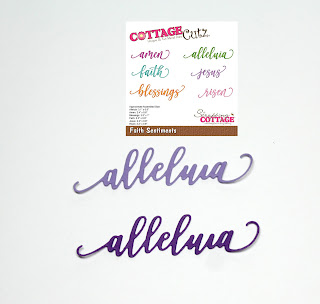
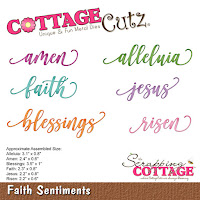
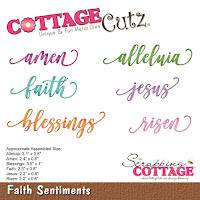
I wanted to use one of the new phrase sentiments that were just released. I chose the alleluia phrase from Faith Sentiments die. I cut it in 2 shades of purple because I wasn't sure which one to use. My cards are always a work in progress.
Now that all my elements are prepared, I am ready to start card assembly. I decided to use some ribbon on my card that matched one of the shades of purple on the cross. I attached that to the designer paper and then that layer to the card base with double sided tape.
For the cross, I used dimensional adhesive to slightly lift it off the oval background. At this point I decided to change the flower colors. I made them all yellow, and I liked that better. I added the alleluia phrase. I went with the darker purple one. I thought that made more of a statement on the card. Added a few yellow enamel dots and this card is complete. 

Well, that's it for me for this post. So, until next time.........God bless.

dies I used to create card:


I am also entering:

1.  Crafty Catz has an anything goes w/optional to add flowers. 
2Creative Knockouts has a die cuts/punches challenge. 
3.  Gem of a Challenge is anything goes. 


Friday, January 28, 2022

Warm Winter Birthday Wishes

Hello Blogger Friends! Thanks for taking the time to stop and visit with The Charmed Life Blog today. 

It's been a snowy and cold week here in Pittsburgh. One of those weeks where comfort type food is always welcome. I made 2 new soup recipes this past week. Wild Rice and Corn Chowder and both of them were delicious. They are definitely on my keeper list. 

I also roasted a big batch of veggies- cauliflower-broccoli-butternut squash. We really enjoyed those along with a salad. Roasting brings out such flavor in veggies. I don't have any plans for dinner tonight. We have lots of leftovers in the fridge and that might be what we will eat. We don't mind eating leftovers. In fact, when I cook, I always make more than what we will eat to enjoy the leftovers.  

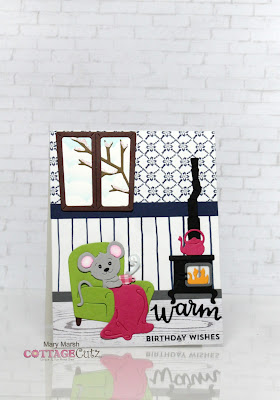
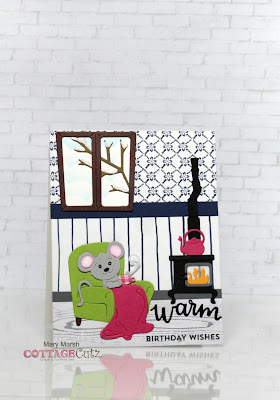
Now onto my card for today. This one I created for my niece who celebrated her birthday yesterday. I used a new die -Winter Mouse by Woodstove die to create a warm and cozy inside scene. I love the window and snow covered limbs to reflect that it's snowy and cold outside. 

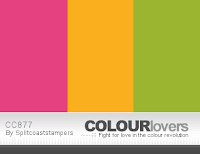
I used the colors from the Splitcoaststampers color challenge #877. Chris was the hostess, and we were to use granny apple green, mango melody and melon mambo for our color trio. And optional was to use any blue.
melon mambo, mango melody, granny apple green

The mouse, chair, blanket coffee cup & teapot are cut in the challenge colors. The wallpaper background is from Stampin'-Up "floral boutique" designer paper collection. I thought it worked perfectly for wallpaper and the striped for a clapboard effect. 

I used another CottageCutz die for the "warm" phrase. My sentiment is an MFT stamp set- bitty birthday wishes.

Well, that's my card for today. So until next time.......God bless. 

card details:
Stamps: bitty birthday wishes (MFT)
Paper: whisper white, night of navy, basic black, melon mambo, granny apple green, mango melody, basic gray, floral boutique dsp (Stampin'-Up)
Paper Size: A2
Ink: tuxedo black (Memento), tumbled glass distress, picked raspberry distress (ranger)
Accessories: winter mouse by woodstove, warm & cozy cocoa dies (CottageCutz)
I am also entering:
1.  Aud Sentiments is anything goes + a sentiment.
2.   Seize the Birthday #230 is anything goes birthday. 
3.  Crafty Gals Corner has a snow much fun challenge. I have snowy tree branches on my card. 
4.  Fab 'n' Funky wants us to use 2 or more patterned papers. 
5.  Simon Says Stamp has an anything goes challenge. 


Saturday, January 22, 2022

Easter Blessings

Hello Blogger Friends! Thanks for taking the time to stop and visit with The Charmed Life Blog this frigid Saturday in January. 

Well, at least it's frigid temps here in Pittsburgh. It was 1° overnight and our high today is 21°.  But we are only a month into winter, so this is what's to be expected. We just stayed warm and snuggly in our house last night.

We did venture out today for a run to Costco. Lots of people had the same idea because the store was very busy. We had a $27 check from them for purchases we made last year, and we wanted to use it before it expires. The store locations just aren't convenient to where we live, and we are going to drop our membership. A new BJ's store opened about 15 minutes from our home, and we stopped in there today to join that club. 

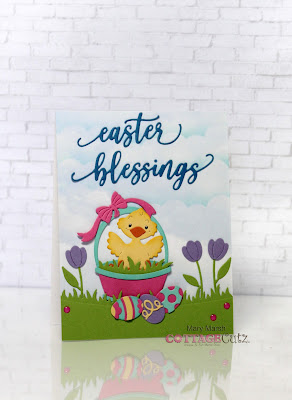
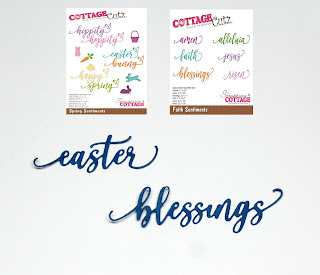
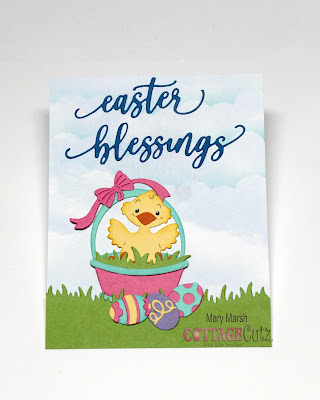
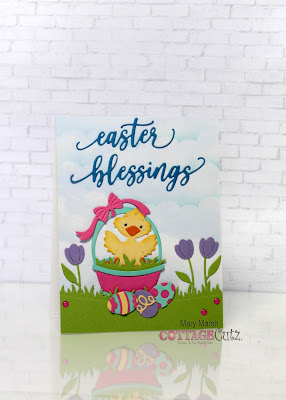
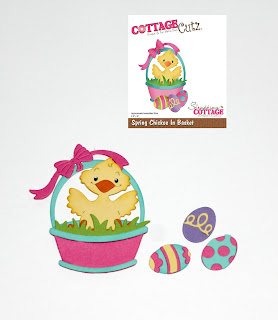
Now I am doing household chores and some light cleaning. I took a break to get my Blog post finished. The card I am featuring today is an early Easter card. I am using the new Spring Chickee in Basket die and the phrases are from the Faith Sentiments + the Spring Sentiments dies from CottageCutz.  So, let's get started with some details on how I created this card.  

Design Steps:
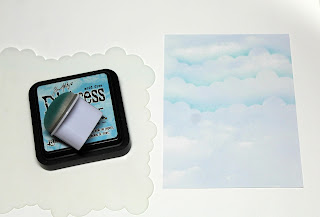
I started with my background. I found designer paper that had a sky and cloud theme. It was a bit light, so I took a cloud stencil and tumbled glass distress ink and deepened the color a bit.
Next, I cut the main image using different bright cardstocks. I liked the colors used on the packaging, and I kept with that color scheme.
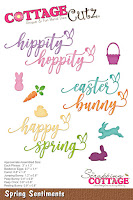
Then I used the Faith Sentiments & the Spring Sentiments dies for the phrases on my card. I cut them in a royal blue cardstock to allow them to stand out on the background.
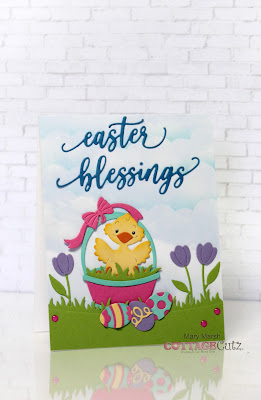
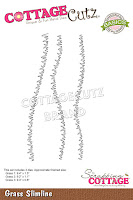
Now that my card elements are prepared, I am ready to start card assembly. I did cut a grass base using the Grass Slimline die and attached with double sided tape. The basket image is attached with the same adhesive. My Easter Blessings phrase is attached with Art Glitter glue. I like it because it dries clear.
To finish off my card, I attached the image panel to a white card base measuring 4 1/4" x 5 1/2". I also added some spring tulips cut from the Spring Kitten w/Envelope die and scattered a few pink enamel dots.


Well, that's it for me for this post. So until next time -stay warm and God bless.

dies I used to create card:


I am also entering:
1.  Creative Fingers has an anything goes challenge. 
2.  Arty Divas has an anything goes. 
3.  Polkadoodles has an anything goes challenge. 
4Critter Crazy has an anything goes with a critter. 
5.  Crafty Animals has an anything goes. 


LinkWithin

Related Posts with Thumbnails