
Hello Blogger friends! Thanks for taking the time to stop and visit with The Charmed Life Blog this last Saturday in September.
The weather has taken a jump to the cooler side these past couple of days. We even needed a blanket to cover at night. But during the day I have been able to shut my air off and open the windows. I love the breeze blowing through my home. It just seems to freshen everything up.
I finished my Fall decorating the other day. Still processing the garden harvest and today there are more tomatoes that I will roast and freeze. We have a bunch of banana peppers still on the vine. They are producing at an incredible rate this year. I may just take some of these to church tomorrow and give them away. We have eaten so many and I have so many in the freezer for winter enjoyment.
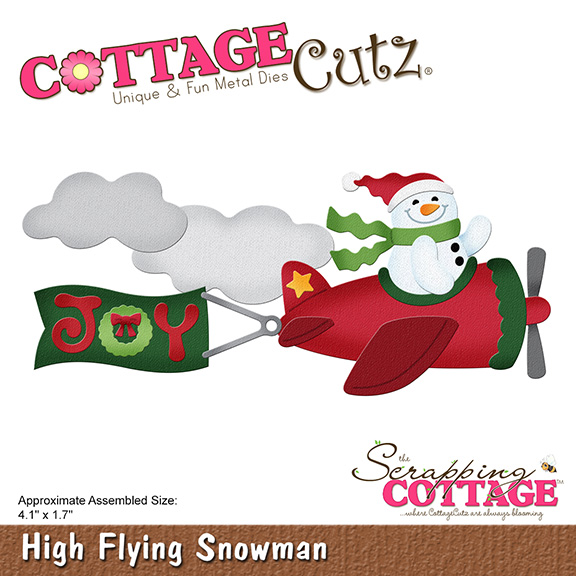
Anyway, let's move to my card for today. This one I created for my weekly DT post on the CottageCutz Blog. There was a new release of Christmas dies and I am the High Flying Snowman for my card today.
Design Steps:
I started my card this week by selecting my designer paper. I wanted something with a snowflake theme background. I found this one from the Stampin'-Up joyous noel specialty collection. I also had the matching cardstock base. Tranquil Tide card base - 5 1/2" x 4 1/2"
Designer Paper - 5 3/8" x 4 1/4"

Then I cut the flying snowman images in colors that coordinated with the designer paper. The plane trim and banner are tranquil tide the color in the designer paper and card base. The plane itself is red because that makes it so Christmas. You can also follow the colored image on the packaging which is always a good guide.

I wanted both clouds and a snow bank on my card for interest and also because the designer paper pattern was a bit busy. I used the Hills Slimline & Clouds Slimline dies. I cut them the full 9 1/2" and that way I could decide what part of the pattern I would use.

Next, I stamped my sentiment on the snowbank in the same ink (tranquil tide) as my card base. The sentiment is part of the Hero Arts Christmas Messages set. I trimmed the snowbank down to 5 3/8" and also added some white glitter to the top of the bank.

Now that all my card elements are prepared I am ready to start card assembly. I attached the clouds and snowbank with dimensional adhesive. Also, sponged broken china distress ink on the clouds for added interest. I used dimensional adhesive to attach the flying snowman image for more depth. Looks like I forgot to give this little guy his carrot nose.

To finish off my card I attached the image panel to the card base. Scattered some white snowflakes on the clouds and some red glitter dots on the snowbank. I think this new die is just too cute and will make a great card for someone on my list that is out of state.
Well that's it for me for this post. So until next time.......God bless.

dies I used to create card:


I am also entering:
1. CHNC Christmas challenge is to use the word JOY.
2. Sweet Stampin' has a Christmas in September challenge.
3. Gem of a Challenge has an anything goes.
4. Crafty Calendar Challenge is anything goes.
5. Crafter's Castle has an anything goes.


This is so cute thanks for joining us at Crafty Calendar hugs Sue x
ReplyDeleteThank you for sharing your lovely crafting for CHNC challenge 561 - I hope to see you again soon. x
ReplyDeleteSuper cute card! I love the way you did the layers. Thank you so much for entering our challenge at Crafter's Castle this month....good luck :)
ReplyDeleteHugs... Janie
DT
Crafter's Castle
crafterscastle.blogspot.com
Love this, what a fun and happy Christmas card!
ReplyDeleteThank you for joining us at Polkadoodles Gem of a Challenge! Jane S (DT) Paper, Pencils & Pretty Things xxx