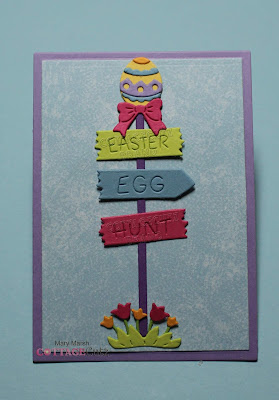
Hello Blogger Friends! Thanks for taking the time to stop and visit with The Charmed Life Blog today.
We had our first real taste of winter yesterday with a 5" snowfall. It closed the schools. It was one of those bone chilling days. The kind that makes you want to sit in front of the fireplace and cuddle under a blanket.
My hubby was under the weather so he did that most of the day. Me on the other hand had a card to get ready for my weekly DT post on the CottageCutz blog. But, I did manage to make it to the gym for a workout. My community had all the main roads cleared by 12:00.
I created my first Easter card for the upcoming season. So let's get started on some card details.
Design Steps:
As I have said so many times before, having a layout in mind at the start of my card is always a big boost for me. It jump starts my creative thought process. I love working with the sketches that are out there in the online world. That way I just choose the colors and designer paper and I am good to go.
I liked this week's sketch #787 from Splitcoaststampers.
I wanted some bright Spring colors for my card. I chose this gorgeous grape designer paper from my Stampin'-Up collection and then paired it with other Stampin'-Up colors that I thought would work well.
Gorgeous Grape Card Base: 4 1/4" x 5 1/2"
Grape Gingham Designer Paper: 4 1/8" x 5 3/8"
Heather Heather Layer #2: 3 1/8" x 4 3/8"
Balmy Blue Layer #4: 2 7/8" x 4 1/8"
Gorgeous Grape Card Base: 4 1/4" x 5 1/2"
Grape Gingham Designer Paper: 4 1/8" x 5 3/8"
Heather Heather Layer #2: 3 1/8" x 4 3/8"
Balmy Blue Layer #4: 2 7/8" x 4 1/8"
Next I cut the images from the die. I used various colored cardstock. You could always cut everything in white cardstock and use the coloring medium of your choice. I just prefer using the colored cardstock.
Now that my panels and images are cut. I am ready to start my card assembly. I started with the image panel. The images are attached with mini glue dots and Ranger multi medium matte. I like this adhesive because it dries clear.
My original idea was to use ribbon for panel 3 of the sketch. Instead I decided to cut a 1" strip of the lemon-lime cardstock and emboss it. This way the image panel would lay flat on top of it. My cards are always a work in progress.
I attached the image panel to the designer panel layer using double sided tape. For the bunny, I used dimensional adhesive. At this point I wasn't going to use the other bunny. But that changed as well.
To finish off my card I attached the grape card base. I used lemon-lime sequins for element 5 of the sketch. I thought it just kept with the whimsical card appeal. In the upper right corner I used some grape enamel dots. This is the point that I decided to go with the gray bunny. I attached him with dimensional adhesive and my card is complete.
Well that's it for me for today. So until next time........God bless
die I used to create card:
I am also entering:
1. 2 Crafty Critter Crazies has an anything goes with a critter.
2. Crafty Animals has an anything goes.
3. Crafty Catz has an anything goes with optional of embossing.
4. Cute Card Thursday has an anything goes.


Utterly adorable!
ReplyDeleteMany thanks for joining us at Cute Card Thursday this week!
Debxx
Great use of the sketch and that die cut is so adorable. Cutest little Easter scene ever.
ReplyDeleteThank you for sharing your talent with us at CRAFTY CATZ this week. Best of luck with your entry. Nick