Monday, September 10, 2018

Birthday Tulips

Hello Blogger Friends! Thanks for taking the time to stop and visit with The Charmed Life Blog today.
 
Hope your weekend was a great one and you were able to do some crafting or something else fun. I put out all my fall decorations. Sunflowers, pumpkins, fall leaves and scarecrows are adorning the living room, dining room and kitchen. I have several Thanksgiving themed decorations that I will put out at the end of October.
 
We are having a massive rainfall here in Pittsburgh and yesterday the police sent a community wide call and asked people to stay off the roads. There were power failures and flooding so it was a day for indoor activities.
 
Our home is fine but there is a creek that runs behind our house that is really swollen with all the rain. We have had 10" of rain so far. It is supposed to stop around 4:00 this afternoon.  It has been raining since late Friday night. I am more than ready for it to be finished.
 
Now let's move onto my card for today. This one I created for the color challenge #692 on Splitcoaststampers. Karen was our hostess and she chose very vanilla, mint macaron and blushing bride for her color trio. Optional was to create a vintage card.
very vanilla, mint macaron, blushing bride
Vintage is so out of my comfort zone but Karen put forth the challenge, so I had to give it a go. I had this card pinned on my Pinterest board so I used the layout but changed the colors. I needed all the help I could get (LOL).

I used the tranquil tulips set from Stampin'-Up on my card. Love how this set stamps to give the image a somewhat watercolor look.

My background mint macaron designer paper is from the color me irresistible collection. The angled layer has designer paper from the Stampin'-Up "bundle of love" collection. Distressed all the edges for the vintage look with the Tim Holtz distressing tool.

The doily is cut in blushing bride cardstock with a die from Cheery Lynn Designs.

Added some linen thread, ribbon and pearls to finish off this card. Birthday sentiment stamped in soft suede ink.
 
Well, that's it for me for this post. Have lots to do around my home today. Tomorrow it's my first day of Pre-School. Summer vacation is officially over!!!
 
card details:
Stamps: tranquil tulips (Stampin'-Up), silly shells (MFP)  
Paper: mint macaron, blushing bride, very vanilla, bundle of love, color me irresistible dsp 
Paper Size: A2  
Ink: soft suede
Accessories: blushing bride ribbon, linen thread, pearls (Stampin'-Up), Polynesian sails die (Cheery Lynn Designs)  
 
I am also entering:
1.  Crafting from the Heart has an anything goes challenge.
2.  heARTful Stamping has an anything goes + use a stamp challenge.
3.  Stamping Sensations has a "B" challenge. I have blushing bride cardstock and ink, bow and birthday sentiment.
4.  A Vintage Journey has a back to nature challenge.
 

Saturday, September 8, 2018

Joyful Christmas Mice

Hello Blogger friends! Thanks for taking the time to stop and visit with The Charmed Life Blog.
 
It's a rainy Saturday here in Pittsburgh. In fact we are supposed to get 5" of rain this weekend. The remnants of the tropical depression Gordon. It will be a good time to stay inside and spend some time in my craft room. That way I can watch the rain from the window.
 
First up today will be to process our garden tomatoes. My hubby picked about 20 lbs. of tomatoes and I will be canning them. But first, I do have a card for today. This one I created for my weekly DT post on the CottageCutz Blog. So let's get started with some details.
Step 1: I started off by die cutting all the pieces that are part of this die set. I use various colors of cardstock. But you could cut them in white cardstock and then color the pieces with pencils, alcohol markers or water color. 
I simply followed the package coloring and used similar cardstocks. Our artist does such a great job of coloring the images, and I always love the colors she uses.
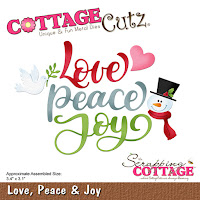
My Joy word is cut from the new die Love, Peace & Joy. I cut it 2x in red cardstock to give it a bit more dimension on my card.
Wanted just a bit of snow in my outdoor scene so I cut a snowbank in white glitter cardstock from the Snowman Lane die. Click here to see another card I made using this die.

The last item for my card prep is the background clouds. I wanted this to be a daytime scene. Although with the lamp pole you could certainly make a nighttime sky and have a great night scene. 
I used a mini-cloud stencil and distress ink to sponge in some clouds. I stenciled right on the white card base, making this more of a one layer card.

Step 2: Now that all the pieces of the card are ready, it's time for card assembly. I started with the snowbank.
Then I attached the Christmas Mice die cut pieces with a combination of glue dots and double sided adhesive.
The Joy sentiment was attached with Ranger multi matte medium to complete my card. I don't often do one layer cards because I like the addition of designer paper and layers but I like how this one turned out. I plan on making several more of these for Christmas. 
Card Base: 4 1/4" x 5 1/2"
Well, that's my card for today. So until next time...…..God bless.
 
dies I used to create card:
http://www.scrappingcottage.com/cottagecutzchristmasmice.aspx

http://www.scrappingcottage.com/cottagecutzlovepeaceandjoy.aspx
 
http://www.scrappingcottage.com/cottagecutzsnowmanlane.aspx

I am also entering:
1.  Brown Sugar has an all creatures great and small challenge.
2.  Winter Wonderland has a Christmas Joy challenge.
3.  2 Crafty Critter Crazies has an anything goes with a critter.
4.  Crafty Animals has an anything goes challenge.
5.  The Merry Christmas Challenge has an anything goes.
6.  Crafty Hazelnut's Christmas Challenge is anything goes + include word Joy.


Monday, September 3, 2018

coneflowers

Hello Blogger Friends! Thanks for taking the time to stop and visit with The Charmed Life Blog.
It's the last holiday weekend of summer. We are celebrating the labor day holiday. The weather here is hot and sunny. The perfect weather for our tomatoes to ripen.
 
Yesterday I processed my first batch. It's a lot of work but I love taking the summer bounty to enjoy in the cold winter months. I have five 16 oz jars now. I will probably end up with about 12-15 jars once its all said and done.
 
I also roast some with onion, garlic, olive oil, a bit of balsamic glaze and some salt and pepper. It makes such a incredible sauce. You don't need to add anything else. I use a variety of tomatoes in both the canning and roasting methods. Right now all I have is roma tomatoes but our heirlooms are getting ripe. Those two together make a powerhouse sauce.
 
I wanted to get this post done so I can enjoy a bit of the outdoors today. This card I made as a sample for for the color challenge #699 on Splitcoaststampers.
rich razzleberry, berry burst, old olive
Karen was the hostess and she chose rich razzleberry, berry burst and old olive as her color trio. Optional this week is a touch of gold.

I decided to do some coloring on my card because these colors seemed like they belonged on a flower. I am using the Oriole w/Blossoms stamp and die from CottageCutz.

Colored the coneflowers with Rich Razzleberry Stampin' Blends, and Prismacolor pencils & gamsol. The coneflowers stems are old olive stampin' blends. I took some liberty with the oriole since they are usually black and orange. And, orange is not one of our colors this week. I colored with prismacolor pencils and gave him more of a sparrow look.

My background designer paper is from the Stampin'-Up "gold fancy foil" vellum collection. I layered with gold foil. Added some ribbon and a bow to complete the card.
No sentiment yet because I am not sure if this will be a birthday card or something else. The heart on the bow is a metallic enamel shape.
 
Well that's it for me for today. So until next time...…...God bless.
 
card details:
Stamps: Oriole w/Blossoms (CottageCutz)  
Paper: berry burst, gold foil, gold fancy foil vellum (Stampin'-Up), solar white cardstock (Neenah Crest)  
Paper Size: A2  
Ink: tuxedo black (Memento)  
Accessories: Rich Razzleberry, Old Olive Stampin' Blends, berry burst ribbon, metallic enamel shapes (Stampn'-Up), Prismacolor Pencils: PC947 Dark Umber PC1082 Chocolate, PC995 Mulberry, PC1062 Cool Gray, Stitched Eyelet Oval die (CottageCutz)  
 
I am also entering: 
1.  Crafting From the Heart has an anything goes challenge.
2.  A Bit More Time to Craft has an anything goes challenge.
3.  Classic Design Team Challenge is anything goes.

Saturday, September 1, 2018

Christmas Fawns Walking in Winter Wonderland

Hello Blogger Friends! Thanks for taking the time to stop and visit with The Charmed Life Blog.

It's a holiday weekend and summer's last hurrah. Seems like I was just welcoming summer for the Memorial Day weekend. Don't know where the last 3 months actually went (lol)!

I was up at pre-school this entire week with the other teachers preparing the classrooms and decorating the hall and entryway for the start of school next week. Everything looks so nice to welcome the kiddos. I am looking forward to the new class we will have this year. Some of the kids are younger siblings of others we taught previously.
 
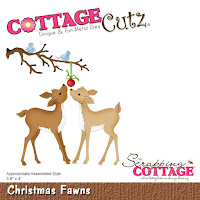
Now onto my card for today. This one I created for my weekly DT post on the CottageCutz Blog. I used the new Christmas Fawns die to create my card. So, let's get started with some details on how I created my card.
 
Step 1:  I started my card with the colors this week. I used the colors from the Splitcoaststampers color challenge #702 or my card. The colors are cherry cobbler, early espresso and so saffron. I was able to incorporate them nicely into my card.
so saffron, cherry cobbler, early espresso
Step 2: Once the card colors were chosen, I started the stenciling for my background. I used a snowfall stencil and some shimmery white embossing paste. There is lots of sparkle on the snowflakes. I set that aside to dry and started the die cutting.
 
I cut the fawns in a baked brown sugar cardstock (medium brown) and did a bit of sponging for some contrast.  The tree branch is cut in the early espresso shade, the ornament in so saffron and the birds in cherry cobbler.
What I have learned doing color challenges is that you don't have to emphasize all colors equally.  And, neutral colors like white, brown gray etc. help to balance the other colors.
Step 3: Next I cut a snowbank for my fawns to stand on. I used glitter glue and chunky glitter to give a bit of sparkle to the top of the bank.
I stamped my sentiment in early espresso ink. I love this rich brown shade of ink and it's also another way to incorporate the colors from the challenge.
Attached the snowbank to the stenciled base with dimensional adhesive.
Once that was in place I began attaching the images. I used a combination of dimensional adhesive and glue dots. I decided I didn't want a yellow bird so I changed it out to both in the cherry cobbler color. Used some light yellow metallic glue dots for a little added bling. Again, another way to get the challenge colors onto my card.
To complete my card, I attached the image panel to the cherry cobbler card base. And, that's it for me for this post. So until next time...….God bless.
 
 die I used to create card:
http://www.scrappingcottage.com/cottagecutzchristmasfawns.aspx
 
I am also entering:
1.  Kitty Bee Designs has an anything goes w/optional twist of animals.
2.  Winter Wonderland has a Christmas Joy challenge.
3.  Simon Says Wednesday has an anything goes challenge.  
4.  The Holly and Ivy Christmas challenge is anything goes.


Saturday, August 25, 2018

Gingerbread Home for the Holidays

 Hello Blogger Friends! Thanks for taking the time to stop and visit with the Charmed Life Blog today.
The last weekend of August is here. Can you believe it? This month just flew by for me.  
Our tomatoes are all starting to ripen now. So canning time is also here for me. My hubby always plants a variety so it results in a great tasting sauce. That is possibly a chore for me tomorrow.
Today we have a really early wedding to attend. So let's move on with my post for today. This is a card that I created for my weekly DT post on the CottageCutz blog.
 
I am using the Gingerbread House Mini's die. As soon as I saw these cute little houses, I thought of snowbanks and pine trees and the gingerbread houses nestled in among them. And on this card I brought my idea to life. So let's get started with some details on how I created the card.

Step 1: Started my card by cutting the gingerbread houses. I used a soft brown cardstock for the base and then white cardstock for all the trim. The houses are just a bit over 2" when assembled. So this size is perfect for layering on a snowbank.
Step 2: I wanted a snowy background so I used the Stampin'-Up snowfall embossing folder for texture and ran it through my Big Shot machine. 
I cut 3 snowbanks from white cardstock and added chunky glitter to the hill tops.  
 I stamped my sentiment with the help of my MISTI.
 Step 3: Started card assembly. I attached the snowbanks to the embossed background with dimensional adhesive. After I secured the snowbanks, I realized that I covered most of my embossing. I didn't want only 2 hills so I decided to leave it as is.
I added the houses and pine trees to the little snowy scene. The pine trees are older CottageCutz dies. I have a picture and link below of what I used.
 I scattered a few red, green and gold sequins around the sentiment just for some added interest and color.
Attached the image panel to a red card base.
Red Card base: 4 1/4" x 5 1/2"
Image Panel: 4 1/8" x 5 3/8" 
And, that's it for me for this post. So until next time...…..God bless.
 
dies I used to create card:
 
 
I am also entering: 
1.  Christmas at Sweet Stampin' has an anything goes Christmas.
2.  Watercooler Wednesday is all about holidays.
3.  Holly and Ivy Christmas Challenge is anything goes.


Wednesday, August 22, 2018

October Birthday

Hello Blogger Friends! Thanks for taking the time to stop and visit with The Charmed Life Blog today.
 
I am back from my week in San Francisco. I was there taking care of my sweet granddaughter, Phoenix Daisy, while her Mom & Dad went away for a little alone time.
 
The two of us had a wonderful time together. She has 6 "babies" and we had lots of adventures with them. Each one has a name and she has given them a personality. I love the innocence. She will grow up too fast so I am treasuring these precious times.
 
I really missed my hubby this time around.  He stayed home because of work. My cell phone doesn't work in my son's home and this time it didn't work outside either. I guess Verizon is not the big carrier in San Francisco and maybe less cell towers? Not sure of the reason but I wasn't able to talk to my hubby only send text messages. They say love makes the heart grow fonder. I was so happy to see him today.
 
Now onto my card for today. This one I made for one of the Dare To Get Dirty Challenges on Splitcoaststampers. Stacy was the hostess and I was one of her sample makers. If you are a fan club member on SCS, you can get all the details of her challenge here.  
 
For my card, I used elements from the Stampin'-Up September 2017 "layered leaves" paper pumpkin kit. For my pumpkins, I used the CottageCutz "give thanks" die. The background designer paper is from the Stampin'-Up "painted harvest" collection.

This is going to my friend who has an October birthday so I used the CottageCutz "calendar months" die. The October phrase is cut in Cajun craze cardstock. Scattered a few sequins to complete this card.
 
Well, that's it for me for this post. So until next time...…...God bless.
 
card details:
Stamps: abundant blessings (Verve)  
Paper: peach parfait, cajun craze, painted harvest dsp (Stampn'-Up)  
Paper Size: A2  
Ink: cajun craze, pumpkin pie
Accessories: layered leaves paper pumpkin kit, linen thread (Stampin'-Up), calendar months, give thanks dies (CottageCutz), orange sequins (darice), flag dies (MFT)  
 
I am also entering: 
1.  A Bit More Time to Craft has an anything goes.
2.  A Perfect Time to Craft has an anything goes challenge.
3.  Crafting By Designs has an anything goes challenge.
4.  Lemon Shortbread has an anything goes challenge.
5.  Retro Rubber Challenge has a tic tac toe. I chose die cut- green-leaves-. Verve stamp is about 5 years old.

LinkWithin

Related Posts with Thumbnails