Hello Blogger friends! Thanks for taking the time to stop and visit with The Charmed Life Blog.
It's a rainy Saturday here in Pittsburgh. In fact we are supposed to get 5" of rain this weekend. The remnants of the tropical depression Gordon. It will be a good time to stay inside and spend some time in my craft room. That way I can watch the rain from the window.
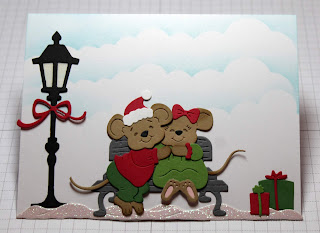
First up today will be to process our garden tomatoes. My hubby picked about 20 lbs. of tomatoes and I will be canning them. But first, I do have a card for today. This one I created for my weekly DT post on the CottageCutz Blog. So let's get started with some details.
Step 1: I started off by die cutting all the pieces that are part of this die set. I use various colors of cardstock. But you could cut them in white cardstock and then color the pieces with pencils, alcohol markers or water color.
I simply followed the package coloring and used similar cardstocks. Our artist does such a great job of coloring the images, and I always love the colors she uses.
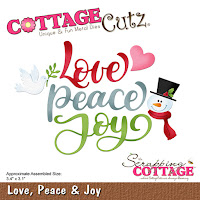
My Joy word is cut from the new die Love, Peace & Joy. I cut it 2x in red cardstock to give it a bit more dimension on my card.
Wanted just a bit of snow in my outdoor scene so I cut a snowbank in white glitter cardstock from the Snowman Lane die. Click here to see another card I made using this die.
The last item for my card prep is the background clouds. I wanted this to be a daytime scene. Although with the lamp pole you could certainly make a nighttime sky and have a great night scene.
I used a mini-cloud stencil and distress ink to sponge in some clouds. I stenciled right on the white card base, making this more of a one layer card.
Step 2: Now that all the pieces of the card are ready, it's time for card assembly. I started with the snowbank.
Then I attached the Christmas Mice die cut pieces with a combination of glue dots and double sided adhesive.
The Joy sentiment was attached with Ranger multi matte medium to complete my card. I don't often do one layer cards because I like the addition of designer paper and layers but I like how this one turned out. I plan on making several more of these for Christmas.
Card Base: 4 1/4" x 5 1/2"
Well, that's my card for today. So until next time...…..God bless.
dies I used to create card:
I am also entering:
1. Brown Sugar has an all creatures great and small challenge.
2. Winter Wonderland has a Christmas Joy challenge.
3. 2 Crafty Critter Crazies has an anything goes with a critter.
4. Crafty Animals has an anything goes challenge.
5. The Merry Christmas Challenge has an anything goes.
6. Crafty Hazelnut's Christmas Challenge is anything goes + include word Joy.


What a darling image, I really love this one will have to go and check this die set out.
ReplyDeleteAwwww, what a cute Christmas card! Love it! :)
ReplyDeleteBeautiful make. Love this project. Thank you for joining us at Crafty Animals. Hugs Traci DT xx
ReplyDeleteAbsolutely adorable. Thank you for joining at CHNC in the Anything Christmas with an optional theme of Include the word Joy.
ReplyDeleteTotally adorable card. What a great die cut! Thanks for joining my Christmas Joy challenge over at Winter Wonderland.
ReplyDeleteLove n hugs
Marie
Such a cute design and I loved seeing your step by step too.
ReplyDeleteThanks for joining us at 2 Crafty Critter Crazies.
Helen x
Wonderful :)Thanks for playing with us at Brown Sugar Challenge:)Ines DT
ReplyDelete