Saturday, December 17, 2016

Christmas Gift Bags

 
Hello Blogger friends! Thanks for taking the time to stop and visit with the Charmed Life Blog.
 
Hope your Christmas preparations are moving along. I just wrapped all the gifts that I have so far. I am waiting for more to be delivered. I am not going to get any candy making done this year. My son and his family come on Wednesday so I don't see any time to make my candy before then. I am disappointed because I use this for gifts but it's not to be this year.
 
My kitchen was the big factor this week. Our contractor was here all week and I basically had no kitchen. But the good news is that the backsplash and floor are done. So after Christmas we will paint and have a new chandelier installed in the eating area of our kitchen and then we are done. I don't know why but I hadn't picked the new light fixture so he couldn't install it.
 
I am just so happy to have my house back in order. We have had our kitchen table and chairs in our dining room for months. But today it gets put back in its rightful place and I can get my tree up in the dining room.
 
Now let's move on to my project for today. I made a couple of gift bags using the We R memory Keepers gift bag punch board. I have had this for a few months but just used it for these projects. It's such a fun tool to work with and it worked perfectly for the 2 small bags I needed for gifts.
 
The dies for my project are the Merry Christmas Notecard and the Elegant Angel Ornament.

Let's get started with some details on what I did to alter the bag I just made. If you don't have the Punch Board, here is a link to tutorials to make one using a scoreboard and another link to make one just by folding the cardstock.

My Bag: started with white cardstock measuring 6" x 11" and then followed the instructions on the punch board for a medium bag. The bag size ended up at 4 11/16" high and 3 1/8" wide. I also punched the holes at the top in order to run my ribbon through for bag closure.
There are a number of ways to add your ribbon. You could just punch holes on both sides and make ribbon handles. Or use cardstock and a brad and make a single handle running from side to side.

For decorating the bag I kept it simple. The Merry Christmas Notecard die is so pretty and decorative that I didn't need anything else.  Here is a close-up so you can see the detail on this die.


I used red cardstock for a layering panel and it measures 4 1/16" x 3". I finished off this bag with my 1/8" red striped ribbon.

My 2nd Bag: I started with white cardstock measuring 6" x 10" and then followed the instructions on the punch board for a small bag. The bag size ended up at 4 11/16" high and 2 5/8" wide. I also punched the holes at the top in order to run my ribbon through for bag closure.

For decorating this bag I used the elegant angel ornament die, merry Christmas ribbon (for the stars) and the expressions joy dies.

 
I used blue patterned paper for the layering panel and it measures 4" x 2 1/2". I finished off this bag with my 3/8" navy ribbon. The angel was adhered with dimensional foam tape and the joy word and stars with Ranger multi-matte medium.
Well, that's it for me for today. I hope I have inspired you to look at your dies for other uses besides card making. And if you have this tool to make some of your own gift bags. So until next time........God bless.
 
Dies I used for my gift bags:
 
http://www.scrappingcottage.com/cottagecutzelegantangelornamentelites.aspx
http://www.scrappingcottage.com/search.aspx?find=merry+christmas+ribbon

http://www.scrappingcottage.com/cottagecutzmerrychristmasnotecardelites.aspx


Saturday, December 10, 2016

~Christmas Wreath~

Hello Blogger Friends! Thanks for taking the time to stop and visit with the Charmed Life Blog.
Can you believe that it is only 2 weeks until Christmas? Even as I sit and type this it seems unreal. And, I am certainly not ready for Christmas. I still have a few cards to mail out and with this one I am showing today I am officially finished.
 
Once I get on a roll with my Christmas cards, I don't want to stop. I told my husband yesterday that I needed an intervention. He just laughed at me. I need to remember this for next year so I can start in September or October. Although I think I say this every year.
After I type this post I will spend all of today and tomorrow decorating. I can't put up the tree in my dining room because the contractor will be working in our kitchen this coming week.
 
So let's move on with some details on how I made this CAS wreath card.
Kraft Card Base: 4" x 5"
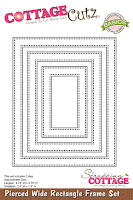
Kraft Pierced Wide Rectangle: 3 3/4" x 4 3/4"
Vanilla Sentiment Layer: 3 7/8" x 4 7/8"

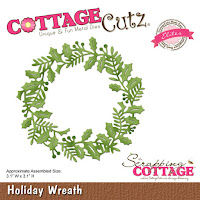
I wanted to make a card with a wreath and the Holiday Wreath was just perfect for what I had in mind for my card. I cut it out 2x in a ivy green textured cardstock. This cardstock is a lighter weight and I thought it needed a little more dimension. I layered the 2 wreaths together with Ranger multi-matte medium.
 
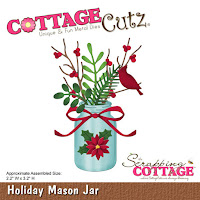
Next I cut my frame from Kraft cardstock with the pierced wide rectangle set.  I decided not to use the smaller cardinals on the above picture but I did use the bow from the Holiday Mason Jar die set for my wreath. I went for the bigger cardinal from the Cardinals & Birdhouse die set. I stamped a seasons greetings sentiment in red ink and that took care of all the pieces I needed for my card.
 
 
Now that everything is cut I started the assembly of my card. I was going for the tone-on-tone look so I used dimensional foam tape on my frame to lift it off the card base. It gives it a little more depth since the card base is also Kraft. I attached the vanilla layer to the back of the frame with double sided tape.
 
On my wreath I used some red half pearls for berries. I used foam tape just at the top of the wreath to attach it. I didn't want it to be flush against the vanilla layer. The cardinal was placed in the center to complete this card. This close up shows the detail on the wreath as well as the cardinal. If you click any of the photos it will give a bigger image.
 
Well that's it for me for today. Time to get busy with my decorating. I love Christmas and seeing my house all festive. So until next time.........God bless.
 
 
http://www.scrappingcottage.com/cottagecutzcardinalsandbirdhouse.aspx

http://www.scrappingcottage.com/cottagecutzholidaymasonjar.aspx

http://www.scrappingcottage.com/cottagecutzpiercedwiderectangleframesetbasics.aspx

 
http://www.scrappingcottage.com/cottagecutzholidaywreathelites.aspx
I am also entering:
1.  A Gem of a Challenge has anything goes- Christmas.
2.  Crafty Calendar Challenge has a Christmas Time challenge.
3.  Crafty Friends has a Merry Christmas challenge.
4.  Alphabet Challenge has a "U" for use something red
5.  Jingle Belles has a Merry Christmas challenge.

Thursday, December 8, 2016

SnowGlobe Santa

Hello Blogger Friends! Thanks for taking the time to stop and visit with the Charmed Life Blog.
I mentioned a few months ago that we were doing an update in our kitchen. No new cabinets but a new countertop, backsplash, floor and appliances. Well it's still not finished. Although our contractor is coming on Monday for the floor and backsplash.
 
We had a setback because of the lighting in our kitchen. We have a wood ceiling in the kitchen that my husband did not want to take down. It made the kitchen dark and I didn't know what to do.
 
So after a few consultations with the contractor we decided to paint he ceiling white. It made such a big difference. Interesting side note, once we decided to paint the ceiling there was a big article on the Houzz site about painting wood ceilings.
 
The contractor that was interviewed for the article was all for painting the wood ceilings to bring in more light as well as update the room. So I was happy with the decision that we made. I am so ready to have this project finished. My house has been in a state of disruption since April. But soon it will be completed.
 
Now let's move on to my card for today. This one I made for the color challenge #611. Karen was our hostess and she chose very vanilla, wild wasabi and real red. Optional this week is make it sparkle.
real red, wild wasabi, very vanilla
 I decided to make a snow globe card with a Santa insert for one of the kids on my Christmas card list. The snow globe is a CottageCutz die.

Everything I did on my card this week is self-explanatory. I did sponge wild wasabi ink on the same color cardstock to get a deeper shade of green.
To cover the dessert option, I used gold and silver glimmer paper. Gold is the layering piece on the snow globe plate and silver for Santa's belt buckle.

The North Pole sentiment is a stamp from Stampin'-Up. I separated it from the original set so not sure what the set name is. The Merry Christmas sentiment is from the MFT set "stitched stockings".

My background designer paper is from the Stampin'-Up "all is calm" collection. I layered it on smoky slate cardstock. Well, that completes my card for today. So until next time..........God bless.
 
card details:
Stamps: LJD stitched stockings (MFT), unknown stamp (Stampin'-Up)
Paper: real red, smoky slate, whisper white, very vanilla, wild wasabi, all is calm dsp (Stampin'-Up), silver and gold glimmer paper (Recollections)  
Paper Size: A2
Ink: wild wasabi, tuxedo black (Memento)
Accessories: snow globe, snow globe and winter accessories (CottageCutz)

I am also entering:
1.  Creative Knockouts has a snow much fun challenge. I used a snow globe.
2.  DL.Art challenge has a any winter holiday.
3.  Moving Along with the Times has a Christmas scenes challenge.
4Little Red Wagon has a Santa's coming to town challenge.

Tuesday, December 6, 2016

Ornament Card

Hello blogger friends! Thanks for taking the time to stop and visit with the Charmed Life Blog.
 
Christmas is in full swing both here in my home and also at our Preschool. I am doing Christmas projects with the kids every Tuesday and Thursday until Christmas. They made a gingerbread man, Christmas tree and today we did Christmas stockings to hang on the tree we have at school. 
 
All the projects were fun foam images that I found at Dollar Tree. Then I gave them self stick foam shapes to glue on the images. We do the projects as a group and there are 11 in our class.
 
So I have learned that you give them a couple of foam shapes at a time to take off the backing and glue down. Removing the backing is good for their fine motor skills. They do very well with these projects. For the stockings I attached ribbon because that would be too much for them. It was a fun day for them and for us as teachers.
 
Now onto my card for today. This one I made for the color challenge #610 at Splitcoaststampers. Vicki was our hostess and she chose cherry cobbler, gold and white for her color trio. Optional this week is an ornament.
cherry cobbler, gold, whisper white
For my card, I used the CottageCutz “fancy nativity ornament” die. I cut it with a gold glitter paper. Used the same paper for my stars.

I decided to emboss the background panel with the Cuttlebug “scrollwork” die. Layered that over more of the gold glitter paper and onto my cherry cobbler base.

The sentiment is from the Stampin’-Up “star of light” set. I used versamark ink and also cherry cobbler and then clear embossed it. I wanted it to stand out a bit. And that is my card for today. This was a quick card to make and will be sent out in the next day or two. I only made one of these but if I need a few more cards. I can easily reproduce it.
 
Well that's it for me time to get busy with my Christmas projects. So until next time.......God bless.
http://www.scrappingcottage.com/cottagecutzfancynativityornamentelites.aspx
 
I am also entering:
1.  Fairy Tale Challenge has a Christmas ornaments challenge.
2.  Holly Jolly Christmas has an anything Christmas challenge.
3.  Sunny Day Crafting has an anything goes.
4.  Unicorn Challenge is to add some glitter. I used glitter paper.
 

Saturday, December 3, 2016

Stair Step Camping Scene Card

Hello Blogger Friends! Thanks for taking the time to stop and visit with the Charmed Life Blog.
Are you in total Christmas mode yet? I am just about done with my cards and hope to finish the last of them today. This year as I made them I stamped the inside sentiment as well. So they will be ready for addressing and mailing.
 
But, today I took a little break from Christmas cards to show you a card I created with a new Camping set bundle from CottageCutz. I made this one for my weekly DT post and it is also a stair step card. 
 
The Camping Bundle is packed full of dies for the outdoor enthusiast and can help you create some really cute scenic cards. There are 12 new dies included in this set. And, it looks like it is on sale. If you buy the entire set you can save 55%. Each individual die is currently 30% off the list price.
 
I am using several dies from this new release. So let's get started with some details on my stair step camping card. I used an outer stair step to create my camping scene. I bought the stair step card at a local retailer. But, here is a tutorial from Splitcoaststampers  that shows you step by step how to make your own. This card will fold flat for mailing and measure 4 1/4" x 5 1/2". It's a standard A2.

I started the creation of my scene on the 3rd step and there I placed the snowcapped mountains and forest trees. I sponged the white background with a soft blue ink. I used 2 sets of mountains to fill the width of the step. The forest trees are cut in a dark green cardstock. They are a border stamp so it was perfect to use here.


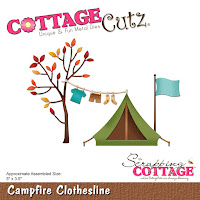
My next step was to add the images for the outer part of the card. I sponged the outer part of the stair in the same soft blue ink and then down at the bottom I used an olive ink and a chocolate ink. I used the Campfire Clothesline, Woodland Friends and Camping Phrases dies on this part of the card.


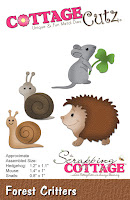
In the center part of the step, I used the Campsite die for the directional arrows and the Forest Critters die for the little hedgehog.

Well that's my card for today. Time to get busy with my day. I hope my card provided some inspiration for you today. So until next time........God bless.

http://www.scrappingcottage.com/cottagecutzwoodlandfriends.aspx

http://www.scrappingcottage.com/cottagecutzforestcritters.aspx

http://www.scrappingcottage.com/cottagecutzforestcritters.aspx

http://www.scrappingcottage.com/cottagecutzcampingphrases.aspx

http://www.scrappingcottage.com/cottagecutzcampsite.aspx

http://www.scrappingcottage.com/cottagecutzsnowcappedmountains.aspx
I am also entering:
1.  Alphabet Challenge is "T" for trees
2Brown Sugar Challenge is anything goes.
3.  Polka Doodles Craft Challenge is anything goes.  
 

Monday, November 28, 2016

~Star of Wonder~

Hello Blogger Friends! Thanks for taking the time to stop and visit once again with the Charmed Life Blog. It's Cyber Monday and the sales are raging everywhere online. I bought a few things and saved big on what I did buy.
 
This year I am determined to wrap the gifts a little each day. I don't want it to be like every other year where I am scurrying at the last minute to get everything done. I have a lot of my cards made and this year I ordered 2 of the Paper Pumpkin kits from Stampin'-Up so I will get 16 cards made quickly by using those kits. Hopefully they will be done in the next couple of days and then I can start addressing them for mailing.
 
This is one of the cards I made for Christmas. I used the colors from Color Challenge #608. Maura was the hostess and she chose elegant eggplant, pacific point and soft sky for her color trio. Optional was to use silver.
 
 For my card I used the new Stampin’-Up Christmas set “star of light”. It also has the matching dies. I really like this card and hope to get a few more made using this set.

I stamped the background star cluster in pacific point ink. I also stamped the sentiment from this same set with the pacific point ink.

I die cut the largest star in the set in elegant eggplant and added a silver topper. Cut some smaller stars in pacific point and then scattered some soft sky sequins to complete this card. 
 
Well that's it for me for this post. So until next time......God bless.
 
card details:
Stamps: star of light (Stampin’-Up)
Paper: elegant eggplant, pacific point, whisper white, silver
Paper Size: 4 3/8" x 5 5/8" 
Ink: pacific point  
Accessories: starlight framelits, sequins
 
I am also entering:
1.  613 Avenue Create has an anything goes challenge.
2.  Weekly Christmas Card Challenge has an anything goes.
3.  Fashionable Stamping has a 'tis the season' challenge - autumn or winter.
 

LinkWithin

Related Posts with Thumbnails