Hello Blogger friends! Thanks for taking the time to stop and visit with the Charmed Life Blog.
Hope your Christmas preparations are moving along. I just wrapped all the gifts that I have so far. I am waiting for more to be delivered. I am not going to get any candy making done this year. My son and his family come on Wednesday so I don't see any time to make my candy before then. I am disappointed because I use this for gifts but it's not to be this year.
My kitchen was the big factor this week. Our contractor was here all week and I basically had no kitchen. But the good news is that the backsplash and floor are done. So after Christmas we will paint and have a new chandelier installed in the eating area of our kitchen and then we are done. I don't know why but I hadn't picked the new light fixture so he couldn't install it.
I am just so happy to have my house back in order. We have had our kitchen table and chairs in our dining room for months. But today it gets put back in its rightful place and I can get my tree up in the dining room.
Now let's move on to my project for today. I made a couple of gift bags using the We R memory Keepers gift bag punch board. I have had this for a few months but just used it for these projects. It's such a fun tool to work with and it worked perfectly for the 2 small bags I needed for gifts.
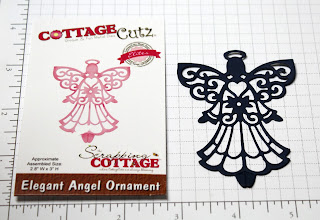
The dies for my project are the Merry Christmas Notecard and the Elegant Angel Ornament.
Let's get started with some details on what I did to alter the bag I just made. If you don't have the Punch Board, here is a link to tutorials to make one using a scoreboard and another link to make one just by folding the cardstock.
My Bag: started with white cardstock measuring 6" x 11" and then followed the instructions on the punch board for a medium bag. The bag size ended up at 4 11/16" high and 3 1/8" wide. I also punched the holes at the top in order to run my ribbon through for bag closure.
There are a number of ways to add your ribbon. You could just punch holes on both sides and make ribbon handles. Or use cardstock and a brad and make a single handle running from side to side.
For decorating the bag I kept it simple. The Merry Christmas Notecard die is so pretty and decorative that I didn't need anything else. Here is a close-up so you can see the detail on this die.
For decorating the bag I kept it simple. The Merry Christmas Notecard die is so pretty and decorative that I didn't need anything else. Here is a close-up so you can see the detail on this die.
I used red cardstock for a layering panel and it measures 4 1/16" x 3". I finished off this bag with my 1/8" red striped ribbon.
My 2nd Bag: I started with white cardstock measuring 6" x 10" and then followed the instructions on the punch board for a small bag. The bag size ended up at 4 11/16" high and 2 5/8" wide. I also punched the holes at the top in order to run my ribbon through for bag closure.
For decorating this bag I used the elegant angel ornament die, merry Christmas ribbon (for the stars) and the expressions joy dies.
I used blue patterned paper for the layering panel and it measures 4" x 2 1/2". I finished off this bag with my 3/8" navy ribbon. The angel was adhered with dimensional foam tape and the joy word and stars with Ranger multi-matte medium.
Well, that's it for me for today. I hope I have inspired you to look at your dies for other uses besides card making. And if you have this tool to make some of your own gift bags. So until next time........God bless.
Dies I used for my gift bags:


No comments:
Post a Comment