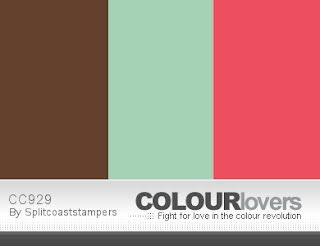
Hello Blogger Friends! Thanks for taking the time to stop and visit with The Charmed Life Blog today.
It's Friday and another weekend is upon us. Hope you have something fun planned. We have been having unseasonably mild temps here in Pittsburgh. So, getting out and enjoying the days in the middle of winter have been great.
Today, I am guest designing with the Creative Creases Blog. It's an anything goes challenge using a fun fold design. I was so honored to be asked to guest design with them.
My fun fold is called a Corner Tuck. It is a new to me fold that I guess has been around for a while, but I hadn't seen it before. Here is a link to the video if you would like to watch how it's made.
Design Steps:
1. Start with cardstock measuring 4 1'4" x 11"
2. Cut cardstock to 4-1/4" x 8" Score the 8" side at 5-1/2" to create the base of the fun fold card. Leftover panel can be used for the image panel.
3. Cut a 2-3/8" x 4 1/8" piece of designer paper and adhere it to the front flap on the card base. I used an older Stampin' Up pattern - from the Sunshine & Rainbows collection. Cut a 5-3/8" x 4 1/8" piece of white card stock and adhered it to the inside of the card.
4. Cut a 2" x 2" piece of the same designer paper and cut the square in half on a diagonal. This is what you tuck the image panel into.
5. Add a bit of liquid glue to the top and right edges of patterned paper. Adhere it to the upper right corner of the white card stock piece on the inside of the card. 6. For my image panel, I cut a piece of granny apple green cardstock at 3 1/4" x 4 1/4". I used designer paper from the Stampin' Up "oh so ombre" collection and cut it at 3 1/8" x 4 1/8".
The cake image is a die from CottageCutz- Party Cake and the birthday phrase is the Happy Birthday w/Shadow die. Stamped the sentiment in chocolate chip ink. The stamp set is Bitty Birthday from MFT.
7. To complete my fun fold card I attached the image panel to the front flap of the card base. You will be adhering the card stock directly onto the
designer paper piece.
I only added adhesive to the section that comes in contact with the flap of the card base. Once this panel is secured, you lift up on the right side of the card stock and tuck it
under the corner piece. To finish off the image panel, I added some "cake confetti". It's part of the Party Cake die.

Here is a photo of the card untucked from the corner.
That's it for me for this post. I hope you can play along with us in the Creative Creases Challenge #51. The Challenge is celebrating it's 2nd anniversary and have teamed up with the Double Trouble challenge Blog.
I am also entering:
1. Let's Craft and Create has an anything goes + add a sentiment.
2. Creative Fingers has an anything goes challenge #248.
3. Creative Knockouts has a birthday wishes challenge.
4. Seize the Birthday has a birthday challenge + option use your initials. I used magenta cardstock.
5. The Paper Funday is anything goes w/option of lots of layers.
6. Double Trouble challenge is a collaboration with the Creative Creases Blog.
.JPG)

.JPG)
.JPG)
.JPG)
.JPG)
.JPG)
.JPG)
.JPG)
.JPG)
.JPG)
.JPG)

.JPG)
.JPG)

.JPG)


.JPG)
.JPG)
.JPG)

.JPG)