Hello Blogger Friends! Happy Saturday to all of you. Hope you are enjoying the spring weekend and will get to do something outdoors. Well weather permitting that is!
I am going on a bike ride this morning before the rain comes in the afternoon. I just bought a bike that a friend of mine wasn't using any longer. It's good exercise and I ride with a friend of mine. So that's always fun to have company.
Let's move onto my card for today. this one I created for my weekly DT post on the CottageCutz blog. I am in need of baby cards right now so that's the direction I took for my card today.
So let's get started with some details on how I created my card.
Card Measurements:Sweet Sugarplum Card Base: 4 1/4" x 5 1/2"
White Stenciled Panel: 4 1/8" x 5 3/8"
Step 1: I started my card this week by stenciling a heart background. I used sweet sugarplum and mint macaron ink. This photo was my first attempt (I did 3). My 3rd attempt was the one I chose to use. But I forgot to photo it before I added my sentiment and phrase.
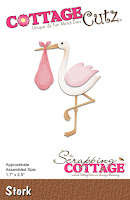
Step 2: I cut the stork image. I found some cardstock in my stash that was various shades of orange from very light to dark. That's what I used for the stork body and legs. His wing is cut in white and I lightly sponged it with some pink ink. I used some sweet sugarplum designer paper for the bundle he is carrying.
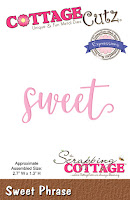
Step 3: I cut my sweet word phrase 2x with sugarplum cardstock. I did this to give it some dimension against the stenciled hearts. Used Ranger multi-matte medium to adhere the 2 words. This dries clear and is a strong adhesive.
Step 4: I adhered the word phrase and then stamped my "bundle of love" sentiment with sugarplum ink. I am happy with the look of the card so far.
Step 5: Time to attach the stork to the card. I used dimensional adhesive to lift him slightly off the background. I wanted to use ribbon and played around with several variations before I decided on this white scallop ribbon.
I didn't want to cover up my stenciling and I thought this one was narrow enough and also open enough to allow the hearts to still be seen. Plus it fit well with the baby theme of the card.
Here is a close-up photo of my card. You can see all the detail in the stork. Love that about all the CottageCutz dies. Click on the photo to get a larger view. If fact, you can click on any of the above photos to get a larger view.
That completes my card for this post. I hope I have given you a baby card idea as well as a way to use the new Expressions Plus Phrases with stamps you already have in your collection.
Until next time........God bless
dies I used to create card:
I am also entering
1. Just Us Girls has a die cut challenge
2. Crazy4Challenges has a repeat day challenge- repeat something at lest 3 times on your card.
3. Animal Friends has an animals with wings challenge
4. The Artistic Stamper has a winged things challenge.


Gorgeous creation.
ReplyDeleteThat is the SWEETEST little stork, what a fabulous baby card! Heart dp perfect with him. I love it :)
ReplyDeleteSuper sweet card Mary! You do rock out the die cuts :). thanks for joining in at JUGS.
ReplyDeleteEine zauberhafte Karte. Vielen lieben Dank für deine Teilnahme bei den Animal Friends.
ReplyDeleteLG Dreja
Great die cuts and I love the background you sponged with the stencil. Cute card! Thanks for playing with Just Us Girls!
ReplyDeleteEine süße Karte. Vielen Dank, dass du sie bei den Animal Friends zeigst.
ReplyDeleteLG Heike
Your card is wonderful.
ReplyDeleteThank you for joining us at the Animal Friends.
Hugs
Kuni
Super cute card, thank you for joining in the challenge on The Artistic Stampers blog.
ReplyDelete