Saturday, November 4, 2017

Penguin Snowglobe Christmas

Hello Blogger Friends! Thanks for taking the time to stop and visit with the Charmed Life Blog today.

It's a beautiful Saturday here in Pittsburgh  Chilly but lots of sunshine. A good day for a making a nice pot of chicken noodle soup. My husband likes to make this type of soup. He considers it his specialty. But he is not feeling well today so I am going to make it. 

But before the soup making I wanted to get my post done for today. This card I made for my weekly DT post on the CottageCutz Blog.  Today, I am showing a couple of the new 2017 Christmas dies released by CottageCutz. They are the Snowglobe w/Fawn and the Snowglobe Friends dies. So let's get started with some details on my card for today.

Step 1: I started my card this week with my layout. I found this great sketch on Splitcoaststampers that I thought would work well for my card idea. Using a sketch is a good starting point when you are creating a card.
I look at the sketch design and then think of possibilities that would fit the circles, rectangles etc. It helps me to get my Mojo in gear. In this case, as soon as I saw the circle I thought of a snowglobe. You can see I am in Christmas mode.
Step 2:  Since my dies were already chosen, I needed to decide on the card colors as well as patterned paper. Of course, I wanted it to be red and green so I just needed some coordinating papers. Looked through my Christmas papers and found some stripes and dots paper.
Step 3: I decided on a white background for layer 1 of the sketch. But, I didn't want it plain white so I used a falling snow embossing folder. I like the deep embossing I was able to achieve with this folder.
Step 4: I cut layer 2 and 3 of the sketch from cardstock and the patterned paper. Used the CottageCutz Rectangle and Pierced Rectangle dies. On the dotted panel (Layer 2) I used the 2nd largest rectangle die and the 3rd largest pierced rectangle die.
On the striped panel, I used the 4th largest rectangle and the 4th largest pierced die.
Step 5: Now I am ready to cut my snowglobe and penguin. These dies are just too cute and so detailed. Even the snowballs for sale sign has incredible detail. And look at his cute little ice skates. You can click on any picture to make it larger.
Step 6: Time to start assembly of my card. Layered the embossed panel to the cherry red cardstock.
Then layered the patterned paper panels.
And finally, the snowglobe is attached it with dimensional adhesive. I doubled up on the dimensional adhesive because some of the globe was on the patterned paper panel and some directly on the embossed panel. By doubling up it evened everything out.
 Step 7: To finish off my card I wanted a Christmas sentiment. I used the smallest CottageCutz oval die and stamped the sentiment.
  Well, that's my card for today. I hope I have given you some inspiration for a Christmas card. And, maybe even for purchasing and using this new snowglobe die. So until next time.........God bless.

dies I used to create card:
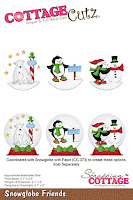
http://www.scrappingcottage.com/cottagecutzsnowglobefriends.aspx

http://www.scrappingcottage.com/cottagecutzsnowglobewfawn.aspx

http://www.scrappingcottage.com/cottagecutzrectanglesetbasics.aspx

http://www.scrappingcottage.com/cottagecutzpiercedrectanglesetbasics.aspx

I am also entering:
1.  Crafty Friends has a Christmas challenge.
2.  Craft Rocket Challenge is Christmas is coming.
3.  Tic Tac Toe Challenge - from the board-vibrant, stripes and circle.


Thursday, November 2, 2017

Sweet Friend (Shaving Cream Technique)

Hello Blogger Friends! Thanks for taking the time to stop and visit with the Charmed Life Blog.

It's a chilly November day here in Pittsburgh. It was also my pre-school day.
We weren't able to take the kids outside because of the cold. Most of them are coughing and have runny noses. I am loading up on my Vitamin C so I don't get anything that they have (lol)!

 We are already making plans for the Thanksgiving Feast we will be having in Pre-School. The kids get to enjoy a Thanksgiving meal but instead of Turkey they have chicken nuggets. It's always a fun day for them.

It's also time for me to begin thinking about my own Thanksgiving meal. We will be hosting a dinner at our home and my in-laws will be coming. My son and his family split the holiday between us and my daughter-in-laws family. So this year they will spend it with them.

I usually keep my menu the same. Tradition goes a long way with me. I like having my menu set and using my tried and true recipes.

So now onto my card for today. This one I created for a challenge over on Splitcoaststampers. We were to use the shaving cream technique for our background.

Into my shaving cream, I added Stampin'-Up melon mambo, pumpkin pie and old olive re-inkers. Squished the paper into the shaving cream, wiped it off and this background was produced. Here is a link to a tutorial that gives more details on how to work this technique.

I layered the background on melon mambo cardstock that was cut with the Locking Loops die from Spellbinders. The Birdhouse, vine and hello dies are from CottageCutz.

I finished off my card with my sentiment. Well that's it for me for this post. Until next time.........God bless.

card details:
Stamps: label maker sentiments (MFT) 
Paper: whisper white, melon mambo, pumpkin pie, mossy meadow   
Paper Size: A2   
 Ink: melon mambo
 Accessories: melon mambo, old olive, pumpkin pie reinkers (Stampin'-Up), birdhouse and vine and hello spring dies (CottageCutz), label maker dies (MFT), locking loops (Spellbinders)  
Techniques: shaving cream technique

I am also entering:
1.  Crafting with an Attitude has an anything goes challenge.
2.  Cute Card Thursday has an anything goes challenge.
3.  A Bit More Time to Craft has an anything goes challenge.

Wednesday, November 1, 2017

Thanksgiving Blessings

Hello Blogger Friends! Thanks for taking the time to stop and visit with the Charmed Life Blog.
 
Welcome to November! I can't believe that I am even saying that. Where did this year go to so quickly? It's time for me to start thinking about my Thanksgiving menu.
 
Hope you survived the trick or treater's last night. I was surprised at how many parents had babies in strollers out for candy. Were they looking to give the babies a sugar high or just collecting treat for themselves (lol)? I think the latter and some were bold enough to say that's what they were doing. Oh well, to each his own.
 
We were with our next door neighbors and had the fire pit going and made s'mores. It was nice being with them and having lots of  interesting conversations.
 
Now let's move onto my card for today. This one I created for the color challenge #655. I was the hostess and I chose peek-a-boo peach, early espresso and lemon lime twist as my color trio. Optional was to make a fall themed project.
peek-a-boo peach, early espresso, lemon lime twist
For my card,  I used the Painted Autumn designer paper from Stampin'-Up.  I cut a sunflower with a Cheery Lynn Designs die in peek-a-boo peach and peach parfait (retired Stampin’-Up). I wanted a bit of a color variance in the sunflower. My leaf is from a CottageCutz die. I sponged the edges for a little more depth.

The blessing word is a die from CottageCutz and I cut it in early espresso cardstock. This cardstock is such a rich, deep shade of brown that I just love.

Stamped my sentiment in early espresso ink and added to a flag to complete this card. Well, that's it for me for this post. So until next time.........God bless.
 
card details:
Stamps: thanksgiving blessings (Stampabilities)  
Paper: early espresso, peek-a-boo peach, peach parfait, lemon lime twist, painted autumn dsp (Stampin’-Up)  
Paper Size: A2  
Ink: peek-a-boo-peach, lemon lime twist, early espresso  
Accessories: sunflower, blessings phrase dies (CottageCutz), sunflower die (Cheery Lynn Designs), flag stax dies (MFT)

I am also entering:
1.  Die Cut Divas has an all things thankful challenge.
2.  Dies R Us has an anything fall challenge.
3.  Crafty Gals Corner has a harvest colors challenge.


Monday, October 30, 2017

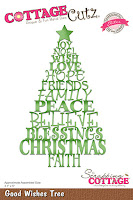
Good Wishes Tree Christmas Card

Hello Blogger Friends! Thanks for taking the time to stop and visit with the Charmed Life Blog today. Hope your weekend was a good one. I spent both days crafting and that's always fun.

Today I get to visit my dentist and then hit the gym. But this afternoon I will be back in my craft room getting my sample card ready for the Splitcoaststampers color challenge.

But before all that I have a Christmas card to show on this post. This one I made for my weekly DT post on the CottageCutz blog. So let's get started with some details on how I created my card.

Step 1: I wanted to use red & green as the main colors and I found this paper in my Christmas collection. I thought the music background would work well with the Christmas words. I matched the designer paper with a pine green, a cherry red and kraft cardstocks.
The patterned paper had a nostalgic look to it so I decided to use burlap ribbon.
Step 2: I cut the good wishes words in the cherry red cardstock. I like the different style font that is used on each word.
I secured this to the patterned paper panel with glue dots. I used mini ones and rolled them into small lines.
Secured the image panel to the cherry red card base, I liked how the panels pop with the addition of the red card base.
Red Card base: 4 1/2" x 5 3/4"
Green Layering Panel: 4 1/4" x 5 1/2"
Patterned Paper Panel: 4 1/8" x 5 3/8"
Step 3:  I thought the panel needed something else to complete it. I tried a small bow but that didn't work. So I cut some bells and added them to the corner and scattered some gold sequins. It completed the card nicely.
Well that's it for me for this post. So until next time...........God bless.

Dies I used to create card:
http://www.scrappingcottage.com/search.aspx?find=good+wishes+tree


http://www.scrappingcottage.com/cottagecutzbellspetites.aspx


Sunday, October 29, 2017

Falling Leaves Thank You


Hello Blogger Friends! Thanks for taking the time to stop and visit with the Charmed Life Blog this final Sunday in October.

It's a rainy and damp day here in Pittsburgh. I am sitting here typing up my post enjoying a hot cup of coffee. I wanted to turn the fireplace on but I always like my hubby to be here for the first start of the year. We have a gas fireplace so I just like him to turn it on. But, today he is at work so no fire for me.

Yesterday, I had some of my stamping friends over for a fun day of crafting. Everyone was working on different projects. I pulled out one of my Stampin'-Up Paper Pumpkin kits to work on. I was able to make 7 cards. The kit includes a gift box to give the cards away. I plan on giving them to a friend for Christmas.

I will post pictures of those cards later. Today's card is another one I made using a different Paper Pumpkin kit. This one is the September falling leaves kit. I made this one using the colors from CC654. Stef was the hostess and she chose cajun craze, crushed curry and fresh fig as her color trio. Optional this week is metallics.
cajun craze, crushed curry, fresh fig
For my card, I used elements from the September "falling leaves" Stampin’-Up Paper Pumpkin kit. The large background die-cut leaf was already blended with cajun craze. I used the leaf stamp from the kit and stamped the leaf veins in Cajun craze ink.

The 3 smaller crushed curry leaves were stamped on very vanilla cardstock with another stamp from this kit. I fussy cut these leaves. The kit also had gold metallic leaf stickers that I used for the dessert option. Layered the gold leaf on top of the other leaves.

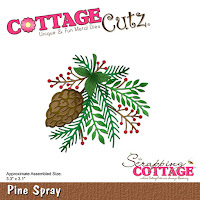
I scattered some sprigs and leaves cut in cajun craze and fresh fig cardstocks. These are from the CottageCutz pine spray die.

On my background I used the Stampin’-Up pinewood planks embossing folder. I splattered some cajun craze ink with a spritzer tool on the embossed panel.

To complete my card I stamped my “thank you” sentiment on the metallic die-cut tag that was also included in the kit. And, that's it for me for today Blogger friends. So until next time.......God bless.


card details:
Stamps: layered leaves (September 2017 Paper Pumpkin Kit) 
Paper: Cajun craze, very vanilla, fresh fig 
Paper Size: A2  
Ink: Cajun craze, crushed curry 
Accessories: September Paper Pumpkin Kit, spritzer tool, pinewood planks ef (Stampin’-Up) Pine Spray die (CottageCutz)  

dies used:
http://www.scrappingcottage.com/cottagecutzpinespray.aspx
I am also entering:
1.  Addicted To Stamps has an Autumn challenge.
2.  Challenge Up Your Life has a die-cuts challenge.
3.  Polka Doodles has an anything goes challenge. 


Saturday, October 21, 2017

Sweet Greetings Christmas Cupcake

Hello Blogger Friends! Thanks for taking the time to stop and visit with the Charmed Life Blog. It's a beautiful Saturday here in Pittsburgh.

My plans for today are to spend the day in my craft room but don't know if that will work out. I want to go over my son's for a visit.

Tomorrow there is a baby shower at church. Our church is associated with a local Crisis Pregnancy Center and we are having a shower for a young woman who chose life for her unborn baby.

It's a sad situation because her parents threw her out of the house when she wouldn't have an abortion. She lives with an aunt now. But when she had a sonogram and saw the baby within her she couldn't have an abortion. The pregnancy center contacted our church and asked us to host a shower for her. There are 50 women from the church that are coming. I am excited to be a part of blessing her.

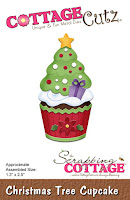
Now onto my card for today. This one I created for my weekly DT post on the CottageCutz blog. I used a new die Christmas Tree Cupcake, for my sample card. I wanted to show a card that would be easy to mass produce using this new die. So let's get started with some details on how I created my card.

Step 1: Since this is a Christmas cupcake, I knew I was going to use red and green for the cupcake itself. So I checked my cardstock and patterned papers for a Christmas theme of red and green. I found this dotted paper that I thought would look good as a background. Dots and stripes always work for me for Christmas.
Step 2: Once I had the shades of red and green chosen, I was ready to cut my cupcake image.  As with all CottageCutz dies, this has such amazing detail and just so cute.
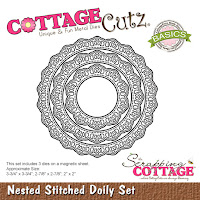
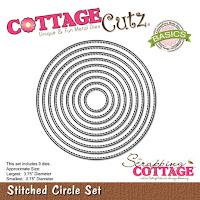
Step 3: I wanted to have the cupcake framed inside a circle die. I used the Nested Stitched Doily die and cut in the cherry red cardstock. I also used the stitched circle die (3rd largest) as a layering piece and cut this in kraft cardstock.

 I adhered the circles together with double sided tape and then stamped my "Sweet Greetings"sentiment.
Step 4: I started the assembly of my card. I decided that I wanted to break up all the dots on the background panel. So, I used a 3/4" x 4 1/8" piece of the green cardstock and layered some kraft ribbon over that.  It will be just enough once my circles are layered on top.
Attached the cupcake to the circles with dimensional adhesive.  There are little circle ornaments that are part of this die that I forgot to attach earlier. I cut them in white, green and red cardstock. I scattered the extras on the image panel for added interest.
To complete my card, I attached the image panel to the red card base. I thought it just needed something else so I added a small bow made with the kraft ribbon. It finished my card off nicely.
Well, Blogger Friends - that's it for me for this post. So until next time...........God bless.
Dies I used to create card:
http://www.scrappingcottage.com/cottagecutzchristmastreecupcake.aspx

http://www.scrappingcottage.com/cottagecutznestedstitcheddoilyset.aspx

http://www.scrappingcottage.com/cottagecutzstitchedcirclesetbasics.aspx

I am also entering:
1.  Really Reasonable Ribbon has an anything goes challenge with ribbon.
2.  Winter Wonderland has a Christmas Flowers challenge. My cupcake has a poinsettia image.
3 C.R.A.F.T. has a Christmas challenge.
4.  A Snowflakes Promise has an anything goes challenge.

Monday, October 16, 2017

Sweetheart LoveBirds

Hello Blogger Friends! Thanks for taking the time to stop and visit with the Charmed Life Blog.

I can't believe it is already mid-October. This year has gone by in a blink of an eye. We are still having very mild temperatures for Fall.


The leaves  on the trees are still green so I don't know if we will have the gorgeous display of autumn colors this year or not. I am hoping we don't go from warm temperatures into winter weather. I love the Fall season with its warm days and cool nights and the changing leaf color. Will have to wait to see what develops here.


In the meantime, let's move onto my card for today. This one I made for the DTGD challenges on Splitcoaststampers. Julie was the hostess for this DTGD17justwritedesigns challenge.


For my background, I used some Liquitex gloss gel, pistachio pudding, melon mambo and pink pirouette reinkers plus a heart stencil from Stampin'-Up. It is a simple technique that I thought made for the perfect background for my card.


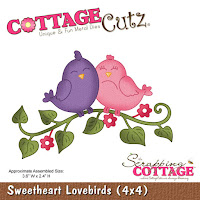
The sweetheart lovebirds and love phrase are both dies from CottageCutz.  The love phrase is cut in melon mambo cardstock and the birds in pink pirouette and pool party. I sponged the birds with the matching ink for a little more depth.

 I thought I could use this as a wedding or anniversary card. And, that completes my card for today. So until next time........God bless.


Card details:
Paper: melon mambo, whisper white, pink pirouette, pool party
Paper Size: A2  
Ink: pink pirouette, pool party  
Accessories: sweetheart lovebirds, love phrase (CottageCutz), heart stencil, pistachio pudding, melon mambo, pink pirouette reinkers (Stampin'-Up), gloss gel (Liquitex)  
Techniques: stencil 
 
Dies I used on card:
http://www.scrappingcottage.com/cottagecutzsweetheartlovebirds4x4.aspx

http://www.scrappingcottage.com/cottagecutzexpressionspluslovephrase.aspx

I am also entering:
1.  Crafting From the Heart has an anything goes challenge.
2.  Get Creative has a wedding challenge.
3.  Glitter & Sparkle has an anything goes challenge.


Saturday, October 14, 2017

Snowflakes + Mother of Pearl Technique

Hello Blogger Friends! Thanks for taking the time to stop and visit with the Charmed Life Blog on this Saturday in October.

I am back from my trip to San Francisco. I went out for a week to take care of my precious granddaughter, Phoenix Daisy. The time spent with her was so wonderful and went by so quickly. 

We play non-stop with her baby dolls, and she has 7 of them. I am always amazed at her creativity and the ideas she has to play with them. She told me no one plays "Babies" like I do. Of course, because that's what Grandma's do (lol)!!

It's been awhile since I have posted on my Blog. There was no time when I was away. I went to bed when Phoenix went to bed because I was so tired. Then just when my body adjusted to the 3 hour time difference, it was time to come back home.

My card for today is one that I made for my weekly DT post on the CottageCutz Blog. I used a new Christmas die, Snowflakes Set for my sample card. I chose the faux mother of pearl technique for my background because it's a very simple technique to do and it has a huge impact on your finished card.  I also thought it would give the illusion of a snow squall. So perfect for my snowflake images.  Here is a video link to a tutorial on Splitcoaststampers.

And, I also wanted to show a card that would be easy to mass produce using this new die. So let's get started with some details on how I created my card.

Step 1: I used some Frost White Acrylic paint from Tsunineko. It has a bit of a shimmer to it. This paint acts as a resist and shows through the colors that I will sponge on in the next step.
I put a small amount of the frost paint on my craft mat. I used a piece of cling wrap and scrunched it up and then dipped it in my frost paint. I pounced it on my craft mat to work it into my cling wrap and also to insure that I didn't have any big globs of paint.

I then dabbed it lightly on my white cardstock. I left some open space so I could sponge the colors I was going to use. There is lots of shimmer on this panel that is hard to capture in a photo. I set it aside at this point to allow it to dry.
Step 3: Once the paint was dry, I decided on the shades of distress ink with tumbled glass and broken china.
After I started to sponge the ink, I decided to add a 3rd shade of ink using peacock feathers. I liked the color variation that I achieved. You can see on the photo below the white paint has resisted the distress ink.
When I finished sponging I used a paper towel to rub off the ink that was sitting on top of the white frost paint. This allows more of the frost design underneath to come through.
Step 4: Since I was going with a turquoise card base, I decided to layer the pearl panel on white. Just for some variation between layers.
Turquoise Card Base: 5 1/2" x 4 1/4"
White Layering Panel: 5 1/4" x 4 1/8"
Background Panel Size: 3 7/8" x 5 1/8"
Step 5: I cut my snowflake images from white cardstock. They are such pretty shapes and I really like the size variation.  I was able to use all 4 of the images on my background panel.
To adhere the snowflakes to the background panel, I cut small pieces of dimensional adhesive. I didn't want them laying flat against the background.
Step 6: The sentiment is from an older CottageCutz die - Merry Christmas Santa. I cut it from one of my practice panels that I made. I sponged more ink on it for more of a contrast. I also cut another phrase in white and very slightly offset it. 
To complete my card I attached it to the turquoise base. I wanted some depth between these two panels so I used some white fun foam behind the image panel. It gave it just the lift I was looking for I secured it with Tombow liquid multi glue.
Well, that's it for me for this post. So until next time.......God bless.

Dies I used to create card:


LinkWithin

Related Posts with Thumbnails