Hello Blogger Friends! Thanks for taking the time to stop and visit with The Charmed Life Blog today.
We are almost a month into Spring and everything is returning to life and blooming here in Pittsburgh. Although we have had a return of colder temps. It's supposed to warm up next week though.
I am looking forward to opening the windows again and letting the breeze blow through my home. It just seems to freshen things up.
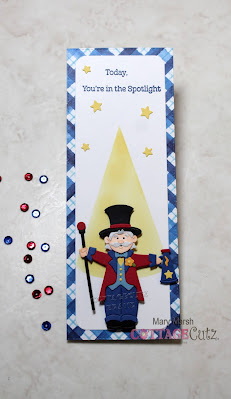
Anyway, let's move onto my card for today. This one I created for my weekly DT post on the CottageCutz Blog. I created a slimline card for Father's Day using new Slimline dies. So let's get started with some details of how I created this card.
Design Steps:
I started my card by cutting the Rounded Rectangle Slimline shape using the 5th largest die in this collection. It measures 2 1/2" x 7 1/2".To complete my card, I cut some stars and scattered them on the card. Well that's it for me for this post. I hope you all have a great weekend. So until next time.......God bless.
1. Aud Sentiments has an anything goes with a sentiment.
2. Creative Knockouts has an add a sentiment challenge.
3. Crafty Creations has an anything goes challenge.
4. Creative Moments has an anything goes challenge.
5. Watercooler Wednesday has a masculine challenge.


A super card. Thanks for joining Aud Sentiments challenge. Elaine
ReplyDeleteWhat a super fun card Mary. Thanks for joining us this fortnight at WWC. Tristan DT.
ReplyDeleteOh this is a fun one Mary!
ReplyDeleteThank you so much for playing along with us at Creative Knockouts! Good luck:-)
Cool card. Thanks for sharing with us at Aud Sentiments.
ReplyDeleteSuch a lovely design!
ReplyDeleteSorry for the late comment.
Thank you for joining Creative Moments.
Hugs from Africa!
OlgaB