Hello Blogger Friends! Thanks for taking the time to stop and visit with the Charmed Life Blog.
Another weekend is upon us and in our house March Madness is at a frenzy. Well maybe not a frenzy but that's all that has been on the TV since Thursday (lol).
But, my hubby is a big college basketball fan. Not that I mind though because I was in my craft room all day yesterday and I hope to get in there again today.
My card for today is one that I made for my weekly DT post on the CottageCutz Blog. I used the MojoMonday sketch for the layout and Stampin'-Up cardstock and designer paper.
Today for your viewing pleasure, I am featuring the Easter Bunny & Chicks die. This die has two cute bunnies and 2 chicks.
This week I decided to make an Easter or spring card. So I selected my die and some bright patterned paper and cardstock. The whimsical pattern on the designer paper will fit well with the Easter bunny. I also thought this sketch would keep my layout more simple and still allow the patterned paper to be seen. Let's get started with some details on how I created this card.
calypso coral card base: 4 1/4" x 5 1/2"
gold soiree designer paper layer: 4 1/8" x 5 3/8"
white image panel: 2 7/8" x 3 1/2"
garden green layering panel: 3" x 3 5/8"
white image panel: 2 7/8" x 3 1/2"
garden green layering panel: 3" x 3 5/8"
The bunny is cut in a cantaloupe shade of cardstock and his little bow in a medium green. The chick in a bright yellow and I shaded his wing with the same color of ink to give a bit of dimension. Did some shading with cantaloupe ink around the bunny to add depth.
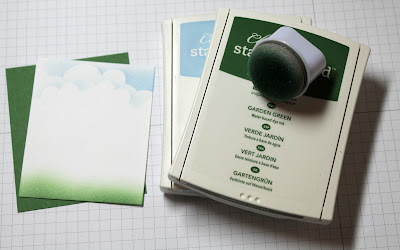
For the image panel, I sponged the bottom with a medium green ink for grass and also to ground the bunny image. I used a cloud template and added a few clouds with a light blue ink.
I wanted the sentiment in the corner of the card and the "some" word to be placed on an angle. I pulled out my stamp positioner to accomplish this. I taped off the 2nd line of the sentiment and stamped my first line. Then I taped off the "some" word and stamped my 2nd line.
All the preliminary work is done and I am ready for card assembly. For the long rectangle panel on the sketch I decided to use a flag. And, I added garden green enamel dots that matched the garden green cardstock to complete the card.
I hope I have given you some inspiration to create either an Easter card or a Spring card to send to someone special. That's it for me for this post. Until next time......God bless!
Dies I used to create card:


Pretty background for your cute bunny!
ReplyDelete