
Hello Blogger Friends and a happy Wednesday to you all. Well, school is out for the summer. Yesterday was our final class at preschool. Tonight we have a little program as a sendoff for the kids. They will be singing a few songs for their parents and guests. They have all done well during practice so it will be a great evening.
Today's post is a bit long but I have a photo tutorial of the card I made. This is also posted over on the CottageCutz blog for my Wednesday DT post. So let's get started.
Skirt Fold Technique instructions:
Step 1: Start with your choice of patterned paper measuring 3" x 6. You score at 3/4", 1", 1 3/4", 2", 2 3/4", 3", 3 3/4", 4".

Step 2: Your paper needs cut in order to create an angle. Lay the paper on your trimmer with the wider part that is not scored to your right. The 2nd score line should be in the groove of your trimmer. The top left corner of your paper should be at the 1 1/2" mark on your trimmer. It will be at an angle in your trimmer and you just cut from point to point.
 |
| click on photo to enlarge to see score lines |

Step 3: Fold accordion style, back and forth, on your score lines. The finished folded piece will look like this.

Step 4: To hold the folds in place add some adhesive to the back of each pleat.

Step 5: Attach patterned paper to white card base. Base measure 3 7/8" x 5 1/2". At this point I also added my ribbon at the top of the skirt fold pleats. I think it adds a finished look. No photo of adding the ribbon step.

Step 6: Die-cut the teacups & flowers image. I used X-Press It card stock because I colored the image with alcohol markers.


Step 7: Attached teacup & flowers image to card base. Stamped a sentiment and added some enamel dots.

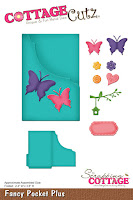
I also added a die cut heart from the brand new fancy pocket plus dies to the bottom of my card. I am giving you a little sneak peek of the new This N That CottageCutz dies that were just released. There is a 25% off sale right now at the Scrapping Cottage store. More to come with these fabulous new dies.


Just a reminder about our newest challenge and there are prizes to be won. The theme is Spring and you have until May 31st to enter. Get all the deets here.
Thanks for sticking around to the end. Hope you enjoyed the post- until next time.....God bless.

I am also entering:
1. Come and Get It Challenge is a fancy fold.
2 Craft-Dee Bowz has an anything goes with a handmade bow.
3. 2 Creative Chicks has an anything goes challenge.
4. Creative Craft Cottage has a 3 of a kind challenge. Mine is enamel dots.
5. Dies R Us has a birthday challenge.


Great tutorial and a gorgeous card Mary! I love the patterned paper you selected for the folds and that cup with the flowers is like a breath of Spring! Beautiful!
ReplyDeleteLynn
Wow I am loving this, thanks so much for the tutorial and sharing your gorgeous card
ReplyDeleteOH MY STARS! This is AWESOME Mary and thanks for all the fabulous details. Hope you don't mind if I pin this so I can find it again when I have time to give this awesome technique a try. Thanks so much for playing in our ‘BIRTHDAY’ challenge at Dies R Us! Please come back again soon!
ReplyDeleteDarlene (DRU Blog Leader)
DIES R US CHALLENGE BLOG
DAR’S CRAFTY CREATIONS
Oh what a lovely card Mary!!!! I love the pleated "skirt". Great idea and I've never seen that before.
ReplyDeletePretty card! Love the pleats! Thanks for joining us at Creative Craft Cottage!
ReplyDeleteThanks for the great tutorial, Mary! Love all the detail you added to the photos that make it super easy to follow. Reminds me of folding fabric for the cascades that go with window swags. It's a beautiful card.
ReplyDeleteHow cute! I love how you pleated the paper!! Thanks for joining us at Craft-Dee BowZ for our May challenge! Hugs, Gail
ReplyDeleteVery pretty and great tutorial. Thank you for joining us at Creative Craft Cottage. Cindy (DT)
ReplyDeleteThis is really pretty and thanks so much for your tutorial <3.... Thank you for sharing your wonderful project with us at Come And Get It challenge.Neva
ReplyDeleteSweet card. Thanks for joining us at CCC Challenge.
ReplyDeleteHugs
Claudia
DT Creative Craft Cottage
http://knutselmeisjes.blogspot.be/
http://creativesketchygirls.blogspot.be/
This is adorable! I have seen the pleated "skirt" with larger folds, but I love the smaller folds you've made. TFS!
ReplyDeleteThis card is so very pretty!!! Love your colors, so fun and cherry! Thank you for sharing your tutorial with us too! Thank you for playing with us at Dies R Us Challenges!
ReplyDeleteHugs,
Jo-DT
♥ Dies R Us Challenges ♥
♥ Jo's Scrap Shack ♥
A fab card!
ReplyDeleteThank you soo much for taking part in our "fancy folds” challenge over at Come and Get it.
Hope to see you again in our new challenge as well…
Hugs,
Melanie
(DT-Coordinator Creatalicious Challenges)
(DT Come and Get It)
(DT Crafty Friends)
PS: Sorry for the late comment, life had been very hectic the past couple of weeks…