Thursday, July 6, 2017

~Celebrate Patriotism~

Hello Blogger Friends! Thanks for taking the time to stop and visit with the Charmed Life Blog.
 
Hope your July 4th celebration was a great one. We spent the day with good friends of ours and their family. It's become our tradition the last 4 years or so. Karen is so hospitable and extends the welcome mat.
 
I made this card for my cousin to thank him for his military service and also as a 4th of July celebration card. I wanted to post it on July 4th but there was just no time. We went out to a farm to pick blueberries in the morning. Then after a quick shower we went to a card dealer to start the process of buying a new car. Then off to our friend's home for our July 4th celebration.
 
So I am posting it a couple of days behind schedule (lol)! Here are the details on how I created this card.
 
This is a card I created for the Splitcoaststampers color challenge #640. I was the hostess and I hosen real red, dapper denim, smoky slate and whisper white for the color palette. Optional was to create something patriotic.
dapper denim, real red, smoky slate, whisper white
I found lots of patriotic ideas on Pinterest this week. Here is one idea I used for inspiration.

For my background, I used the Cuttlebug Stars embossing folder. My flags are cut in dapper denim with an MFT die.
For the stars, I used the Stampin'-Up "star framelits dies. The celebrate word is cut from the CottageCutz "celebrate phrase" die.
 
Well that's my card for today. So until next time........God bless.
 
card details:
Paper: real red, dapper denim, whisper white, smoky slate  
Paper Size: A2  
Accessories: celebrate phrase die (CottageCutz), flag stax & sun, moon and stars dies (MFT), star framelits (Stampin'-Up), star embossing folder (Cuttlebug)
 
I am also entering:
1.  TicTacToe Challenge- I chose summer, die-cut, pattern paper
2.  Crafting By Designs has an anything goes challenge
3.  Shopping Our Stash Our Stash has a flag day challenge. We are to use the colors of our flag.

Saturday, July 1, 2017

~ Precious Little One ~

Hello Blogger Friends and a happy Saturday to you all. This is a holiday weekend here in the USA. Our July 4th celebration is coming up on Tuesday. So enjoy whatever weekend plans you may have.
 
The card I am showing today is one that I made for my weekly Saturday post on the CottageCutz Blog. So let's get started on some details of how I created this card.
I have been showing you over the past several weeks how to combine word die phrases with a stamped sentiment. Check out my cards here, here, here here and here.  I am continuing with this series today as well.

Today I wanted to create a baby card and use the Baby Koala w/Blanket die. I thought the Precious Phrase would work nicely along with a baby sentiment. So let's get started with some details on how I created my card.

Step 1: I started my card this week with a sketch. I liked this one because it's a square card and I thought it would fit the Koala Bear well.

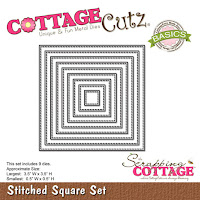
Step 2: Once the layout was decided on, I started figuring out my square card base and the additional layers. I decided to make a 4 3/4" square card. Then I picked my card colors. For the center squares I was able to use the stitched square & square set dies. I used the 2nd largest of each set.

Sweet Sugarplum Card Base: 4 3/4" square
Vanilla Layer: 4 1/2" square
Wild Wasabi Striped Designer Paper: 4 3/8" square
Daffodil Delight Center Square Layer: 3 1/8" square
Vanilla Center Square Layer: 3" square
Step 3: I cut the Koala Bear in a medium and dark brown cardstocks. Decided to use a yellow for the blanket. The ears and tummy are cut in vanilla and I shade them with cocoa ink.
Step 4: Started some partial card assembly. I hadn't cut the oval or the rectangle layers yet and I needed to determine how large to make those.
Step 5: Placed my Precious Phrase in this step. This helped in the placement of the center square. The sketch has everything evened off. I moved my image panels down slightly to accommodate the phrase.
Step 6: I decided to use the 4th largest oval from the Oval set. The Koala Bear fit nicely in that size oval.
The rectangle panel underneath the oval is cut at 1" x 3 3/4". I used a hearts embossing folder on this panel. These were both cut in the sugarplum cardstock.
The green flag is 5/8" x 4 3/8" and I cut in wild wasabi cardstock that matched the designer paper.
Step 7: Before I assembled all the center layers, I stamped my sentiment. It is a bit large and I wanted to make sure everything would fit. It also had more words than I wanted to use.  So I used my MISTI and taped off the words "for a special". I inked up just "Little One".

Step 8:  Almost finished. I adhered the image to the oval panel and then attached it to
the square sentiment panel. 
Step 9: Assembled this panel to the card base to complete my project. I used a couple of hearts in the sugarplum shade to finish it off. There is such detail in he CottageCutz dies. Here is a close-up of the Koala Bear. Love the font on these new phrase dies as well. the square sentiment panel. 
I hope I have given you some inspiration today. If you need a baby card this bear is just too sweet. And, by changing the color of the blanket you could make it for a boy or girl. Well, that's it for me for this post. Until next time........God bless.
 
Dies I used to create card: 
http://www.scrappingcottage.com/cottagecutzbabykoalawblanket.aspx

http://www.scrappingcottage.com/cottagecutzexpressionspluspreciousphrase.aspx

http://www.scrappingcottage.com/cottagecutzovalsetbasics.aspx

http://www.scrappingcottage.com/cottagecutzstitchedsquaresetbasics.aspx

http://www.scrappingcottage.com/cottagecutzsquaresetbasics.aspx


Wednesday, June 28, 2017

~ Home of the Free ~

Hello Blogger Friends! Thanks for taking the time to stop and visit with the Charmed Life Blog. I can't believe that June is almost over and July will be upon us. We will be celebrating the 4th of July holiday in less than a week.
 
Tomorrow evening I will be hosting a little get together for the Preschool teachers.  I am having a lot of different appetizers with a Greek flair. I will let you know all that I make in my next post. There will be 8 of us enjoying a beautiful summer evening on my deck.
 
I am excited that all the teachers will be together for something other than a preschool function. Lots of work on my end tomorrow but I am looking forward to it.
 
Now let's move onto my card for today. This one I made for the Splitcoaststampers color challenge #640. I was the hostess for this challenge and I chose real red, dapper denim, smoky slate and whisper white for the color palette. Optional this week is something patriotic.

For this card, I did something a little different than my usual style. I have been seeing lots of patriotic cards on Pinterest using the Stampin'-Up "work of art" set. Here is one of those cards.

I don't have that set but I thought the "sheltering tree" set might work. So that's what I used and with the help of my MISTI I was able to stamp the flag and flag pole. For the vertical part of the flag, I used the "brushstroke" stamp set and stamped in dapper denim.

My sentiment is from SNSS "patriotic cocoa" set. Cut a few stars and scattered them around the card to complete it.
 
Well, that's it for me for this post. Time to dim the lights in Charmed Life land for another day. So until next time.........God bless.
 
card details:
Stamps: sheltering tree (Stampin'-Up), patriotic cocoa (SNSS)
Paper: dapper denim, real red, smoky slate, whisper white
Paper Size: A2
Ink: real red, dapper denim  
Accessories: sun, moon and stars die (MFT), MISTI  


Saturday, June 24, 2017

Ice Cream Birthday Wishes

Hello Blogger Friends! Thanks for taking the time to stop and visit with the Charmed Life Blog.
 
It's a sunny Saturday after a crazy weather day yesterday. We had an all day rain that was very heavy at times and reports of flash flooding and a tornado touched down in one area. We had 2" of rain in our area and some areas had over 3" of rain.
 
Our area was only hit with the heavy rain. There was no damage to our home. The weather report said that out of the last 60 days, we have had precipitation 43 of those days. In the past 2 weeks there has been flash flooding 3 times. The area where our church is located was affected by the flooding all 3 times. Our church had very minor damage.
 
Now onto my card for today. This one I created for my weekly DT post on the CottageCutz blog.
I have been showing you over the past several weeks how to combine word die phrases with a stamped sentiment. Check out my cards here, here, here and here.  I am continuing with this series today as well.

What I do is look at the word phrase and then think of other dies I have that would be identified by the phrase. Today, for instance, I thought of what could be identified as sweet and work for a birthday card. Lots of food items came to mind ice cream, frozen treats (popsicles), cupcakes to name a few.

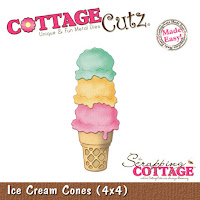
For your viewing pleasure I am using the Sweet Phrase and Ice Cream Cone dies to create a cute summertime birthday card.

So let's get started with some details  on how I created my card.

Step 1: I looked through my patterned paper for a bright and fun design for my card background. I found this melon mambo striped paper from Stampin'-Up and thought it would work well. It reminded me of an old fashioned ice cream parlor.
white card base: 4 1/4" x 5 1/2"
melon mambo layer: 3 7/8" x 5 1/8"
melon mambo striped paper: 3 5/8" x 5 1/8"
 
Step 2: Cut the ice cream scoops using bright pink, mint green and curry cardstocks. I sponged the mint green scoop with the same shade ink for a little depth.  The cone is cut in a medium brown cardstock and I sponged the underneath layer with tea dye ink. Again this is for depth.
 Step 3: I used the stitched circles die (2nd largest) to cut a backdrop for my ice cream cone and also to stamp the sentiment. My sentiment is just a bit too long for my circle. So by masking, with painters tape, and using my MISTI, I was able to turn it into a 2 line sentiment.


Step 4: With all my elements cut and stamping done, I am ready to start assembly of my card. I decided to add some twine to the circle for interest. I found some floss in my stash that is a mint color. Adhered the ice cream cone with dimensional adhesive.
Step 5:  I cut my Sweet Phrase in mint cardstock. The font is so pretty on all these new word dies. Love how it flows. It's a perfect fit for my ice cream cone.
Step 6: I finished off my card by adding some mint and pink enamel dots. I thought it finished off my card nicely. And, that my friends is my card for this post. So until next time.......God bless.
 
Dies I used to create card:
http://www.scrappingcottage.com/cottagecutzexpressionsplussweetphrase.aspx

http://www.scrappingcottage.com/cottagecutzicecreamcone4x4pre-order.aspx

http://www.scrappingcottage.com/cottagecutzstitchedcirclesetbasics.aspx
 

Thursday, June 22, 2017

Sweet Birthday Wishes

Hello Blogger Friends! Thanks for taking the time to stop and visit with the Charmed Life Blog this beautiful day in June.
 
Well, it's official according to the calendar. Summer is here. Although, we have been having summer temps for a couple of weeks here in Pittsburgh. The gardens will begin producing profusely.
 
I am so looking forward to garden tomatoes. My hubby planted several different varieties for us to enjoy. And, in August I will be going through my canning process. It's become a summer ritual for me and I really enjoy doing it.
 
I have taught my daughter-in-law and she enjoys it immensely as well.  We both use the water bath method and the freezer method. For the freezer, I roast the tomatoes with onions and garlic and then put them in freezer bags. It's such a delight to pull them out in mid-winter to enjoy as a marinara sauce or in other recipes.
 
Now onto my card for today. This is another sample I created for the Splitcoaststampers color challenge #639. Maura was our hostess and she chose tempting turquoise, crushed curry and pumpkin pie. Optional this week is summer treats. So of course, I chose ice cream. What's better than that in the summer?

My background is stamped in pumpkin pie with the Stampin'-Up brushstrokes stamp. The birthday sentiment is from Verve and stamped in tempting turquoise.

My ice cream cone is from the MFT "sweet treats die". The stitched circle and sweet phrase are dies from CottageCutz.

To complete my card I used some twine and scattered a few pumpkin enamel dots.
 
Well that's it for me for this post. So until next time ..........God bless.
 
card details:
Stamps: brushstrokes (Stampin'-Up), be blessed (Verve)
Paper: whisper white, pumpkin pie, crushed curry, tempting turquoise
Paper Size: A2  
Ink: tempting turquoise, pumpkin pie  
Accessories: Sweet treats die (MFT), stitched circle die, sweet phrase (CottageCutz), twine, enamel dots (Stampin'-Up)
 
I am also entering: 
1.  Simon Says Stamp Wednesday challenge is patterned paper-you can make you own as well.
2.  Crafty Addicts has an anything goes with option or using die cuts.
3.  Create and Makes challenge is anything goes with an option to use yellow. 

Sunday, June 18, 2017

Father's Day Fox

Hello Blogger Friends! Thanks for taking the time to stop and visit on this Sunday in June.
We are celebrating Father's Day today but without our sons or grandkids. My youngest son lives in California and the oldest one and his family left for the beach yesterday. It's their year to go with my daughter-in-law's family. So we are taking care of their dog.
Today I will make my hubby a special dinner and just let him relax. The US Open (golf) is on TV so he will probably watch that. He is a great Dad and Granddad so a day to honor that is wonderful.
 
I showed his card yesterday. See that here. And, today I am showing the card that  I sent to my son in California. So let's get started with some details on how I created this card.
 
crushed curry, pumpkin pie, tempting turquoise
This is my card for the Splitcoaststampers Color Challenge #639. Maura was our hostess and she has chosen tempting turquoise, crushed curry and pumpkin pie for her color trio. Optional this week is to add the treats of summer to your card.

I needed a Father's Day card so I didn't use the option on this card.  My sweet granddaughter will love the fox.

I used a kaleidoscope stencil + sponge dauber for my background and the challenge colors. I thought it made a nice masculine backdrop for my little fox.

The fox and log are dies from CottageCutz - the Forest Peekers Fox and the Log for Peekers. I cut the fox in pumpkin pie cardstock and then sponged with the same ink ink. I wanted to deepen his color a bit to make him look like a red fox.

The sentiment is from the "Man of the Hour" set from Waltzingmouse. Cut it with a flag die. Well that's my card for today. I hope you are enjoying your Sunday whatever plans you may have. Until next time........God bless.
 
card details:
Stamps: man of the hour (Waltzingmouse)
Paper: pumpkin pie, choc chip, crushed curry, basic black, whisper white  
Paper Size: A2  
Ink: crushed curry, pumpkin pie, tempting turquoise (Stampin'-Up), tuxedo black (Memento)
Accessories: kaleidoscope stencil (Stencil Ease), log for peekers, forest peekers, fox (CottageCutz)  
Techniques: stenciling
 
I am also entering:
1.  2 Crafty Critter Crazies has an anything goes with a critter challenge.
2.  Crafty Purple Frog has a make it manly challenge.
3Just For Fun Rubber Stamps has a for the guys challenge

Saturday, June 17, 2017

~ Aweseome Dad ~

Hello Blogger Friends! Thanks for taking the time to stop and visit with the Charmed Life Blog on this Saturday in June. 
 
We have been having some heavy rain and thunder storms the past few days. It has caused some flash flooding in several areas in Pittsburgh. My home has experienced no flooding or other damage. We are supposed to have some more heavy storms on Sunday. Hopefully, flooding won't be another issue.
 
Tomorrow is Father's Day here in the US. Not sure if that is a world wide holiday or not. The card I created today is for my weekly DT post on the CottageCutz blog.  This is also the card I will be giving to my hubby to celebrate his special day. He is an awesome dad and Grandfather.
 
I wanted to use the Awesome Phrase die and started thinking of how I could incorporate that into a Father's Day card.

I wanted the card to reflect my hubby as extraordinary & impressive and also to have an image that reflected that as well. I came up with a dinosaur image. They were grand and striking animals. So my card idea was born. Maybe I think to much (LOL), but it helps me to create when I have a theme in mind.

So let's get started with some details on my card for this week.

Step 1: Once my card theme was set, I needed a layout for my card. I saw the  Splitcoaststampers Sketch #649 and thought it would work perfectly. When I look at a sketch I guesstimate the layer sizes. I usually start with an A2 base then go form there. It looked to me as though layer #2 had a 1/4" border on this layout. Once I figured that size, the other panel sizes became a bit easier.
 
Burgundy Card Base: 5 1/2" x 4 1/4"
Striped Patterned Paper (layer #2): 4 7/8" x 3 5/8"
Lime rectangle Panel: (layer #4) 4 7/8" x 1 3/4"
Navy Blue Rectangle Panel (layer #5) 4 7/8" x 1 5/8"
Sentiment Circle: (layer #6): circle dies -3rd largest
Step 2: I looked through my patterned paper and cardstock for my colors. I thought this striped paper had a nice masculine appeal, and I could also use it for layer #3 in the sketch. The striped paper has burgundy, navy blue. lime green, emerald green and peach. I cut the papers to the above sizes and die cut my circles. Navy blue is a hard color for me to photograph for some reason. It looks black in this photo.
 
Step 3: I die cut my dinosaur and my word phrase. I wasn't sure at first what color to make the awesome word or the dinosaur. So I cut several staying with the card colors. But in the end, the dino ending up lime green and a darker contrast green. His bony spine is cut in peach also one of the colors in the striped paper. The awesome phrase look best in the burgundy color.
Step 4: Next I stamped my sentiment in night of navy ink. I just wanted the Dad portion of the stamp for my circle. So I taped off all the words except Dad and inked up that part of the stamp. I used my MISTI just in case  I needed to stamp the sentiment more than one time. And, as it turned out the image did stamp dark enough the first time so had to re-stamp. If you look at my finished card you will see the difference a second stamping made.


Step 5: Now that all the dies are cut and sentiment stamped, it 's time for card assembly. I added a couple peach enamel dots and a peach heart to complete my Father's Day card.
 
Well, that's it for me for this post. So until next time.........God bless.
 
Dies I used to create card:
http://www.scrappingcottage.com/cottagecutzbabydino-stegosaurus.aspx

http://www.scrappingcottage.com/cottagecutzexpressionsplusawesomephrase.aspx

I am also entering:
1.  Crafty Calendar Challenge for June is "boys will be boys".
2.  Craft Rocket Challenges has a for the men/boys challenge.
3.  Cardz 4 Guyz has a something blue for Father's Day. My rectangle panel is blue and my sentiment is stamped in navy blue.
4.  Cuttlebug Mania has a Father's Day challenge.

LinkWithin

Related Posts with Thumbnails