Wednesday, July 6, 2016

~Framed Sofa & Chair Scene~

 
Hello Blogger Friends and thanks for taking the time to stop and visit with the Charmed Life Blog.
 
Today started quite early for me since 2 of my brothers came over to help me prepare some food for Aidin's (middle grandson) grad party on Friday night. We have our Mom's recipe for enchiladas that I have never prepared, believe it or not.
 
My brothers are great cooks and have made these many times for our family reunions and get togethers. Aidin had specifically requested these for his party food. Well as a matter of fact he asked for all his favorite dishes to be served at the party. So my daughter-in-law has been busy cooking away for a couple of weeks now. It will be a fun family night with both sides of the family as well as friends and lots of good food.
 
Aidin goes off to the University of Kentucky in a month. He is excited although it will be an emotional time for my daughter-in-law. Anyway, let's move onto my card for today.
 
This one I made for my DT blog post on the CottageCutz Blog.Today for your viewing pleasure, I am featuring several new dies set from the June "Home Sweet Home" release.  I thought I would make a card to send to a friend who has had some stressful days at work. We all need to take time to relax a bit. Don't you agree? The sofa & chair dies were so perfect for my card idea. So let's get started with some card details.
 
Card Base: 5 1/2"  x 4 1/4" - used Stampin'-Up coastal cabana cardstock.
Embossed Paper Layer:  5 3/8" x 4 1/8" - used Stampin'-Up vanilla cardstock.
 
 
Step 1.  Created the background texture using an embossing folder and my BigShot machine.
Step 2. I wanted this panel raised from the card base. The card has nice dimension that's not picked up in these photos. I decided not to use mounting tape. Instead I had some fun foam which works quite nicely. I only had blue but once it's on the blue card base you can't really see it. It gives about an 1/8" lift to the panel. 

 
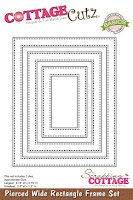
Step 3:  I die cut the frame using the Pierced Wide Rectangle Frame set and attached it to the embossed layer. Added some pearls to the frame corners. I die cut my sofa and chair with Stmpin'-Up baked brown sugar cardstock and the sofa pillows with  striped designer paper from the retro fresh collection. This card could also work for a guy just by eliminating the pearls.
 
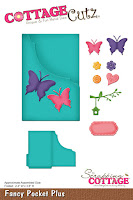
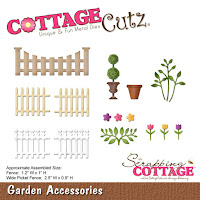
Since I don't have the floor lamps, rugs and plant dies, I punched an oval for my rug and used the flower pot from the Garden Accessories and the leaves from the Fancy Pocket Plus to create my plant. Just another way to get more use out of the CottageCutz dies you own.  I attached the dies with a variety of adhesives - double sided tape, glue dots and multi-matte medium.
 
Step 4. To complete my card, I stamped my sentiment on a die that is also part of the Fancy Pocket Plus set. I added a bit of thick baker's twine that matches my cardstock color. I decided to add a couple of cats to this scene because my friend likes cats and that finishes off the card. 
 
Well friends, that's it for me for today, so until next time...God bless.
 
http://www.scrappingcottage.com/cottagecutzsofaandchair.aspx

http://www.scrappingcottage.com/cottagecutzpiercedwiderectangleframesetbasics.aspx
http://www.scrappingcottage.com/cottagecutzfancypocketplus.aspx


Monday, July 4, 2016

~Life ~Moments~Breath~

 
Hello Blogger Friends and a happy 4th of July to you all. It's America's 240th birthday and a day filled with lots of festivities, fireworks and fun.
 
I read somewhere that there are 14,000 fireworks celebrations across the USA today. From the very beginning, there have been celebrations held on July 4th with parades, speeches and the public reading of the Declaration.
 
Yesterday in church our Pastor mentioned a scripture that is engraved on the Liberty Bell in Philadelphia, PA. The scripture is from Leviticus 25:10 and reads: "Proclaim liberty throughout all the land unto all inhabitants thereof." I don't think I knew that before or I just didn't remember it.
 
Some other facts that I did know about the Liberty Bell history is that on July 8, 1776 a chime went out from Independence Hall in Philadelphia to invite people to hear the reading of the Declaration of Independence. It was the first public reading of the document. I know there are reenactments of this reading around the US. One of them is in Williamsburg, VA. I have seen that one and it is awesome.
 
Now let's move onto my card for today. I didn't create any patriotic cards. I usually do that on Veterans Day and send them to family members that have served in our military.  
 
This CAS card is using some dies and washi tape and a stamp from a wedding set I have. I don't use washi tape very often but I always like the look I get when I do use it.
 
The feathers are dies from Impression Obsession. I cut them in Stampin'-Up colors of baked brown sugar, coastal cabana and designer paper from the "retro fresh" collection. The washi tape is a match to the paper. 

The sentiment is a old stamp set from Artful Inkables. It's their wedding silhouettes set. I have always liked this sentiment and thought it could be used for other cards besides wedding. Although it does make for a great sentiment for a wedding card as well.

I used a toothbrush and a reinker and sprayed my card for some background effect. And then, to finish off my card I used the MFT sequins die and cut some sequins in the baked brown sugar color. Well, that's it for me for today.  So until next time.........God bless.
 
card details:
Stamps: wedding silhouettes (Artful Inkables)
Paper: so saffron, baked brown sugar, coastal cabana, retro fresh designer paper (Stampin-Up)
Paper Size: A2 
Ink: bermuda bay
Accessories: Retro Fresh washi tape & bermuda bay reinker (SU), MFT sequins die, Impression Obsession feathers die 
 
I am also entering:  
1.  Dragonfly Dreams has an anything goes challenge.  
2.  Lil Patch of Crafty Friends has an anything goes challenge.
3.  A Bit More time to Craft has an anything goes challenge.
 

Friday, July 1, 2016

Bird Trio

 
Hello Blogger Friends and a happy Friday to you all. we are getting ready to celebrate the 4th of July holiday weekend here in the US.
 
There will be lots of festivities and fireworks everywhere. It's always a fun weekend. We are going to a friends home for a backyard barbecue on Sunday. Then on Monday we will probably bring my Mother-in-Law here for a cookout at our home.
 
Our local community always has a fantastic fireworks display but they moved the location this year. So I am not sure what we will do. The new location might just be a bit tricky for parking.
 
Now onto my post for today. This card I am showing over on the CottageCutz blog for a 2nd DT post this week. Today for your viewing pleasure, I am featuring the bird trio die from the May "This & That" release.
 
This die could be used for a variety of card types, and I made it as a card of encouragement for my BFF who is battling breast cancer. So let's get started on some details on how I made this card.
 
Card Base: 4 1/4" x 5 1/2"
Designer Paper Layer: 4 1/8" x 5 3/8"
Image Panel: 3 1/4" square (largest CottageCutz square die)
Angled panels: 1 1/4" wide & 1/2" wide (trimmed at ends to fit card)
Sentiment flag: 5/8" wide

I started this card by selecting my colors first. I found this rich looking designer paper in my stash from the Stampin'-Up "Bohemian Collection" and that determined my card colors. I am using rich razzleberry, delightful dijon and bermuda bay. I also used an older MojoMonday #453 sketch for my card layout.
 I did some sponging of clouds for the background. Used a cloud template I have which makes it so easy to get perfect clouds every time. I used the grass stamp from the Stampin'-Up "Sheltering Tree" set for a little green and the background was complete.
I die cut the bird trio in the Bermuda bay cardstock and layered that over the background panel. Added a sun that is cut from the Spring Stamps die to complete the image panel.
 
 
Stamped my sentiment from the ODBD "He watches Me" set on the flag panel to complete this card. I also made a matching envelope to use with this card. I used the bird images from the Stampin'-Up set "serene silhouettes". I thought it was a pretty good match for my die cut.


Well, that's it for me for today. Before I go and speaking of bird trios. We have a robin's nest underneath our deck. Today the little ones heard my hubby and I talking and put their heads up and mouths open. I pulled out our 6ft step ladder and took a quick photo while they were performing. Mama Bird wasn't around so I didn't get attacked (lol)!!!


card details:
Stamps: Sheltering Tree, Serene Silhouettes (Stampin'-Up), He Watches Me (Our Daily BreadDesigns)  
Paper: rich razzleberry, delightful dijon, bermuda bay, very vanilla, bohemian dsp (Stampin'-Up) 
Paper Size: A2  
Ink: bashful blue, old olive (Stampin'-Up), tuxedo black (Memento)  
Accessories: Bird Trio & Spring Stamps dies (CottageCutz), flag stax (MFT)   
http://www.scrappingcottage.com/cottagecutzspringstamps.aspx
http://www.scrappingcottage.com/cottagecutzbirdtrioelites.aspx
http://www.scrappingcottage.com/cottagecutzsquaresetbasics.aspx
I am also entering:
1.  Cute Card Thursday has a banner/flag challenge.


Thursday, June 30, 2016

Welcome To the Neighborhood

 
Hello Blogger Friends! Thanks for taking the time to stop and visit with the Charmed Life Blog. It's such a beautiful summer day here in Pittsburgh. Lots of sunshine warm temps and no humidity. We have all our windows open and a gentle breeze is blowing through the house. Love days like this when we can give the air conditioner a break.
 
Today is my day for posting my DT creation on the CottageCutz Blog. For your viewing pleasure, I am featuring several new dies set from the June "Home Sweet Home" release. This release is chock full of dies that are all about the home. 

I thought I would make a "welcome to the neighborhood" card and also make it an easel card. Here in my neighborhood we have a lot of new families with young children that are moving in. So a handmade card along with a meal or a dessert is what I like to do to welcome them. It is always so appreciated by the busy Mom's and Dad's.
 
So let's get started with the details on how I created this easel card. Just an fyi - you can click on any photo to make it larger.

Step 1: cut your cardstock to 4 ¼” x 11”. Score at 5 ½” and then at 8 ¼”. Your card front will measure 5 ½”.
 
Step 2: Fold your card in half and then fold the other score line in the opposite direction.
 
Step 3: Use Scor-tape or other strong double sided adhesive on the small flap. Remove the liner and tape another piece of cardstock cut at 4 /14’ x 5 ½” to the tape lined flap.
 
Step 4: This creates the easel card base. Now it’s time to decorate the card front.
 
Since this is an outdoor scene, I wanted to add some sponged clouds to the card front. I have a well used cloud template. Even though its stained with blue inks, it doesn't affect your card. I move it around several times until I get the look I want.
I sponged just a few clouds on the white cardstock panel. This layer measures 4 1/8" x 5 3/8".


Then I started my die cutting. I used the Build-A-House Set 1. This set has the ability to make 3 different style houses. It also includes doors, windows, window boxes, a dormer and a chimney. It's an awesome set of dies, my friends. For the glass panes in the windows and door, I used vellum paper and sponged lightly with yellow distress ink. I wanted to give the appearance of light inside the house. 
 
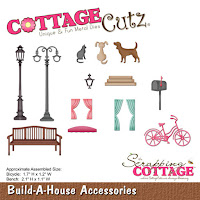
For my outside accessories, I used the CottageCutz Build-A-House and the Garden Accessories dies. I added the lamppost, front steps, a mailbox, a fence and some pretty tulips. I added a sun that was cut from the Springs Stamps die collection. That completed my card front. Love all the detail on the roof.
 
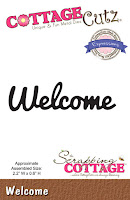
Now it's time to start the inside and complete the easel look. In order to have the easel card stand up by itself, add an embellishment or an extra layer to the inside of the card. On my card I used the welcome word to keep the card from closing. Ideally, place the embellishment or layer at least 1/3 up from the bottom.
 
 
There are several new Expressions word dies released this month and the Welcome word is one of them. I used it along with my stamped sentiment for a welcoming message. I added some homemade enamel dots and a little black dog to complete my card. The dog is part of the Build-A-House Accessories dies.
 
 
Well, friends that's it for me for today. Hope you enjoyed my little tutorial. Until next time.......God bless.
 
Dies Used:
http://www.scrappingcottage.com/cottagecutzbuild-a-houseset1includes2dies.aspx

http://www.scrappingcottage.com/cottagecutzbuild-a-houseaccessories.aspx

http://www.scrappingcottage.com/cottagecutzgardenaccessories.aspx

http://www.scrappingcottage.com/cottagecutzexpressionswelcome.aspx
 
I m also entering:
1.  Crafty Girls Creations has an anything goes challenge.
2.  Southern Girls has an anything goes challenge.
3.  Sisterhood of Crafters has a create your own background challenge.


Wednesday, June 29, 2016

~Nautical Hugs From Afar~

 
Hello Blogger Friends! Thanks for taking the time to stop and visit with the Charmed Life Blog. I think I have recovered from my West Coast trip. It seems to take me a few days to get back on East Coast time. I may be going back in mid-August for a week or so. Not sure yet.
 
Our next big trip will be to the beach in mid-July. I love going to the beach with my family. It's always a relaxing time and wonderful conversations with my grandsons. This year we are going to the Isle of Palms which is near Charleston, South Carolina. I am looking forward to going into Charleston and do some sight seeing.
 
Now onto my card for today. This one I made using the salted background technique. I used some Stampin-Up reinkers in coastal cabana, bashful blue and night of navy and an aqua brush and painted onto glossy cardstock. Then I sprinkled with chunky sea salt and spritzed with more water. the colors will blend a little more at this point. I set it aside to dry. After it dries you just brush off the salt.
 
With this technique, you get a different look each time you do it. It also depends on the colors you use. This one reminded me of water and sky so I went with a nautical theme.
 
My sailboat is from Memory Box and the airplane and banner are from Impression Obsession. The sentiment I used is from Verve. Well, my friends that's it for me for today. Have lots to do around my home. Nothing fun just chores like laundry and spot cleaning etc.
 
So until next time........God bless.
 
card details:
Stamps: Verve
Paper: night of navy, white, Kromekote glossy card stock
Paper Size: A2   
Ink: Reinkers: bashful blue, coastal cabana, night of navy   
Accessories: aqua painter, marina sailboats (Memory Box), plane with banner die (Impression Obsession)  
Techniques: salted background
 
I am also entering:
1.  Simon Says Stamp Wednesday Challenge is anything goes.
2  Crafty Creations has an anything goes challenge.
3.  Crafty Gals Corner has an anything goes challenge.
4.  Inky Impressions has a Summertime Challenge.
5.  Mod Squad Challenge is Nautical.
 

Monday, June 27, 2016

~Whale Done~

Hello Blogger Friends! Thanks for taking the time to stop and visit with the Charmed Life Blog. I returned from San Francisco in the wee hours of Friday. A series of mishaps in San Francisco caused me to have my flight rescheduled. So instead of returning at 8:30 pm I didn't get in until 1:00 am. I am still running on West Coast time so hopefully my internal clock adapts back to my time zone quickly.

It was a great visit with Phoenix Daisy, and I am already looking forward to her visit next month for 10 days here in Pittsburgh. She even gets to stay with me along for 4 days while her parents take a little side trip.

It will be a first for her and she is excited. Hopefully that excitement transfers over to bedtime when Mommy isn't here. I don't have any trouble at all in San Francisco at bedtime. I am thinking it will be the same here In Pittsburgh.

Now onto my card for today. This one I created as my sample for the color challenge #589 on Splitcoaststampers. Barbara is our hostess and she rose red, elegant eggplant and island indigo for her color trio. Optional this week is to use ribbon.

rose red, elegant eggplant, island indigo
This week we are also saying goodbye to Peggy aka pegmac71 and so we decided to dedicate the challenge to her this week. You can read more about it here. I went with a beach themed card because Peggy loves the beach. Well who wouldn’t- living in Florida (lol)!! You know what I mean???


I am using some new dies from Reverse Confetti and also their June sketch #37. Love the octopus as well as the little crab stamps and dies.


 My background designer paper is from the Stampin-Up “festival of prints” collection. I thought the stripes gave it some nautical appeal. The colors in the paper are island indigo and early espresso. Espresso is a deep rich brown shade but sometimes it wants to photo darker and look black. I am using it as one of my neutrals this week along with very vanilla.

Stamped my octopus and crab in rose red ink and the whale in island indigo ink. To get the eggplant color on the card and this week's optional, I used elegant eggplant ribbon and candy dots. The side flags are cut from early espresso cardstock.
 
The sentiment is from the Reverse Confetti “seaside” set. I stamped in elegant eggplant ink. I chose this sentiment because Peggy has done a fantastic job for the past 7 years for our team. Goodbye and God bless my sweet friend.

Well, that's it for me for today. So until next time........

Card details:
Stamps: seaside (Reverse Confetti)
Ink: rose red, elegant eggplant, island indigo (Stampin’-Up)
Paper: island indigo, very vanilla, early espresso, festival of prints dsp (Stampin;-Up)
Accessories: seaside dies (Reverse Confetti), elegant eggplant enamel dots & grosgrain ribbon (Stampin’-Up)flag stax die (MFT)


I am also entering:
1.  Crafting From the Heart has an anything goes challenge.
2.  Use Your Stuff has a good things in 3's challenge. I used 3 images-3 colors-3 embellies-ribbon-enamel dots and flags
3.  Lil Patch of Crafty Friends has an anything goes challenge.


Wednesday, June 22, 2016

~Christmas Candles~


Hello Blogger Friends! Thanks for taking the time to stop and visit with the Charmed Life Blog. I am still out in San Francisco although today is my last day here. 

My son and daughter-in-law returned home last night. She went to do some errands and Phoenix Daisy wanted to go with her. So I took the opportunity to get a blog post done. Tonight we are going out to dinner to celebrate Father's Day since they were in Mexico on Sunday. And before dinner the girls are going to a ceramic shop to do a little painting before we meet up with my son. It will be fun.

I miss my hubby and am ready to go back home. Tomorrow will be a long day of travel. They are all coming here in July for 10 days so I will get to spend time with them soon. Looking forward to their visit.  Phoenix will get to stay with me alone for 3 days while my son and daughter-in-law go to a concert. She and I are both excited about that. 

Now onto my card for today. This one I created for the color challenge ##585. I was the hostess for this challenge, and I chose wild wasabi, cherry cobbler and gold  for the color trio. I decided to go with a Christmas theme for my card. 

I used some Memory Box dies to create the Christmas candle and window scene. On the background, I used the Kassie's Brocade embossing folder from Cuttlebug. I inked it up with gold ink before putting my paper inside. 

For the sentiment, I used the Stampin'-Up set "come to Bethlehem". Used the MFT bracket die as an anchor. I plan on making about 10 of this design for Christmas. 

Well, my friends that's it for me for today. My next post will be done from my home in Pittsburgh. So until next time.......God bless.
card details:
Stamps: come to Bethlehem (Stampin'-Up)
Paper: cherry cobbler, wild wasabi, whisper white (Stampin'-Up), gold mirror, ivory metallic(Recollections)
Paper Size: A2
Ink: wild wasabi (Stampin'-Up), tuxedo black (Memento), gold (color box)
Accessories: glowing candles, small gothic arch, small gothic window (Memory Box), bracket tab (MFT), Kassie's brocade EF (Cuttlebug)

I am also entering:
1.  Stampin' Royalty has a "to die for" challenge. 
2.  Simon Says Stamp Wednesday challenge is to add a little shimmer. 
3.  A Snowflakes Promise has an anything goes Christmas challenge. 

Sunday, June 19, 2016

~Father's Day Lighthouse~


Hello Blogger Friends! Thanks for taking the time to stop and visit wit the Charmed Life Blog. Today is Father's Day here in the US. 

I am still away in San Francisco taking care of my granddaughter. We will celebrate Father's Day here on Wednesday when my son and daughter-in-law return from their little getaway. Then I will celebrate with my hubby when I return from San Francisco. 

While I was getting Phoenix Daisy ready for bed tonight she lost her 2nd baby tooth. She was so excited. We went through the process of putting it under her pillow and wait for the tooth fairy. It's been a few years since I went through this with her Daddy. It was exciting for me as well. I will post the photo I took of her tomorrow. It's on my cell phone and I am typing this post late and want to get it finished to get to bed. I will have a busy day with her tomorrow and she does wear me out. 

So let's move onto my card for today. This one I made for my son in Pittsburgh for Father's Day. I used the colors from the Splitcoaststampers color challenge #579. I was the hostess and I chose lost lagoon, hello honey and basic gray for my color palette. Optional was to make it masculine. 

I started by stenciling a sun in hello honey ink for my background. For my water, I used a stamp from PaperTrey Ink- the "ombre builders" set. It reminds me of waves. My Misti tool came in handy for placement and repeat stamping. The sentiment is a set from Waltzingmouse "man of the hour" also stamped in lost lagoon. 

Now for my die cut images. The lighthouse, sailboat and birds are dies from CottageCutz. They are part of the Nautical Release

For my sand, I used the Lawn Fawn hillside die and cut with whisper white cardstock. Sponged with crumb cake and soft suede ink and then for the sand granules, I used a stamp from Just For Fun but just inked up the sand grains with crumb cake ink.

Well, that's it for me for today. Time to get myself into bed and rest this body for tomorrow's full day with Phoenix Daisy. So until next time........God bless.
card details:
Stamps: man of the hour (Waltzingmouse), ombre builders (PaperTrey Ink), sunset at the seashore (Just For Fun)
Paper: lost lagoon, whisper white, basic gray, hello honey
Paper Size: A2
Ink: lost lagoon, hello honey, crumb cake, soft suede
Accessories: : sailboat (large) & lighthouse with clouds dies (CottageCutz), Sunray stencil (MFT), stitched hillsides die (Lawn Fawn)


I am also entering:
1.   Amusing Challenges wants us to go masculine. 
2.  Come and Get It Challenge is Father's Day. 
3.  Crafty Calendar Challenge has a Father's Day/for a male.

LinkWithin

Related Posts with Thumbnails