Tuesday, May 16, 2017

~ Hummingbird Hugs ~

Hello Blogger friends! Thanks for taking the time to stop and visit with the Charmed Life Blog.
 
This week our Preschool year is coming to an end. Thursday we have a fun day planned for the kids. We have a bouncy house, face painting and a fun art project. We also are going to serve ice cream cones for snack. They will love these especially because we will roll them in sprinkles.
 
I will really miss this group of kiddos. They were by far the best class of 3 year olds we have had. They all worked their way into my heart. But, we can't keep them little forever. I have certainly learned that lesson with my own grandkids.
 
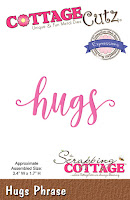
Before, I get all emotional let's move on to my card for today. This one I made for my weekly DT post on the CottageCutz blog. There is another great release of new dies over in the online store. The Expressions Plus (word dies) with 35 designs are currently on promotional pricing and are 25% off. The font is so beautiful and you will definitely want these in your collection.

For your viewing pleasure today, I am featuring one of the new dies. It's the hugs phrase along with the hummingbird die.  So let's get started with some details on this card.

I started my card this week with the card colors. I am using the colors from the Splitcoaststampers color challenge #636. They are Peekaboo Peach, Calypso Coral and Always Artichoke. Once that was decided, I started thinking about my layout. I am using the MojoMonday #497 sketch.
peekaboo peach, calypso coral, always artichoke

 
 Card Sizes:Card base: 4 3/8" x 5 5/8"
Calypso Coral Layer: 4 1/4" x 5 1/2"
Coral Designer Paper Layer: 4 1/8" x 5 3/8"
Vanilla Rectangle Layer: 2 1/4" x 4 3/4"
Calypso Coral Flower Paper: 2 1/8" x 4 5/8"
Image Layer: 2 3/8" x 4 1/8"
Calypso Coral Layering Panel: 2 1/2" x 4 1/4"

Step 1: I first figured out all the card panel sizes. Since I had the card colors, I looked through my patterned papers and found these ones in the coral shade. I decided I would go after a more monochrome look. I liked the gradient look on the background panel. I ended up putting the lighter shade at the top.
 
Step 2: I cut the flowers in peach and coral cardstocks and the leaves in artichoke. The hummingbird I cut in white cardstock and then sponged in coral, peach and a bit of artichoke.
 
Step 3:  I am now ready to start the card assembly. I wanted to show how I did my angled panel. I attached it onto the patterned paper panel at an angle with double sided tape . I used my craft knife and trimmed off the excess.


Step 4: The Hugs Phrase is cut with both artichoke and coral cardstocks. I did a slight offset for added interest. Here is a close-up shot of the hugs phrase as well as the hummingbird.

 
Well, that's it for me for this post. So until next time........God bless.

Dies I used to create card:
http://www.scrappingcottage.com/cottagecutzhummingbird4x4pre-order.aspx

http://www.scrappingcottage.com/cottagecutzexpressionsplushugsphrase.aspx
 
 
I am also entering:
1.  Crafting From the Heart has an anything goes challenge.
2.  Crafty Cardmakers has an add a sentiment challenge.
3.  A Bit More Time to Craft has an anything goes challenge.
4.  Classic Design Team Open Challenge is anything goes.
 

Wednesday, May 10, 2017

~ I Woof You ~

Hello Blogger Friends! Thanks for taking the time to stop and visit with the Charmed Life Blog.
 
I went to a garage sale on Saturday, in spite of all the rain we had. It was rainy and cold all day long. A friend of mine had this sale and she was selling a bike. It is in really good shape and I have been looking for a secondhand one.
 
We have lots of bike trails here in the Pittsburgh area and it is great exercise. I am not going to do any serious riding. My plan is to go a few miles on the trails. I have a friend who is interested in riding with me. So once school ends in a couple of weeks, I will be set to go. And having a riding partner is always good. I will keep you posted on the success of my plan.
 
Now onto my card for today. This one I created for the Virtual Stamp Night challenges on Splitcoaststampers. This is my card for Katlyn's color crazy challenge. She wants us to use pink and brown and extra points if we use a dog image.

My card used sketch # SC638 from Splitcoaststampers.  The background designer paper is some really old Stampin'-Up that I found in my stash.

My dog image is from the CottageCutz "jolly snowman" die. It just happened to have a dog image with it. The bones and paw print are a die from MFT.
 
I made this for my daughter-in-law for Mother's Day. Their dog is like one of their kids and he loves her so. She will think its cute and I am hoping to get a paw print from him on the inside of the card. That might be tough but we will see.
 
Well, that's my card for today. So until next time........God bless.
 
card details:
Stamps: Woof You (SNSS)  
Paper: close to cocoa, pretty in pink, taken with teal, dsp (Stampin'-Up) 
Paper Size: A2  
Ink: close to cocoa  
Accessories: jolly snowman, stitched rectangle dies (CottageCutz), pet accents (MFT)
 
CottageCutz dies: 
http://www.scrappingcottage.com/cottagecutzjollysnowman4x6.aspx
I am also entering:
1.  Addicted to Stamps and more challenge #241 is anything goes.
2.  Little Red Wagon has a punny projects challenge.
3.  Simon Says Stamp Wednesday challenge is going dotty.
4.  The Crafty Addicts challenge is to add a sentiment.  


Saturday, May 6, 2017

Dinosaur Birthday Kisses

Hello Blogger Friends! Thanks for taking the time to stop and visit this 1st Saturday in May.
 
It's rainy and a bit cool here in Pittsburgh but Spring is here for sure. Gardens are budding and blooming and we have already had our first lettuce harvest. And today, I will be cutting some basil- hopefully there is enough to make pesto.
 
Let's move to my card for today. This one I made for my weekly DT post on the CottageCutz Blog. Today for your viewing pleasure, I am showcasing a couple of the new baby dino dies using the Brontosaurus and T-Rex. I needed a child's birthday card and these dino's work perfectly. What little one doesn't love dinosaur's? And that's both boys and girls.

So let's get started with some details on what I did this week. I already knew I was making a birthday card so I just needed my layout. So when I saw the Splitcoaststampers sketch #643 for this week, I knew it would work for a little dinosaur scene.
 
Sweet Sugarplum Card Base: 4 1/2 " x 5 3/4"
White Image Panel: 4 1/4" x 5 1/2"
I used a hinge technique to get this larger size card base. Here is a link to some instructions I provided previously on how I do this with 8 1/2" x 11" cardstock.

Step 1: Once I looked at this sketch, I thought I would make rolling hills as the spot to place my dino's. I was going to cut the hills but after looking through my patterned paper, I found paper that already had the shape of the hills. I just needed to measure and fussy cut. The paper even had a little pattern. It's the look I was after.

Step 2: Once the hills were cut I adhered to white card base with dimensional adhesive. I used a cloud template and sponged the top of the white cardstock with tumbled glass distress ink. The clouds are covering layer 1 of this sketch.
 
Step 3: I wanted 3 dino's in this scene so I cut one (1) T-Rex and two (2) from the Brontosaurus dies. On the Brontosaurus I used peekaboo peach card stock + peach designer paper and daffodil delight cardstock and + daffodil delight designer paper.
On the T-Rex I used sweet sugarplum and old olive cardstocks + sweet sugarplum designer paper. I like the variegated colors on the designer papers I chose. It adds some interest to the dinosaurs.

Step 4: I also used the CottageCutz grass, tree and vines die for another element to this card.  Now that all the card elements are done, I needed to think about my sentiment and the placement of it.
I used a stamp set from MFT with individual sentiment words so I chose birthday & kisses. Since they are 2 separate stamps, I stamped in black ink on sweet sugarplum cardstock and cut them into 2 labels. Here is a card close-up.
 
Well, that's it for me for this blog post. So until next time..........God bless.
 
dies I used to create card:
http://www.scrappingcottage.com/cottagecutzbabydino-brontosaurus.aspx

http://www.scrappingcottage.com/cottagecutzbabydino-t-rex.aspx

http://www.scrappingcottage.com/cottagecutzgrasstreeandvines.aspx
 
I am also entering:
1.  Crafty Friends has a cute challenge.
2.  Jo's Scrap Shack has a fun Friday challenge of anything goes.
3.  Polkadoodles has an anything goes.
4.  That's Crafty challenge is "bright".
 

Saturday, April 29, 2017

~ Christening Blessings~

Hello blogger Friends! Thanks for taking the time to stop and visit with the Charmed Life Blog.
 
I went back for day 2 of the Copic Class here in Pittsburgh. We covered a lot in this intermediate class including: shading with Copics, coloring trees, coloring with reds, coloring faces and hair. We had a fair amount of coloring time as well. I am glad that I took the class and now it's time to practice, practice practice.
 
Between the two classes I have plenty of images to color. So it's just the matter of me setting the time aside to do it. Our school season is drawing to a close so I will have open days available.  
 
Now onto my card for today. This one I made for my weekly DT post on the CottageCutz Blog. Today, for your viewing pleasure, I am showcasing the new girl christening gown die. It's such a beautiful die that cuts a sweet baby dress. So let's get started with some details on what I did this week.

I already had the card idea in mind. So when I saw the sketch #642 on Splitcoaststampers this week, I knew it would work perfectly as my layout. It's a square layout this week and one with lots of layers. So I was anxious to give it a try.
 
Vanilla Card Base: 5" square
Blush Pink Layer: 4 1/4" square
Blush Pink Patterned Paper Layer: 4 1/8" square
Champagne Mesh Ribbon Layer: 1 1/2"

Blush Pink Ribbon Layer:  1/2"

Step 1. I figured out my card sizes and then cut all the cardstock and patterned paper. I found this pretty blush pink paper in my stash. I liked how the hearts are cascading down the paper. On the reverse side is a pretty sand color lace pattern.

Step 2:  I wanted to have a cross in this design because it is a christening. And in this Christian ceremony the baby is dedicated to God. I decided to stencil the cross pattern instead of using the die cut. I was going after a very soft look for this card.
 
I used the Easter Cross die and cut the stencil from a window sheet. I used blush pink ink to stencil the cross. The paper size on this vanilla panel is 1 3/4" x 3 1/4" and the pink layering panel is 1 7/8" x 3 3/8". I used a corner rounder for some added interest. It's layer #6 on this sketch.
I decided to stamp my sentiment directly over the stenciled cross. I used a brown sugar ink. This sentiment is layer #7 in this sketch.

 
Step 3: I cut the christening gown in vanilla cardstock. The other pieces are cut in blush pink. This is another of the detailed dies from CottageCutz. With this die you can cut the collar, buttons, sleeve trim, waistband, bow and hemline. You have the option to cut in white and color the pieces,  or do as I did and cut with colored cardstock. I really like how this gown turned out. It's so soft and girlie.
 
Step 4: Time for card assembly. I originally was going to use the lace pattern that is on the reverse side of my patterned paper. But when I placed it on the card I thought it was a bit dark. So I used a champagne mesh and blush pink ribbon. It kept the softness of my card. To finish it off I added some pearls in the corner and a butterfly to the cross panel.

 
Well, that's it for me for this post. So until next time.........God bless.
 
Die I used to create card:
http://www.scrappingcottage.com/cottagecutzgirlchristeninggown.aspx
 
I am also entering:
1.  Hiding in my Craft Room has a freestyle challenge.
2.  Crafting with Friends has an anything goes challenge.
3.  Fussy and Fancy has an anything goes challenge.
 

Friday, April 28, 2017

Birthday (Shaving Cream Technique)

Hello Blogger Friends! Thanks for taking the time to stop and visit with the Charmed Life Blog.
It's Friday and another weekend is upon us. My weekend is centering around Copic markers. The Copic classes are being held here in Pittsburgh today and Saturday. I signed up for both the standard and intermediate classes.
 
In today's class, I learned about the Copic coloring system and what the letters and numbers mean. Markers to start your collection, how to refill the markers, coloring techniques, correcting mistakes and using the airbrush system. And, we also colored some images. The 7 hours went by so quickly. Tomorrow will be a 9.5 hour class and I am looking forward to it.
 
Our instructor, Debbie Olson, said that we need to practice, practice, practice to get results we will be happy with. We learn the methods in the class to take home and work with.
 
So more on what I learn in the class tomorrow in another post. Now, let's move onto my card for today. This one I made for one of the Virtual Stamping Night challenges on Splitcoaststampers. Kim was the hostess and her challenge was to use the shaving cream technique. She wants us to use that technique for our background or for die cuts. I did a background.

I used pumpkin pie, real red and pear pizzazz re-inkers to create my background.

The image panel is using the Stampin'-Up "field flowers" stamp set. It's a 2 step stamp set and to get the color gradient I stamped the watermelon wonder off 2x and then stamped the image.
The detail stamp is stamped full strength. I decided to fussy cut one of the flowers and pop it up on my card for added interest.

To finish the card off, I added some pear pizzazz ribbon and bow, then stamped my birthday sentiment. This one has already left my home. It was our Preschool director's birthday this past week and I was in charge of bringing the card.
 
Well, that's it for me for this post. So until next time........God bless.
 
card details:
Stamps: Field Flowers (Stampin'-Up), Seashells (MFP)  
Paper: pear pizzazz, watermelon wonder, whisper white  
Paper Size: A2
Ink: watermelon wonder, pear pizzazz, tuxedo black (Memento)
Accessories: pear pizzazz ribbon, pearls, reinkers: real red, pumpkin pie, pear pizzazz, shaving cream
Techniques: Shaving Cream
 
I am also entering:
1.  Aud Sentiments Challenge wants us to use a stamped sentiment.
2.  Simon Says Stamp has an anything goes challenge.  
3.  Seize The Birthday is an anything goes birthday challenge.
3. 


Saturday, April 22, 2017

Sending Hugs from Noah's Ark

Hello Blogger Friends! Thanks for taking the time to stop and visit with the Charmed Life Blog on this Saturday in April.
 
It's already a beautiful day here in Pittsburgh-sunny but on the cool side. But, the temps don't matter to me because Spring is officially here. Our spring flowers are blooming and the trees are budding.
I don't have any special plans for today. Hubby goes to work this afternoon so maybe I will just go into my craft room for a bit. That's always fun for me.
 
Now let's move onto my card for today. This one I created for my weekly DT post on the CottageCutz Blog.  
We just had the cutest release of baby dies. There are 42 different designs. So perfect for creating cards to welcome the new baby, baby birthday cards or even as baby shower invitations. I have several nieces who just got married and now are expecting so I will need baby cards soon. Just not right now and that may be where you are at.

So today for your viewing pleasure, I am showcasing the new Noah's Ark die. But, I am showing another way to use this die that isn't centered around a baby card. I featured this card on Tuesday using the choo choo train dies with the same idea. 

I needed a card of encouragement to send from a group of us. I thought all the ark animals would be perfect for a card of this type. So let's get started with some details on how I created this card.

Smoky Slate Card Base: 5 1/2" x 4 1/4"
Island Indigo Layer Panel: 5 3/8" x 4 1/8"
Designer Paper Image Panel: 5 1/4" x 4"


Step 1: This week I created my card design totally around my designer paper. I found this awesome scenic water and sky designer paper in my stash. It's from the Stampin'-Up "serene scenery" collection.
I thought it would be a great accompaniment to the ark. I really like using designer paper on my cards. So when the card design, dies and paper fit like a glove it's a win-win for me.
 
Step 2: I cut all the animals and the ark using different color cardstock. The colored picture on the die packaging is always the perfect colors-in my opinion. So I usually use colored cardstock that matches the picture.
 
 Step 3: I assembled the ark and placed all the animals in their assigned spot. Normally, I would do this right on the patterned paper but I only had 1 sheet of this paper and I didn't want to make a mistake or get glue somewhere it shouldn't be. You know how easily that can happen (lol)!!
 
 Step 4: I stamped my sentiment on this step. I used 2 different stamps and my MISTI for placement. I forgot to take a photo of this part of the process. Started assembling all the layers. I changed the base color to a light gray instead of the white I was going to use. I thought the smoky slate accented the island indigo panel and the designer paper more than the white.
 
Well, Blogger friends that's it for me for this post. I hope I have given you another idea on how to use these new dies. Until next time..........God bless!!!
 
Die I used to create card:
http://www.scrappingcottage.com/cottagecutznoahsark.aspx
I am also entering:
1. Crafty Friends has an anything goes challenge.
2. Brown Sugar Blog has a die cut challenge.  
3. Crafting with friends has an anything goes challenge.
 

Thursday, April 20, 2017

Fairy Hugs Shaving Cream Technique

Hello Blogger Friends and a happy Wednesday to you all.
 
We had a new mattress delivered this morning. We were long overdue in buying a new one. When you go to buy a mattress now you really get an education. Our sales person was very knowledgeable and we are confident that we made a good decision. We also have 90 days to try it and if it doesn't work we can return it and pick another mattress.
 
The delivery men were in and out within 10 minutes and even removed the old mattress. And, there were no issues getting it up our stairs. That was a bit of a concern with us. So tonight will be the first sleep test.
 
Now onto today's card. This one I made for one of the Virtual Stamp Night challenges on Splitcoaststampers.  Dawn Mercedes VSN APRVSN17M was the hostess for this challenge. She wants us to create a card w/o any stamps on it. I love using dies so that's the direction I went.

My background was made using the shaving cream challenge. Here is a link to this technique.

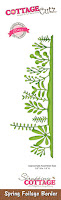
I used pumpkin pie, pear pizzazz and mossy meadow re-inkers with the shaving cream. I cut the foliage border in mossy meadow cardstock. The fairy was in my stash. The hugs word I cut in mossy meadow and pumpkin pie cardstock and then did a slight offset.

I found the pumpkin pie scalloped frame in my stash so I decided to use that. Secured it to my mossy meadow base and this card was done. It's time to dim the lights in Charmed Life land for another day. So until next time....................God bless.
 
card details:
Paper: mossy meadow, pumpkin pie, whisper white
Paper Size: A2  
Accessories: pumpkin pie, pear pizzazz, mossy meadow reinkers, spring fairy, spring foliage border dies (CottageCutz), rectangle die (Impression Obsession), hugs die (MFT)  
Techniques: Shaving Cream
 
Dies I used to create card:
1.  Crafts and Me has a things with wings challenge.
2.  Crafting with an Attitude #26 challenge is anything goes.
3.  Crafty Girls challenge #35 is anything goes.
4.  Creative Knockouts has a lots of layers challenge
http://www.scrappingcottage.com/cottagecutzspringfairyelites.aspx

http://www.scrappingcottage.com/cottagecutzspringfoliageborderelites.aspx
 I am also entering:
1. 

LinkWithin

Related Posts with Thumbnails