Wednesday, July 13, 2016

Screen Divider Card


Hello Blogger Friends and a happy Wednesday to you all. The countdown is on for me. I am leaving for the beach in South Carolina in a couple of days.
 
We are really looking forward to getting away and relaxing at the ocean. Lots of preparations still to be made to get ready to leave but I wanted to get this blog post up before I start my day.
 
This Screen Divider card I made for my weekly DT post on the CottageCutz blog. I have never made one of these before and I was really happy with how it turned out. So here are all the details and pictures of my process.
 
Card Base: 5 1/2" x 11"
Decorated Panels: 2 5/8" x 4 1/4"

Step 1: Score 5 1/2" x 11" cardstock at 2 3/4", 5 1/2", and 8-1/4" in the horizontal position.
 
Step 2: To create the Screen Divider fold, fold in half at 5 1/2" score then fold each side back in the opposite direction on the scored lines.


Step 3: Unfold card and lay flat. Using a border punch, create a punched border along the top edge of the card. I used a Martha Stewart trellis punch. I started punching at the 5 1/2" center point and worked my way across the card.
 
Step 4: To create "legs" at the bottom of the screen you can either use a punch or a die. For my card I used a punch. I worked with half of the card at a time. Keeping the two left panels folded, slide the bottom of those two panels into the punch (only 2 layers at a time will work). Position the cardstock about one-third of the way into the punch and center side to side, then punch.


Step 5: The screen divider is ready for decorating.

I started my 1st panel by sponging in some clouds with pool party ink using a cloud template.
 
Die-cut the pieces for this panel using the grass, trees & vines, build-a-house accessories, spring stamps and fancy pocket plus dies. Bike is cut in calypso coral cardstock, tree in gumball green and Stampin'-Up epic day designer paper, birdhouse in pool party.
 
The next panel I again used pool party ink to sponge the panel and gumball green for the grassy area. The dies are from the same sets listed above.
 
The 3rd panel is using the same dies listed above plus the garden accessories & hello spring dies. I cut a stencil from the clouds & sun die and sponged in the sun in the upper corner. I also added clouds and a grassy area. I wanted some small butterflies so I used a Martha Stewart punch for those.

 
On the last panel I used the spring bloom corner and the bicycle in grass  and the fancy pocket plus dies. I sponged the background in pool party ink. My corner is cut in calypso coral cardstock and the butterflies in rich razzleberry cardstock.
 
I adhered the panels to the screen divider and to hold in place I used some pool party ribbon that matches the card base.
 
 
Here are some other close-up shots of the card panels.


All sentiments are from Great impressions Stamps. I used the Little Pleasures (C402) and Love Summer Stamps (D462).
 
And, that my friends is my card for today. Thanks for sticking with me till the end of this post. I know it was a long one.
 
Also a reminder about the current challenge with CottageCutz. This one is to use Greenery and there are prizes to be won. Get more info here.
 
So until next time......God bless.
 
I am also entering:
1.  Great Impressions Stamps has an anything goes challenge.
2.  Simon Says Stamp wants us to create a scene.
3.  City Crafter has an on the border challenge.

Tuesday, July 12, 2016

~She was Amazing~

 
Hello Blogger friends and thanks for taking the time to stop and visit with the Charmed Life Blog.
 
We had a great weekend just spending time with family. Our middle grandson's graduation party was on Friday night and then on Sunday we went back to my son's home for leftovers.
 
Now this week there are lots of preparations to get ready for our beach vacation in Isle of Palms, SC. I love going to the beach and am so looking forward to the time away. We will be about 30 minutes from Charleston, SC. My hubby and I have wanted to go there to sightsee and explore the town. So this is a plus that we will be so close.
 
When we return home from the beach my youngest son who lives in San Francisco will be coming for a visit with his family. My sweet granddaughter, Phoenix Daisy will be here for 10 days. Nothing like family time in my mind. I love it!!!
 
Now onto my card for today. This one I made for the inspiration challenge #553 on Splitcoaststampers.  Audrie, as hostess, took us to the Style Black & White Living  Pinterest Board for our inspiration this week.
I found this piece of wall home décor and it was perfect for a card I wanted to make for my niece. She just finished her 1st year of college and made the dean's list. I am so proud of her.

To make my frame. I used the rectangle frame die from Impression Obsession. This is a great die because it cuts 7 different frames that can be inlaid. I used 3 of them for my card and cut the frames in black and layered them on my white card base.

My sentiment is from the Waltzingmouse set "half pint heroines". I scattered some sequins to complete this card.
 
Well, that's it for me for today. So until next time........God bless.
 
card details:
Stamps: half pint heroines (Waltzingmouse)  
Paper: thick whisper white, basic black (Stampin'-Up)
Paper Size: A2  
Ink: tuxedo black (Memento)
Accessories: rectangle die (Impression Obsession)

Saturday, July 9, 2016

~Island Sunset~

 
Hello Blogger Friends! Thanks for taking the time to stop and visit with the Charmed Life Blog. It's kind of a laid back Saturday at our home today.
 
We had my middle grandson's graduation party last night. It was a great time with family and friends. I always enjoy the chatting and comradery. We came home about 11:30 and just went off to bed.
 
My daughter-in-law did such a great job of planning the party, the food and all the small party accents. She had a dessert and candy table. The table centerpieces were these cute mason jars with blue and white flowers- Aidin's high school colors. The jar lids were cut in such a way to keep the flowers upright.
 
The appetizers were a fabulous charcuterie tray. There was so much on it but my fave was the Medjool dates stuffed with blue cheese. She also made a great Sangria that I really liked. She makes hers with a red wine, peach schnapps and brandy in all the right quantities and with lots of fresh fruit. It was a great accompaniment to the appetizers.
 
Now onto my card for today. This one I made for the color challenge #590 on Splitcoaststampers. Maura was our hostess and she chose soft sky, pacific point, wild wasabi and crumb cake. Optional was to create a beach scene.
 
soft sky, pacific point, wild wasabi and crumb cake
I saw a card by Teresa Momber on Pinterest and that gave me my idea for this card. I did some background sponging on this beach card to create my scene.

I started by sponging just a bit of daffodil ink for my setting sun. And, then moved to the night sky using pacific point ink. The sky was a little darker than what I wanted so I took some white dye ink and sponged it in to lighten up near the water.   
 
For my water, I continued with soft sky ink. I stamped waves in the water with wild wasabi ink and a stamp from Just For Fun.

Made a mask and sponged at the waters edge with crumb cake ink for a little sand. Moved the mask to the side of the card and sponged with tuxedo black ink for my island. On the island I stamped a palm tree from the Stampin'-Up "plant hope" set. Used my wasabi marker to add some color to the tree fronds.

Finished with a sentiment from the "touch of nature" set from Stampin'-Up. And, that's my card for today. So until next time.........God bless.
 
card details:
Stamps: : plant hope, a touch of nature (Stampin'-Up), sunset at the beach (just for fun)
Paper: whisper white, basic black   Paper Size: A2 
Ink: pacific point, soft sky, wild wasabi, crumb cake, daffodil delight and tuxedo black
Accessories: sponges, daubers. wild wasabi marker
 
I am also entering:
1.  Just Us Girls has a sponging challenge.
 
2My Sheri Crafts has a down at the beach challenge.
3.  Creative Artiste has a anything goes #16 challenge.
4.  4 Crafty Chicks has a summer challenge #306.
5.  DL.Art has a Thursday summertime challenge.
 

Wednesday, July 6, 2016

~Framed Sofa & Chair Scene~

 
Hello Blogger Friends and thanks for taking the time to stop and visit with the Charmed Life Blog.
 
Today started quite early for me since 2 of my brothers came over to help me prepare some food for Aidin's (middle grandson) grad party on Friday night. We have our Mom's recipe for enchiladas that I have never prepared, believe it or not.
 
My brothers are great cooks and have made these many times for our family reunions and get togethers. Aidin had specifically requested these for his party food. Well as a matter of fact he asked for all his favorite dishes to be served at the party. So my daughter-in-law has been busy cooking away for a couple of weeks now. It will be a fun family night with both sides of the family as well as friends and lots of good food.
 
Aidin goes off to the University of Kentucky in a month. He is excited although it will be an emotional time for my daughter-in-law. Anyway, let's move onto my card for today.
 
This one I made for my DT blog post on the CottageCutz Blog.Today for your viewing pleasure, I am featuring several new dies set from the June "Home Sweet Home" release.  I thought I would make a card to send to a friend who has had some stressful days at work. We all need to take time to relax a bit. Don't you agree? The sofa & chair dies were so perfect for my card idea. So let's get started with some card details.
 
Card Base: 5 1/2"  x 4 1/4" - used Stampin'-Up coastal cabana cardstock.
Embossed Paper Layer:  5 3/8" x 4 1/8" - used Stampin'-Up vanilla cardstock.
 
 
Step 1.  Created the background texture using an embossing folder and my BigShot machine.
Step 2. I wanted this panel raised from the card base. The card has nice dimension that's not picked up in these photos. I decided not to use mounting tape. Instead I had some fun foam which works quite nicely. I only had blue but once it's on the blue card base you can't really see it. It gives about an 1/8" lift to the panel. 

 
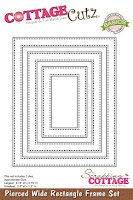
Step 3:  I die cut the frame using the Pierced Wide Rectangle Frame set and attached it to the embossed layer. Added some pearls to the frame corners. I die cut my sofa and chair with Stmpin'-Up baked brown sugar cardstock and the sofa pillows with  striped designer paper from the retro fresh collection. This card could also work for a guy just by eliminating the pearls.
 
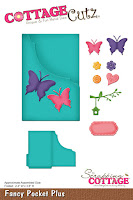
Since I don't have the floor lamps, rugs and plant dies, I punched an oval for my rug and used the flower pot from the Garden Accessories and the leaves from the Fancy Pocket Plus to create my plant. Just another way to get more use out of the CottageCutz dies you own.  I attached the dies with a variety of adhesives - double sided tape, glue dots and multi-matte medium.
 
Step 4. To complete my card, I stamped my sentiment on a die that is also part of the Fancy Pocket Plus set. I added a bit of thick baker's twine that matches my cardstock color. I decided to add a couple of cats to this scene because my friend likes cats and that finishes off the card. 
 
Well friends, that's it for me for today, so until next time...God bless.
 
http://www.scrappingcottage.com/cottagecutzsofaandchair.aspx

http://www.scrappingcottage.com/cottagecutzpiercedwiderectangleframesetbasics.aspx
http://www.scrappingcottage.com/cottagecutzfancypocketplus.aspx


Monday, July 4, 2016

~Life ~Moments~Breath~

 
Hello Blogger Friends and a happy 4th of July to you all. It's America's 240th birthday and a day filled with lots of festivities, fireworks and fun.
 
I read somewhere that there are 14,000 fireworks celebrations across the USA today. From the very beginning, there have been celebrations held on July 4th with parades, speeches and the public reading of the Declaration.
 
Yesterday in church our Pastor mentioned a scripture that is engraved on the Liberty Bell in Philadelphia, PA. The scripture is from Leviticus 25:10 and reads: "Proclaim liberty throughout all the land unto all inhabitants thereof." I don't think I knew that before or I just didn't remember it.
 
Some other facts that I did know about the Liberty Bell history is that on July 8, 1776 a chime went out from Independence Hall in Philadelphia to invite people to hear the reading of the Declaration of Independence. It was the first public reading of the document. I know there are reenactments of this reading around the US. One of them is in Williamsburg, VA. I have seen that one and it is awesome.
 
Now let's move onto my card for today. I didn't create any patriotic cards. I usually do that on Veterans Day and send them to family members that have served in our military.  
 
This CAS card is using some dies and washi tape and a stamp from a wedding set I have. I don't use washi tape very often but I always like the look I get when I do use it.
 
The feathers are dies from Impression Obsession. I cut them in Stampin'-Up colors of baked brown sugar, coastal cabana and designer paper from the "retro fresh" collection. The washi tape is a match to the paper. 

The sentiment is a old stamp set from Artful Inkables. It's their wedding silhouettes set. I have always liked this sentiment and thought it could be used for other cards besides wedding. Although it does make for a great sentiment for a wedding card as well.

I used a toothbrush and a reinker and sprayed my card for some background effect. And then, to finish off my card I used the MFT sequins die and cut some sequins in the baked brown sugar color. Well, that's it for me for today.  So until next time.........God bless.
 
card details:
Stamps: wedding silhouettes (Artful Inkables)
Paper: so saffron, baked brown sugar, coastal cabana, retro fresh designer paper (Stampin-Up)
Paper Size: A2 
Ink: bermuda bay
Accessories: Retro Fresh washi tape & bermuda bay reinker (SU), MFT sequins die, Impression Obsession feathers die 
 
I am also entering:  
1.  Dragonfly Dreams has an anything goes challenge.  
2.  Lil Patch of Crafty Friends has an anything goes challenge.
3.  A Bit More time to Craft has an anything goes challenge.
 

Friday, July 1, 2016

Bird Trio

 
Hello Blogger Friends and a happy Friday to you all. we are getting ready to celebrate the 4th of July holiday weekend here in the US.
 
There will be lots of festivities and fireworks everywhere. It's always a fun weekend. We are going to a friends home for a backyard barbecue on Sunday. Then on Monday we will probably bring my Mother-in-Law here for a cookout at our home.
 
Our local community always has a fantastic fireworks display but they moved the location this year. So I am not sure what we will do. The new location might just be a bit tricky for parking.
 
Now onto my post for today. This card I am showing over on the CottageCutz blog for a 2nd DT post this week. Today for your viewing pleasure, I am featuring the bird trio die from the May "This & That" release.
 
This die could be used for a variety of card types, and I made it as a card of encouragement for my BFF who is battling breast cancer. So let's get started on some details on how I made this card.
 
Card Base: 4 1/4" x 5 1/2"
Designer Paper Layer: 4 1/8" x 5 3/8"
Image Panel: 3 1/4" square (largest CottageCutz square die)
Angled panels: 1 1/4" wide & 1/2" wide (trimmed at ends to fit card)
Sentiment flag: 5/8" wide

I started this card by selecting my colors first. I found this rich looking designer paper in my stash from the Stampin'-Up "Bohemian Collection" and that determined my card colors. I am using rich razzleberry, delightful dijon and bermuda bay. I also used an older MojoMonday #453 sketch for my card layout.
 I did some sponging of clouds for the background. Used a cloud template I have which makes it so easy to get perfect clouds every time. I used the grass stamp from the Stampin'-Up "Sheltering Tree" set for a little green and the background was complete.
I die cut the bird trio in the Bermuda bay cardstock and layered that over the background panel. Added a sun that is cut from the Spring Stamps die to complete the image panel.
 
 
Stamped my sentiment from the ODBD "He watches Me" set on the flag panel to complete this card. I also made a matching envelope to use with this card. I used the bird images from the Stampin'-Up set "serene silhouettes". I thought it was a pretty good match for my die cut.


Well, that's it for me for today. Before I go and speaking of bird trios. We have a robin's nest underneath our deck. Today the little ones heard my hubby and I talking and put their heads up and mouths open. I pulled out our 6ft step ladder and took a quick photo while they were performing. Mama Bird wasn't around so I didn't get attacked (lol)!!!


card details:
Stamps: Sheltering Tree, Serene Silhouettes (Stampin'-Up), He Watches Me (Our Daily BreadDesigns)  
Paper: rich razzleberry, delightful dijon, bermuda bay, very vanilla, bohemian dsp (Stampin'-Up) 
Paper Size: A2  
Ink: bashful blue, old olive (Stampin'-Up), tuxedo black (Memento)  
Accessories: Bird Trio & Spring Stamps dies (CottageCutz), flag stax (MFT)   
http://www.scrappingcottage.com/cottagecutzspringstamps.aspx
http://www.scrappingcottage.com/cottagecutzbirdtrioelites.aspx
http://www.scrappingcottage.com/cottagecutzsquaresetbasics.aspx
I am also entering:
1.  Cute Card Thursday has a banner/flag challenge.


LinkWithin

Related Posts with Thumbnails