
Hello Blogger Friends! Thanks for taking the time to stop and visit with The Charmed Life Blog this Saturday in April.
I was battling a cold all week and it's finally coming to an end. It didn't really take a deep hold though. I attribute that to taking lots of Vitamin C, Zinc and using some Essential oils.
I have just started with Essential Oils but the more I read and the ones that I have used work wonders. I am not big on over the counter meds because of all the side effects. Of course like anything you have to do your own homework and make sure of the safety of the oils you are using as well as a therapeutic grade and organic.
I have been reading a lot of articles by a Dr Eric Zielinski. He doesn't promote a specific brand but rather gives you the research that's been done on specific oils.
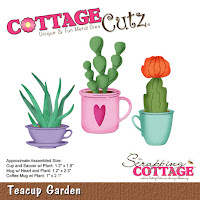
Anyway, let's move on to my card for today. This one I created for my weekly DT post on the CottageCutz Blog. I am featuring the new Teacup Garden die. I thought it would be a good one to use for a Mother's Day card. So let's get started with the details on how I created this card.
Step 1: This week I started my card with the April Viva la Verve sketch. I thought it would work perfectly to showcase the Teacup Garden image as well as add layers to my card. Since I like to use patterned paper, the addition of layers to my cards always works for me. This one already had the layer panels and shapes sized out. I usually just estimate sizes but this worked for me this week.

The center square layer is patterned paper from the same collection. I used the 2nd largest stitched rounded square die to cut it and then a corner rounder.
On the long gray panel I used an embossing folder that somewhat matched the patterned paper underneath it.
Card Measurements:
Melon Mambo Card Base: 4 1/4" x 5 1/2"
Patterned Paper Background Layer: 4 1/8" x 5 3/8"
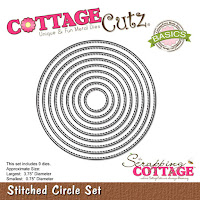
Gray Circle: 4th largest Stitched Circle die
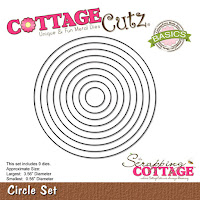
White Circle: 4th largest Circle die


The stamp I am using is a cling stamp so I used my stamp-a-ma-jig for placement. With this tool you are stamping on plastic, and in the photo it looks like its not a good image. But, you are only using the plastic for a straight alignment. Once it's stamped, it's fine and usually with the cling stamps I get a good impression the first time. This stamp is from the ODBD set "Mother's Day".

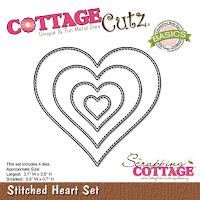
To complete my card, I attached the heart. I thought about adding some sequins or enamel dots. But with the background paper pattern being a bit busy I thought they would be lost. So it's complete as is and now I have another card for Mother's Day.

Well, that's it for me for today and this post. Time to get back to my cards that I need for my Splitcoaststampers Dirty Dozen post for April. I think I mentioned back in November that I was selected for this elite team. It's a 6 month term and this is my last month. So until next time.....God bless.
Dies I used to create card:
I am also entering:
1. Brown Sugar has a Mother's Day or pearls challenge
2. Fussy & Fancy has an add a sentiment challenge.
3. Creative Knockouts has a lots of layers challenge.
4. Simon Says Wednesday wants us to add texture.


Great tutorial on how you made this fabulous card! Love the colors of it. So bright and beautiful.
ReplyDeleteGlad to hear you're feeling better!
Lynn
Love your pretty card and great tutorial you have given too.
ReplyDeleteThank you for joining us at Simon Says Stamp Wednesday Challenge this week.
Jo x