Saturday, February 10, 2018

Stitched HB2U Card

Hello Blogger Friends! Thanks for taking the time to stop and visit with the Charmed Life Blog this Saturday in February.
 
Nothing much happening here for me today. My hubby is working so my plans are to be in my craft room. I have some DT cards I need to finish plus Valentine cards.
 
I usually make some extra cards for Valentine's Day and take them to church and let some of the guys pick one for their wives. They always like doing that and their wives like getting one of my handmade cards. So this will be my entire day. But, I like being in my room and creating so it will be fun for me.
 
Now let's move onto my card for today. This one I created for my weekly DT post on the CottageCutz Blog. Today, I am using the new Stitched Alphabet, Stitched Owl and Bird and the Stitched Sun, Clouds and Umbrella dies to create a birthday card for a little girl.  So let's get started with some details on how I created my card.

Step 1: Since I was creating an outdoor scene, I started by sponging my cardstock with distress inks. I used tumbled glass and mowed green lawn on distress ink cardstock.
I sprayed the panel with a mister to move the ink around a bit and get a more muted look.
I used my heat tool to speed up the drying process. I like the water spots and how the ink splattered a bit in the comer of the card.
Step 2: I started cutting my images.

Bird: cucumber crush cardstock for the body and pacific point cardstock for the wing.
Cloud: I cut it from the sponged background
Sun: I cut this out intending to use it in the corner of my card. When I started assembly, I forgot I had it and put the bird image up to high on the panel (LOL)!!!
Tree Branch: cut in brown sugar cardstock and the leaves are cut in garden green cardstock.
HB2U: cut in cucumber crush cardstock.. I just love the look of the stitched letters. They are so perfect for a kid's card.
Step 3: Now that all the images are cut, I am ready to start card assembly. I think this little stitched bird is just to cute. She could be used for a variety of occasions, but today I am using for a birthday card.
Step 4: I finished off my card by stamping the sentiment directly on the cloud. I thought it added interest and didn't interfere with my sponged background. Used my MISTI for placement and also to insure I would get a good stamped image.
I wanted to add some enamel dots but I didn't have any in the cucumber color. So I cut some small circles and used those on the card. I secured the image panel to the card base to complete this card.

Cucumber Card Base: 4 1/4" x 5 1/2"
Image Panel: 4 1/8" x 5 3/8"
Well, Blogger friends that's it for me for this post. So until next time........God bless.
 
Dies I used to create card:
http://www.scrappingcottage.com/cottagecutzstitchedowlandbird.aspx

http://www.scrappingcottage.com/cottagecutzstitchedsuncloudsandumbrella.aspx

http://www.scrappingcottage.com/cottagecutzstitchedhoneybees.aspx


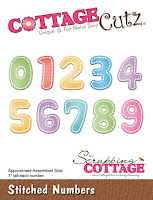
http://www.scrappingcottage.com/cottagecutzstitchednumbers.aspx
I am also entering:
1.  Crafter's Castle has an anything goes + option to share fave distress ink technique. The one I used today is one of my faves because it's easy to get the desired result.
2.  Crafty Calendar Challenge is 2 or more layers.
3.  PolkaDoodles has an anything goes challenge.
4.  As You Like it Challenge has a fave way to add stitching. Mine is by using dies - gives a beautiful result. 
5.  Creative Knockouts has a birthday wishes challenge.


7 comments:

  1. OMG how cute is this!!! I have added you to my 'visit' list so hopefully I'll get over here more often! Who wouldn't love this fun creation! Great job!

    ReplyDelete
  2. Fabulous fun card with a great tutorial, many thanks Meg

    ReplyDelete
  3. Tweet card!!! Ooops I mean SWEET card...hee hee hee I love the way you created the sky and grass with Distress Inks. Thank you so much for entering our challenge at Crafter's Castle this month....good luck :)
    Hugs... Janie
    DT
    Crafter's Castle
    crafterscastle.blogspot.com

    ReplyDelete
  4. This is such a sweet card for a little girl and a great step by step run through too. Thank you for joining in at As You Like It x

    ReplyDelete
  5. Thank you for joining in at AYLI, your stitched detail dies look fabulous, what an amazing collection!! Sarah DT

    ReplyDelete
  6. What a great background and what a cute little birdie. Thank you for joining us at the Creative Knockouts Challenge Blog.
    April

    ReplyDelete
  7. super cute .....fab background... thanks for joining us at Crafters Castle Challenges.

    ReplyDelete

LinkWithin

Related Posts with Thumbnails