Hello Blogger Friends! Thanks for taking the time to stop and visit with the Charmed Life Blog. Another weekend is upon us. Hope you have some great plans.
I will be in my kitchen today making cookies for my niece's baby shower. My contribution is a ladylock. It's a puff pastry with a delicious vanilla buttercream filling. I plan on making 8 dozen cookies.
I can't attend her shower because I will be out in San Francisco taking care of my precious granddaughter Phoenix Daisy. My son and daughter-in-law are going away for a little r & r over the Columbus Day weekend. My hubby is staying here in Pittsburgh to hold down the fort while I am gone.
I am looking forward to seeing her and doing all our usual stuff. Which generally means we will play with her baby dolls from morning till night. She just never gets tired of it. I get worn out at the end of the day though (lol)!!
Now onto my card for today. This one I created for my weekly DT post on the CottageCutz Blog. Today, I am using one of our new dies Joy Nativity. To me this die represents the essence of Christmas. I love the bold Joy word as well as how the Holy Family is nested in the letter "O". So let's get started with some details on how I created my card.
Step 1: This week I started off with a sketch. I found this perfect one on Splitcoaststampers. It wasn't too fussy and it allowed the Joy word to be the center focus.
Step 2: I looked through my paper stash for patterned paper that wouldn't take the focus away from the Joy word and at the same time have a touch of elegance to it. I found this red and gold paper that I thought would work for the elegant look I was after. I paired it up with a red card base that was almost a perfect match.
Maraschino Red Card Base: 5 1/2" x 4 1/4"Patterned Paper Layer: 5 3/8" x 4 1/8"
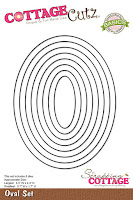
Step 3: For the oval elements #3 & #4) of the sketch I used the largest nested stitched eyelet die and the 2nd largest oval die. It nested quite nicely in the eyelet die and the eyelet die kept with the elegant look I wanted for this card.
Step 4: I cut my Joy word in a gold cardstock. There is such detail in this die. If you click on this photo or any of them really, it will allow you to see the detail I am talking about. Attached to the oval shapes with dimensional adhesive. Being raised a bit from the ovals will give it nice depth.
Step 5: Attached the oval panel to the striped patterned paper layer. For the #2 layer of this sketch I decided to use ribbon. Looked through my ribbon stash and found this pleated ribbon that is a good match for the card base. I really like adding ribbon on Christmas cards. I think it dresses them up nicely.
Attached my image panel to the card base and scattered a few sequins to complete this card. I hope I have given you an idea for using this new Joy Nativity die. By keeping your card simple, you could easily mass produce this one for Christmas. Well, that's it for me for this post. So until next time.........God bless.
Dies I used to create card:
I am also entering:
1. Hiding in My CraftRoom has a freestyle challenge.
2. Just Us Girls has a word die cuts challenge.
3. Alphabet Challenge has an "O" for oval
4. Winter Wonderland has an anything goes Christmas challenge.
5. Simon Says Stamp Wednesday Challenge is anything goes.


