Hello Blogger friends! Thanks for taking the time to stop and visit with the Charmed Life Blog.
Hope you are enjoying your Saturday whatever you are doing. I am enjoying the beautiful spring day here in Pittsburgh. Lots of household chores need done but, the windows are open and a gentle breeze is wafting in and through the house. I just love days like this.
Now onto my card for today. This one I created for my weekly DT post on the CottageCutz blog. For your viewing pleasure today, I am featuring one of the new Expressions Plus word dies. I am using the Explore Phrase. As soon as I saw this word, I thought of making an outdoor scene with the dies from the November 2016 Camping Bundle set.
I have some friends that just retired. They bought a motorhome and are taking a 3 month trip across our beautiful country. This is a retirement celebration card for them.
I thought the outdoor scene would work best in a different type fold. I found a tutorial on YouTube for a double front fold card. You have your front image, then an inside image an then another panel for a 2nd inside image. Here is a video link. I will also give you a step by step tutorial.
So let's get started with some details on how I created my card this week.
Step 1: I started by cutting my navy blue card base. It is 5 1/2" x 8 1/2". I scored it at the 4 1/4" point and cut 2 1/4" off the 8 1/2" side. This is how I achieved the front fold on my card. I set that aside to work on my outside image panel.
Step 2: The next step was to cut the Motorhome. I used light and dark gray + red cardstock on the image. The white panel is cut at 2 3/4" x 3 1/4". I layered that over red cardstock measuring 3" x 3 1/2". I stamped my sentiment and set this aside to work on the inside image panel.
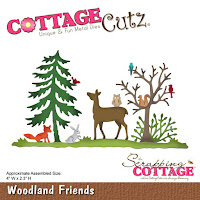
Step 3: On this panel I used the images from the Campsite & Woodland Friends dies. I cut the pine tree in a dark green, a yellow sun and the directional arrows in red, green and blue. I cut a small cloud from the sun & clouds die and used that as a template and did a bit of background sponging.
The white panel is cut at 2 3/4" x 3 1/4". Cut the explore phrase word in navy cardstock. I layered this panel over red cardstock measuring 3" x 3 1/2".
Step 4: I cut another piece of white cardstock at 5 /14" x 8" and scored it at 4". I attached this image panel to the cardstock and then secured it to my navy blue card base.
 |
| 1st inside image |
Now I can attach the front panel to the card. It goes directly over the inside image. I used Scor-tape to make sure it stays put when the card gets opened and closed.
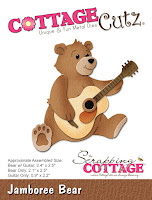
Step 5: Now it's time to decorate the inside hidden panel or the double fold part. I used the Jamboree Bear die and the campfire from the Campfire Squirrel die. The background paper is some that I had in my stash. It reminds me of a nighttime sky so I thought it would work well here.
 |
| 2nd inside image |
Well, that completes my card for today. I hope I have shown you another way to use the new Expression Phrases dies and incorporating them with existing CottageCutz product you already have. And, I hope you will give this fun fold a try. I think it makes a big impact on a card.
Dies I used to create card:
 |
| front panel |
 |
| 1st inside panel |
 |
| 2nd inside image |
I am also entering:
1. Cut It Up has a fun fold challenge.
2. Crafty Catz has a more than 2 layers challenge.
3. KittyBee Designs has an animals challenge.


Oh, my! What fun! I know what will be decorating their camper.
ReplyDeleteI love this card. Everywhere you turn, there's something new to look at. It's so cool to open a card and find such fun surprises. Wonderful job!
Thanks for joining us for our Fun Folds challenge at Cut it Up!
Evelyn
http://mylittlecraftblog.wordpress.com
Hehe what a fun card,
ReplyDeleteHugz tinz
This is such a super fun card. Thanks for sharing it with us this week at Crafty Catz. Naomi x
ReplyDelete