Hello Blogger Friends and a happy Friday to you all. Can't believe another week has come and gone. Thursday was the official start of the fall season.
So even though the temperatures in the high 80's are still screaming summer - it's a wrap my friends. My garden is still producing tomatoes and beans. In fact, today I will be roasting and then freezing another batch. I will be set for this winter with fresh tomato sauce both jarred and frozen.
I feel like I should be showing beach style cards but Christmas is starting to knock on our doors. With that in mind today I am bringing you a Christmas card using several of the new CottageCutz Christmas 2016 dies.
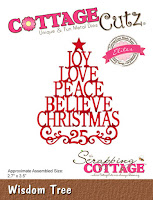
I have said before that I like making Christmas cards in non-traditional colors and that's what I have done today. My card colors are Stampin'-Up's new dapper denim, mint macaron and melon mambo. I used the Nested Ornaments : Teardrop, the bow from the Holiday Mason Jar and the Christmas word from the Wisdom Tree Die.
I also tried my hand at a suspended spinner card for the first time. I don't have a video to show you but the ornament spins nicely. It will be a fun surprise when the recipient opens the card. I did find this video on YouTube that helped me create my card. My ornaments spin just like her Christmas tree does. So let's get started with some details on how I created my card.
Mint Macaron Card Base: 4 1/4" x 5 1/2"
Mint Macaron Designer Paper Layer: 4 1/8" x 5 3/8"
1. I started off by cutting my teardrop ornaments. For this card I used the smallest ornament in this 3 die set. I cut those in a denim blue color. I wanted to add a flourish to the ornament so I used the wisdom tree die and cut the bottom flourish in melon mambo. My camera is almost making it look red.
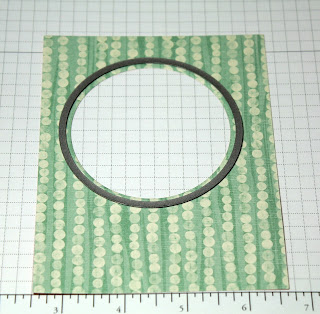
2. The next step was to cut the opening for the spot where my ornament will suspend. I used the CottageCutz Circle Set dies (3rd largest) to cut both the patterned paper as well as my card base.
3. Once the first opening was cut, I took the next largest circle die and this time just cut my mint macaron designer paper. I wanted to be able to see the underlying cardstock and give the appearance of a framed layer.
4. Now I am ready to attach some gold metallic thread to the 2 ornaments and then adhere those together. I cut approximately a 5" piece of the gold thread and laid it in the middle of the ornaments. I used Tombow adhesive for this step. I used 2 ornaments so when it spins around you will see a finished back of the ornament. The silver dots were left after I cut the ornament tops. I thought they made a cute little embellishment.
5. The ornament is now ready to be centered in the opening of the card base. I pulled the thread so it was taut and then taped it down and trimmed off the excess metallic thread.
6. On this step, I attached the patterned paper to the card base. I wanted a bow over my ornament but did want to use ribbon. So, I used the bow that is part of the Holiday Mason Jar die set. This was cut in the melon mambo color.
7. My card is ready for the sentiment. I debated on whether I should stamp a greeting or use a die cut. Once I cut the Christmas word from the Wisdom Tree die in melon mambo color my mind was made up without even trying a stamped sentiment. I really like how the pink color complimented the mint designer paper.
Well, Blogger friends that completes my card for this post. I hope I have given you some inspiration for the teardrop ornament dies. Don't forget about the newest challenge that is running right now on the CottageCutz Blog. The theme is holiday and here is a link for more information.
So until next time........God bless!!!


What a cute idea. Love it!
ReplyDelete