Wednesday, July 27, 2016

Santa's List

 
Hello Blogger Friends and a happy Wednesday to you. Well our beach vacation is over and I am back home in Pittsburgh all tanned and relaxed.
 
We had a wonderful time with our family. I consider that a blessing because I have heard some tales from my friends about family vacation disasters. I am preparing now for my other son and his family to come from San Francisco and bring my sweet Phoenix Daisy for a visit.
 
They will be here for 10 days and I am so looking forward to it. Needless to say I will be busy getting everything in order around my home. I also need to make a visit to the grocery store and stock up. So let's move on with my card for today.
 
This one I made for my weekly DT post on the CottageCutz blog. I am featuring the Santa's List die that is part of the Christmas In July sale going on over at the Scrapping Cottage Store. The sale ends tonight at 9:00 pm Pacific time and there are some great deals to be had. You can save between 50%-80% on some Christmas dies.
 Now lets get started with the details on my card.
 Card Base:  4 1/4" x 5 1/2"
Striped Paper: 4 1/8" x 2 3/4"
Vanilla embossed panel: 4 1/8" x 3"
 
My thought process on this card is to show Santa in a room checking out his naughty or nice list. I decided to create my wall background with some Stampin'-Up striped designer paper for the wallpaper and a vanilla dry embossed layer to represent wood beadboard. Used a Stampin'-Up embossing folder to create the stripes. The scalloped panel is the chair rail. And, that was part of an old Stampin'-Up Christmas scrapbook kit.
After I die cut the Santa silhouette in black, I decided to make a night sky for the window. I sponged 3 shades of blue distress inks and then made a stencil to add some stars to the night time sky. I sponged those in a silver ink. I cut the sponged panel down to the size of the window and used glue to attach.

I wanted Santa's gifts to stand out so I die cut them in red card stock. A few little snips to separate them from Santa's stool and they are ready to be paper pieced over the black. I also paper pieced the moon with some silver cardstock. I attached them with Tombow mono adhesive and Ranger multi-matte medium.

I attached the entire image to the background panel using 3D foam squares to give it dimension. My olive green carpet is actually a sneak peak of a new snow bank die coming soon.
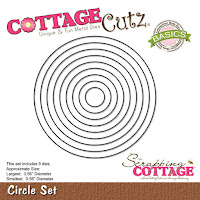
To complete my card, I stamped my "naughty or nice" sentiment on vanilla cardstock and cut with the 3rd largest stitched circle die. Layered that onto a red circle cut with the 4th largest circle die
 And that is my card for this week. Hope it gave you some inspiration. Let me know your thoughts, I read all of the comments you leave. Also, don't forget about our current challenge. It's all about greenery and you can get more info here. Until next time........God bless.
 
http://www.scrappingcottage.com/cottagecutzsantaslistelites.aspx
http://www.scrappingcottage.com/cottagecutzstitchedcirclesetbasics.aspx

http://www.scrappingcottage.com/cottagecutzcirclesetbasics.aspx
 
I am also entering:
1.  Dream Valley Challenges has a Christmas in July.
2.  The Glory of Christmas challenge is die cuts/punches.
3.  Challenge Up Your Life has a Christmas in July.
4.  Hiding in my Craft Room has a Chrismtas in July.
5.  Simon Says Stamp Wednesday Challenge is anything goes.

Thursday, July 21, 2016

Under the Sea Hinged Card Technique

 
Hello Blogger Friends! I am sending greetings from the Isle of Palms in South Carolina. We are having a wonderful time at the beach with my son and his family. The weather is sunny, hot and humid. So perfect for a beach vacation.  We return home on Saturday night.
 
We just finished up a fun night of games. Everyone has gone to bed so I thought I would post the card I made for my Wednesday DT post on the CottageCutz Blog.
 
I created an underwater scene and then I realized my card was going to be a bit larger than the usual A2 size that I make. I have some 12 x 12 paper, but I didn't have any in the navy blue shade I wanted to use. So I did a hinge technique for this card. It worked out well and I show you how in the instructions below.

navy card base: 5 3/4" x 4 3/4"
mint macaron green layer: 5 5/8" x 4 5/8"
mint macaron designer paper layer: 5 1/2" x 4 1/2"
CottageCutz dies used: under the sea, happy fish 2 and clown fish
 
I found this mint macaron designer paper in my stash from the Stampin'-Up "perfectly artistic" collection. I thought it had the look of sea water so I decided to use that. You could also sponge or brayer water in to create an underwater scene.

Next, I cut all the die elements I wanted to use. For the sea greenery, I sponged some of the cardstock to get a variation in shades. I did the same with the sea coral. I used the new Stampin'-Up flirty flamingo cardstock and sponged one to get the shade variant. 

 For my fish I die cut them from a multi media paper and colored them with an aqua brush and night of navy reinker and the flirty flamingo ink pad. So the smaller fish and the coral are the same color but I like how I was able to get a darker shade by water coloring.
 
For the water bubbles I used the happy fish 2 die and cut from acetate and used the round circles from that. I cut it 2x to get all the bubbles I needed.

Now for the hinge technique. I cut 2 pieces of navy cardstock 5 3/4" x 4 3/4". I also cut another 2" x 5 5/8" piece of navy and folded that in half. Using Scor-Tape for added strength, I taped this smaller piece on the first navy panel. Then I repeated the process with the 2nd navy panel. Voila! Now I have a custom made base size and didn't have to go and buy any 12 x 12 paper to make it.

Here are some photos of how I did this technique. I used beige cardstock and dark brown for the hinge part so you could see in the photos what I am doing. You can add patterned paper to the inside to cover the hinge or use an embellishment.


Well friends, that's it for me for today. Time to get to bed because the days start early here at the beach. So until next time......God bless.
 
http://www.scrappingcottage.com/cottagecutzunderthesea-2.aspx

http://www.scrappingcottage.com/cottagecutzhappyfish2elites.aspx

http://www.scrappingcottage.com/cottagecutzclownfishelites.aspx


Wednesday, July 13, 2016

Screen Divider Card


Hello Blogger Friends and a happy Wednesday to you all. The countdown is on for me. I am leaving for the beach in South Carolina in a couple of days.
 
We are really looking forward to getting away and relaxing at the ocean. Lots of preparations still to be made to get ready to leave but I wanted to get this blog post up before I start my day.
 
This Screen Divider card I made for my weekly DT post on the CottageCutz blog. I have never made one of these before and I was really happy with how it turned out. So here are all the details and pictures of my process.
 
Card Base: 5 1/2" x 11"
Decorated Panels: 2 5/8" x 4 1/4"

Step 1: Score 5 1/2" x 11" cardstock at 2 3/4", 5 1/2", and 8-1/4" in the horizontal position.
 
Step 2: To create the Screen Divider fold, fold in half at 5 1/2" score then fold each side back in the opposite direction on the scored lines.


Step 3: Unfold card and lay flat. Using a border punch, create a punched border along the top edge of the card. I used a Martha Stewart trellis punch. I started punching at the 5 1/2" center point and worked my way across the card.
 
Step 4: To create "legs" at the bottom of the screen you can either use a punch or a die. For my card I used a punch. I worked with half of the card at a time. Keeping the two left panels folded, slide the bottom of those two panels into the punch (only 2 layers at a time will work). Position the cardstock about one-third of the way into the punch and center side to side, then punch.


Step 5: The screen divider is ready for decorating.

I started my 1st panel by sponging in some clouds with pool party ink using a cloud template.
 
Die-cut the pieces for this panel using the grass, trees & vines, build-a-house accessories, spring stamps and fancy pocket plus dies. Bike is cut in calypso coral cardstock, tree in gumball green and Stampin'-Up epic day designer paper, birdhouse in pool party.
 
The next panel I again used pool party ink to sponge the panel and gumball green for the grassy area. The dies are from the same sets listed above.
 
The 3rd panel is using the same dies listed above plus the garden accessories & hello spring dies. I cut a stencil from the clouds & sun die and sponged in the sun in the upper corner. I also added clouds and a grassy area. I wanted some small butterflies so I used a Martha Stewart punch for those.

 
On the last panel I used the spring bloom corner and the bicycle in grass  and the fancy pocket plus dies. I sponged the background in pool party ink. My corner is cut in calypso coral cardstock and the butterflies in rich razzleberry cardstock.
 
I adhered the panels to the screen divider and to hold in place I used some pool party ribbon that matches the card base.
 
 
Here are some other close-up shots of the card panels.


All sentiments are from Great impressions Stamps. I used the Little Pleasures (C402) and Love Summer Stamps (D462).
 
And, that my friends is my card for today. Thanks for sticking with me till the end of this post. I know it was a long one.
 
Also a reminder about the current challenge with CottageCutz. This one is to use Greenery and there are prizes to be won. Get more info here.
 
So until next time......God bless.
 
I am also entering:
1.  Great Impressions Stamps has an anything goes challenge.
2.  Simon Says Stamp wants us to create a scene.
3.  City Crafter has an on the border challenge.

Tuesday, July 12, 2016

~She was Amazing~

 
Hello Blogger friends and thanks for taking the time to stop and visit with the Charmed Life Blog.
 
We had a great weekend just spending time with family. Our middle grandson's graduation party was on Friday night and then on Sunday we went back to my son's home for leftovers.
 
Now this week there are lots of preparations to get ready for our beach vacation in Isle of Palms, SC. I love going to the beach and am so looking forward to the time away. We will be about 30 minutes from Charleston, SC. My hubby and I have wanted to go there to sightsee and explore the town. So this is a plus that we will be so close.
 
When we return home from the beach my youngest son who lives in San Francisco will be coming for a visit with his family. My sweet granddaughter, Phoenix Daisy will be here for 10 days. Nothing like family time in my mind. I love it!!!
 
Now onto my card for today. This one I made for the inspiration challenge #553 on Splitcoaststampers.  Audrie, as hostess, took us to the Style Black & White Living  Pinterest Board for our inspiration this week.
I found this piece of wall home décor and it was perfect for a card I wanted to make for my niece. She just finished her 1st year of college and made the dean's list. I am so proud of her.

To make my frame. I used the rectangle frame die from Impression Obsession. This is a great die because it cuts 7 different frames that can be inlaid. I used 3 of them for my card and cut the frames in black and layered them on my white card base.

My sentiment is from the Waltzingmouse set "half pint heroines". I scattered some sequins to complete this card.
 
Well, that's it for me for today. So until next time........God bless.
 
card details:
Stamps: half pint heroines (Waltzingmouse)  
Paper: thick whisper white, basic black (Stampin'-Up)
Paper Size: A2  
Ink: tuxedo black (Memento)
Accessories: rectangle die (Impression Obsession)

Saturday, July 9, 2016

~Island Sunset~

 
Hello Blogger Friends! Thanks for taking the time to stop and visit with the Charmed Life Blog. It's kind of a laid back Saturday at our home today.
 
We had my middle grandson's graduation party last night. It was a great time with family and friends. I always enjoy the chatting and comradery. We came home about 11:30 and just went off to bed.
 
My daughter-in-law did such a great job of planning the party, the food and all the small party accents. She had a dessert and candy table. The table centerpieces were these cute mason jars with blue and white flowers- Aidin's high school colors. The jar lids were cut in such a way to keep the flowers upright.
 
The appetizers were a fabulous charcuterie tray. There was so much on it but my fave was the Medjool dates stuffed with blue cheese. She also made a great Sangria that I really liked. She makes hers with a red wine, peach schnapps and brandy in all the right quantities and with lots of fresh fruit. It was a great accompaniment to the appetizers.
 
Now onto my card for today. This one I made for the color challenge #590 on Splitcoaststampers. Maura was our hostess and she chose soft sky, pacific point, wild wasabi and crumb cake. Optional was to create a beach scene.
 
soft sky, pacific point, wild wasabi and crumb cake
I saw a card by Teresa Momber on Pinterest and that gave me my idea for this card. I did some background sponging on this beach card to create my scene.

I started by sponging just a bit of daffodil ink for my setting sun. And, then moved to the night sky using pacific point ink. The sky was a little darker than what I wanted so I took some white dye ink and sponged it in to lighten up near the water.   
 
For my water, I continued with soft sky ink. I stamped waves in the water with wild wasabi ink and a stamp from Just For Fun.

Made a mask and sponged at the waters edge with crumb cake ink for a little sand. Moved the mask to the side of the card and sponged with tuxedo black ink for my island. On the island I stamped a palm tree from the Stampin'-Up "plant hope" set. Used my wasabi marker to add some color to the tree fronds.

Finished with a sentiment from the "touch of nature" set from Stampin'-Up. And, that's my card for today. So until next time.........God bless.
 
card details:
Stamps: : plant hope, a touch of nature (Stampin'-Up), sunset at the beach (just for fun)
Paper: whisper white, basic black   Paper Size: A2 
Ink: pacific point, soft sky, wild wasabi, crumb cake, daffodil delight and tuxedo black
Accessories: sponges, daubers. wild wasabi marker
 
I am also entering:
1.  Just Us Girls has a sponging challenge.
 
2My Sheri Crafts has a down at the beach challenge.
3.  Creative Artiste has a anything goes #16 challenge.
4.  4 Crafty Chicks has a summer challenge #306.
5.  DL.Art has a Thursday summertime challenge.
 

LinkWithin

Related Posts with Thumbnails